Dating Antique Maps and Prints: Complete Guide 2026
Dating antique maps and prints is a fascinating journey into the history of paper, ink, and human knowledge. Whether you're examining a 16th-century world map or a 19th-century botanical illustration, understanding the techniques and materials used in their creation is essential for accurate dating and authentication. This comprehensive guide will teach you how to identify the age of antique maps and prints through careful analysis of paper types, watermarks, plate marks, inks, and printing methods. Modern tools like the Antique Identifier app can provide instant insights, but mastering these traditional identification techniques will make you a more knowledgeable collector and dealer.
Table of Contents
- Understanding Antique Prints and Maps
- Printmaking Methods and Techniques
- Paper Analysis and Watermarks
- Inks, Colors, and Pigments
- Typography and Cartography
- Plate Marks and Printing Evidence
- Advanced Dating Techniques
- Condition Assessment and Conservation
- Identifying Reproductions and Fakes
- Valuation and Authentication
- Digital Tools for Identification
- Expert Tips and Best Practices
Understanding Antique Prints and Maps
Antique prints and maps are more than just historical documents—they are windows into the past, showing how people understood and represented their world. Before diving into dating techniques, it's important to understand what makes these items valuable and how they differ from modern reproductions.
What Makes a Print or Map Antique?
Generally, prints and maps are considered antique when they are:
- 100+ years old: The standard definition for antiques
- Hand-printed: Created using traditional printing methods
- Original impressions: Not modern reproductions or facsimiles
- Historically significant: Reflecting the knowledge and technology of their time
Types of Antique Prints
Understanding the different types of prints helps with identification:
- Engravings: Intaglio prints with incised lines
- Etchings: Acid-etched intaglio prints
- Woodcuts: Relief prints from carved wood blocks
- Lithographs: Planographic prints using stone or metal plates
- Mezzotints: Intaglio prints with tonal gradations
- Aquatints: Intaglio prints with textured areas
Types of Antique Maps
Maps can be categorized by their purpose and content:
- World maps: Global representations and discoveries
- Regional maps: Countries, states, and provinces
- City plans: Urban layouts and street grids
- Topographic maps: Terrain and elevation details
- Nautical charts: Maritime navigation aids
- Thematic maps: Specialized information (climate, population, etc.)
Printmaking Methods and Techniques
The printing method used is one of the most important clues for dating antique prints and maps. Each technique has distinct characteristics and was developed during specific historical periods.
1. Intaglio Printing (Engraving and Etching)
Intaglio printing involves incising lines or areas into a metal plate:
- Engraving: Lines are cut directly into the plate using a burin
- Etching: Lines are etched using acid on a wax-coated plate
- Characteristics: Sharp, crisp lines with slight embossing
- Plate marks: Visible impressions around the printed area
- Historical period: 15th century to present
2. Relief Printing (Woodcut and Wood Engraving)
Relief printing uses raised areas on a block:
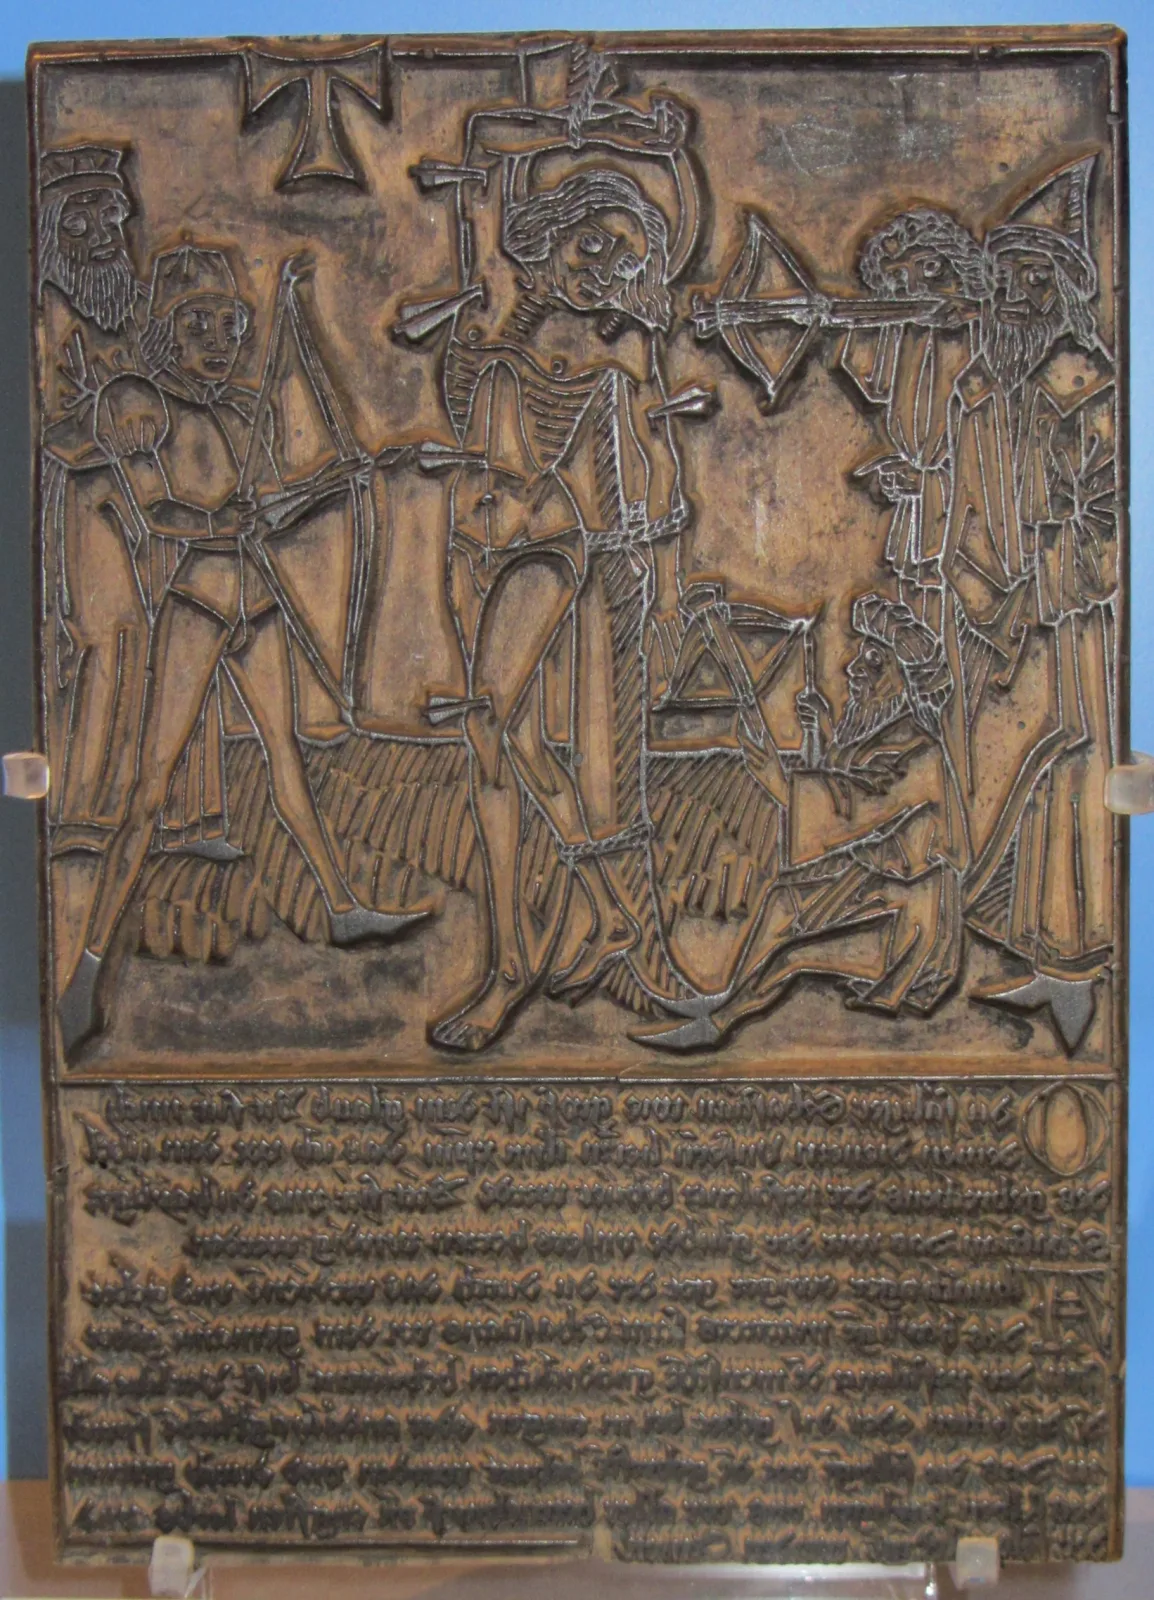
- Woodcut: Traditional relief printing from carved wood, the technique behind Japanese woodblock prints
- Wood engraving: End-grain wood blocks for fine detail
- Characteristics: Bold, graphic appearance with crushed fibers
- No plate marks: Flat printing surface
- Historical period: 15th century to present
3. Lithography
Planographic printing using stone or metal plates:
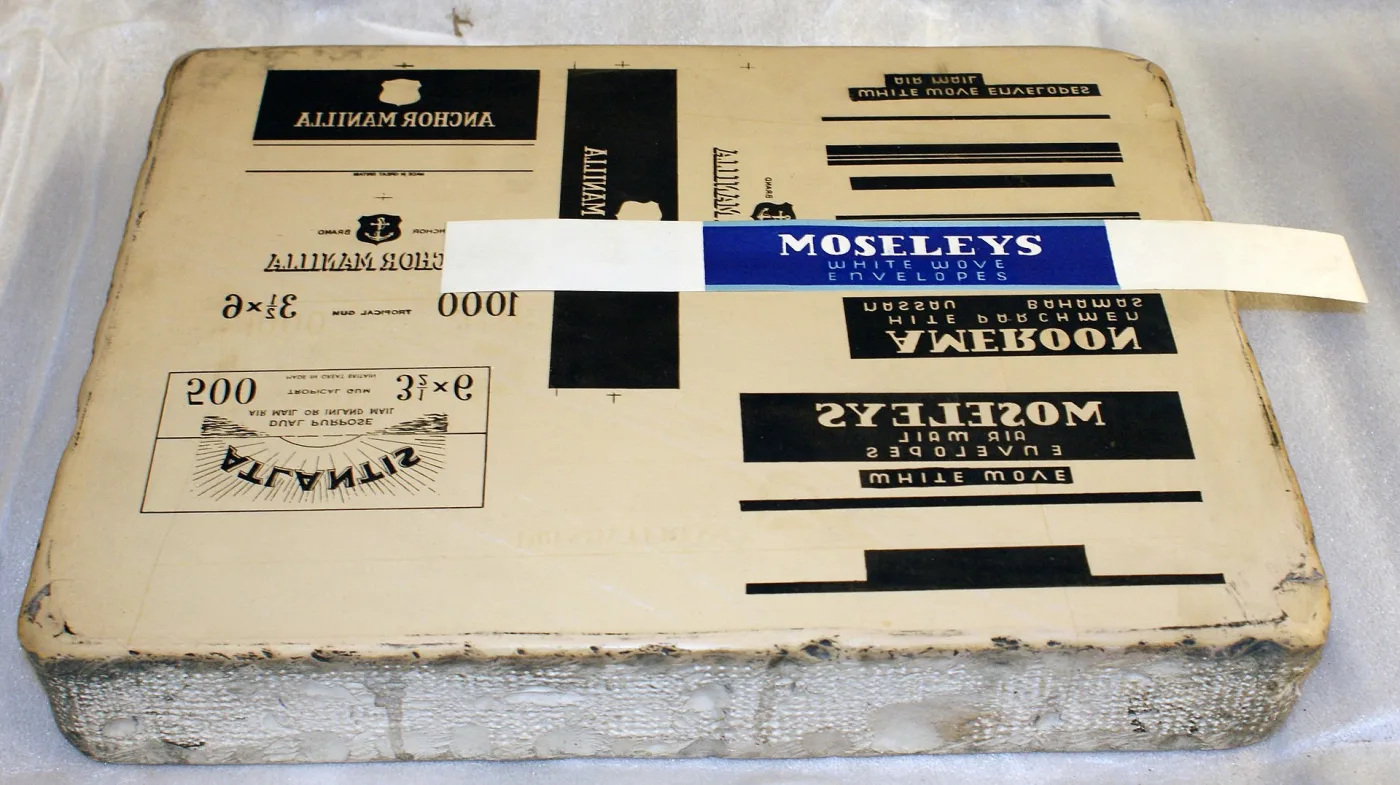
- Process: Grease and water repulsion on flat surface
- Characteristics: Smooth tonal areas and fine detail
- Stipple patterns: Visible under magnification
- Historical period: 1796 to present
4. Photomechanical Processes
Modern reproduction techniques to avoid:
- Halftone: Dots visible under magnification
- Photogravure: Mechanical intaglio reproduction
- Offset lithography: Modern commercial printing
- Historical period: Late 19th century to present
Paper Analysis and Watermarks
Paper analysis is crucial for dating antique prints and maps. The type of paper, its texture, and any watermarks can provide valuable dating information.
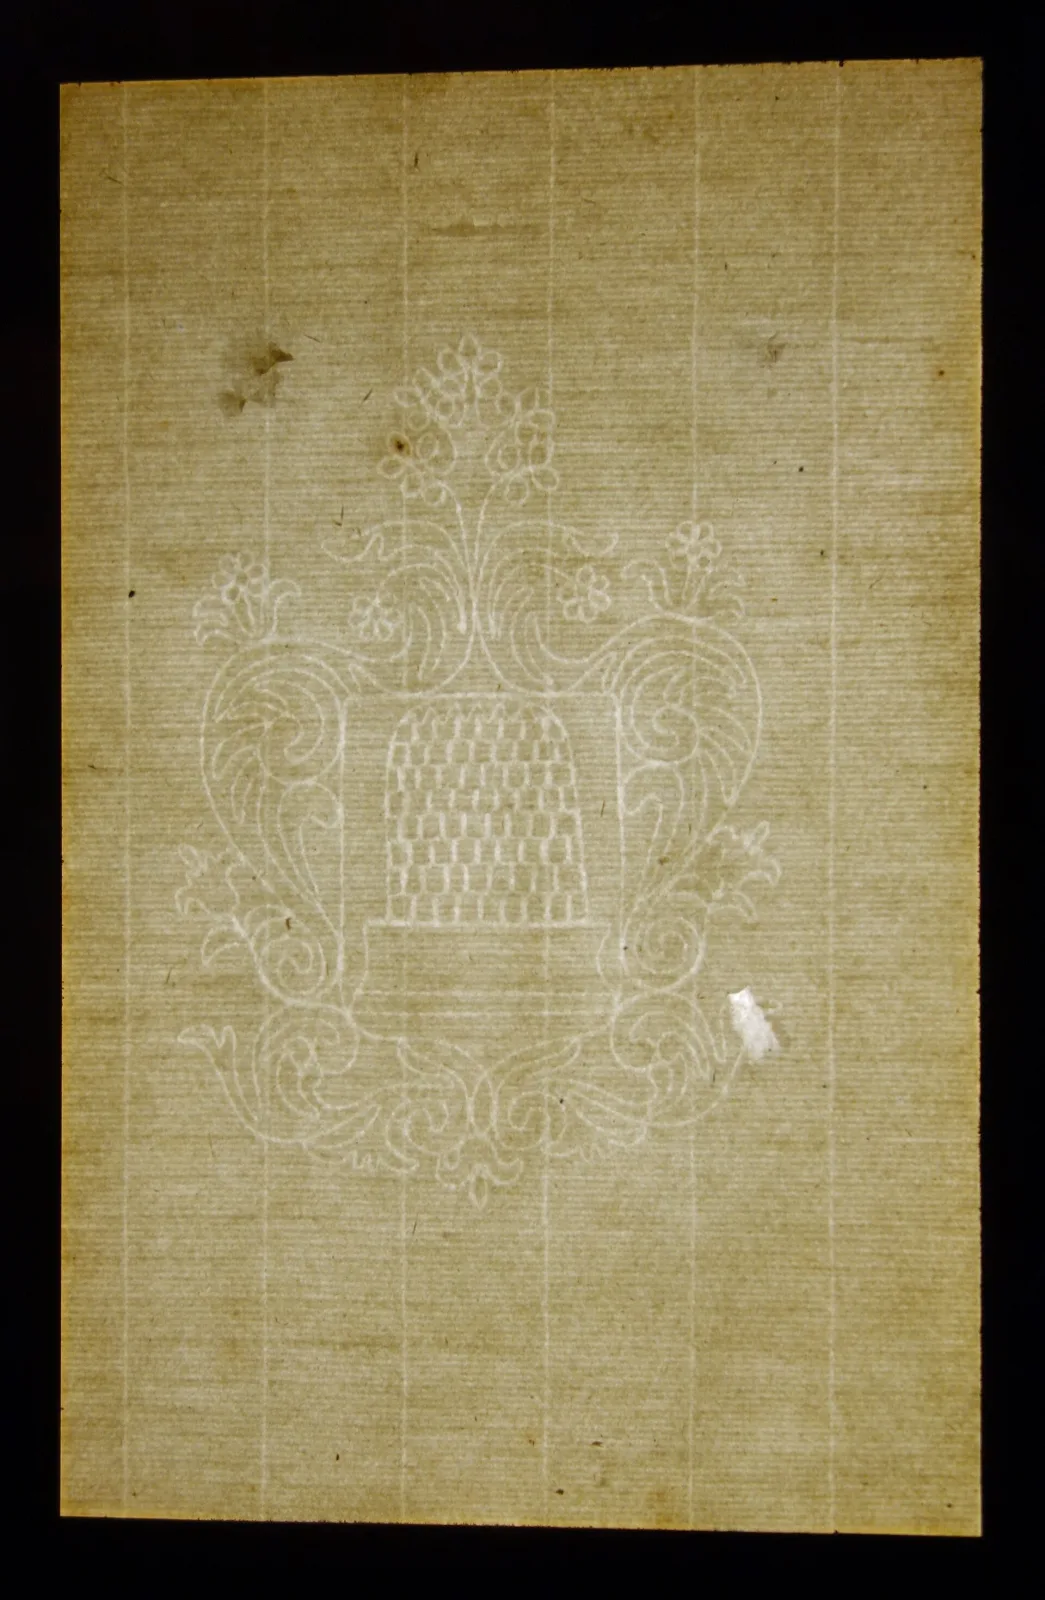
1. Paper Types and Characteristics
Different paper types were used during different historical periods:
- Laid paper: Shows chain and laid lines when held to light
- Wove paper: Uniform texture without visible lines
- Handmade paper: Irregular edges and texture variations
- Machine-made paper: Uniform texture and straight edges
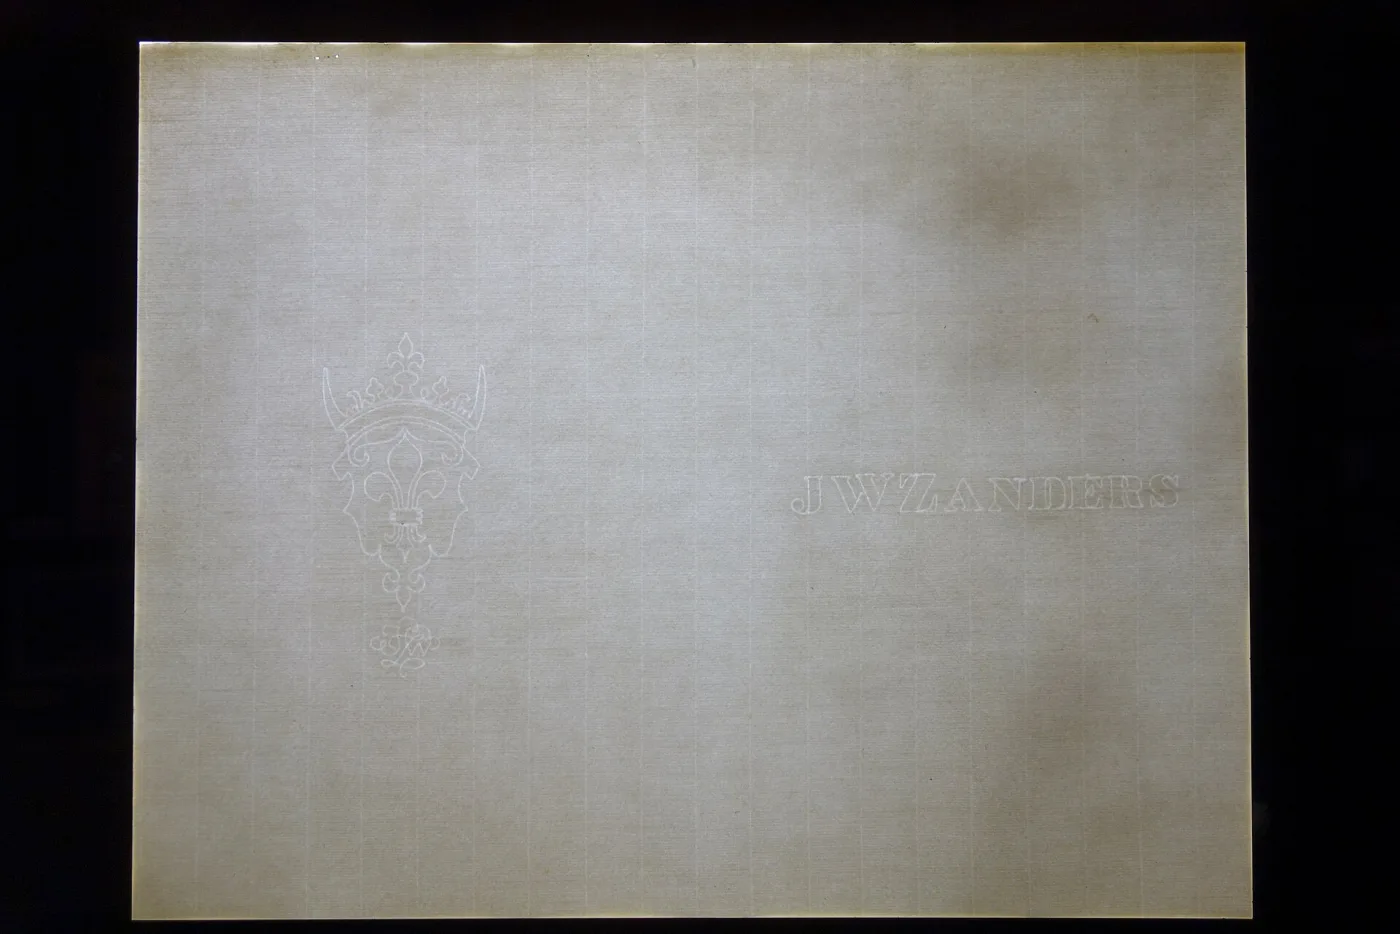
2. Reading Watermarks
Watermarks are designs embedded in paper during manufacture:
- Backlight examination: Hold paper to strong light source
- Transmitted light panels: Professional examination tool
- Watermark databases: Compare with known examples
- Date ranges: Watermarks can narrow dating to decades
3. Paper Dating by Period
Historical paper characteristics:
- 15th-17th centuries: Handmade laid paper, irregular edges
- 18th century: Handmade laid paper, more uniform
- Early 19th century: Transition to wove paper
- Mid-19th century: Machine-made wove paper
- Late 19th century: Mass-produced paper, various types
4. Sheet Edges and Sizing
Paper edges provide additional dating clues:
- Deckle edges: Natural, irregular paper edges
- Chain line orientation: Paper grain direction
- Sheet sizing: Standard paper dimensions by period
- Trimming evidence: Cut marks and framing damage
Inks, Colors, and Pigments
The type of ink and coloring used can provide important dating information. Different periods used different materials and techniques.
1. Printing Inks
Traditional printing inks have distinct characteristics:
- Carbon-based inks: Traditional black printing ink
- Iron gall ink: Dark brown-black, acidic
- Oil-based inks: Rich, durable printing inks
- Water-based inks: Less durable, more prone to fading
2. Hand-Coloring and Pigments
Hand-applied colors reveal much about dating:
- Mineral pigments: Stable, granular colors
- Vegetable dyes: Natural but less stable
- Aniline dyes: Synthetic colors from late 19th century
- Oxidation patterns: Natural aging of pigments
3. Color Dating Techniques
Using colors to determine age:
- Pigment particle size: Visible under magnification
- Color stability: Fading and color shifts
- Application technique: Brush strokes and color placement
- Color palettes: Period-appropriate color choices
4. Ink Analysis Tools
Professional examination methods:
- Magnification: 10x to 100x examination
- UV light: Reveals repairs and alterations
- Chemical testing: Professional analysis only
- Digital imaging: High-resolution documentation

Typography and Cartography
The style of text and map elements can provide valuable dating information. Typography and cartographic conventions evolved over time.
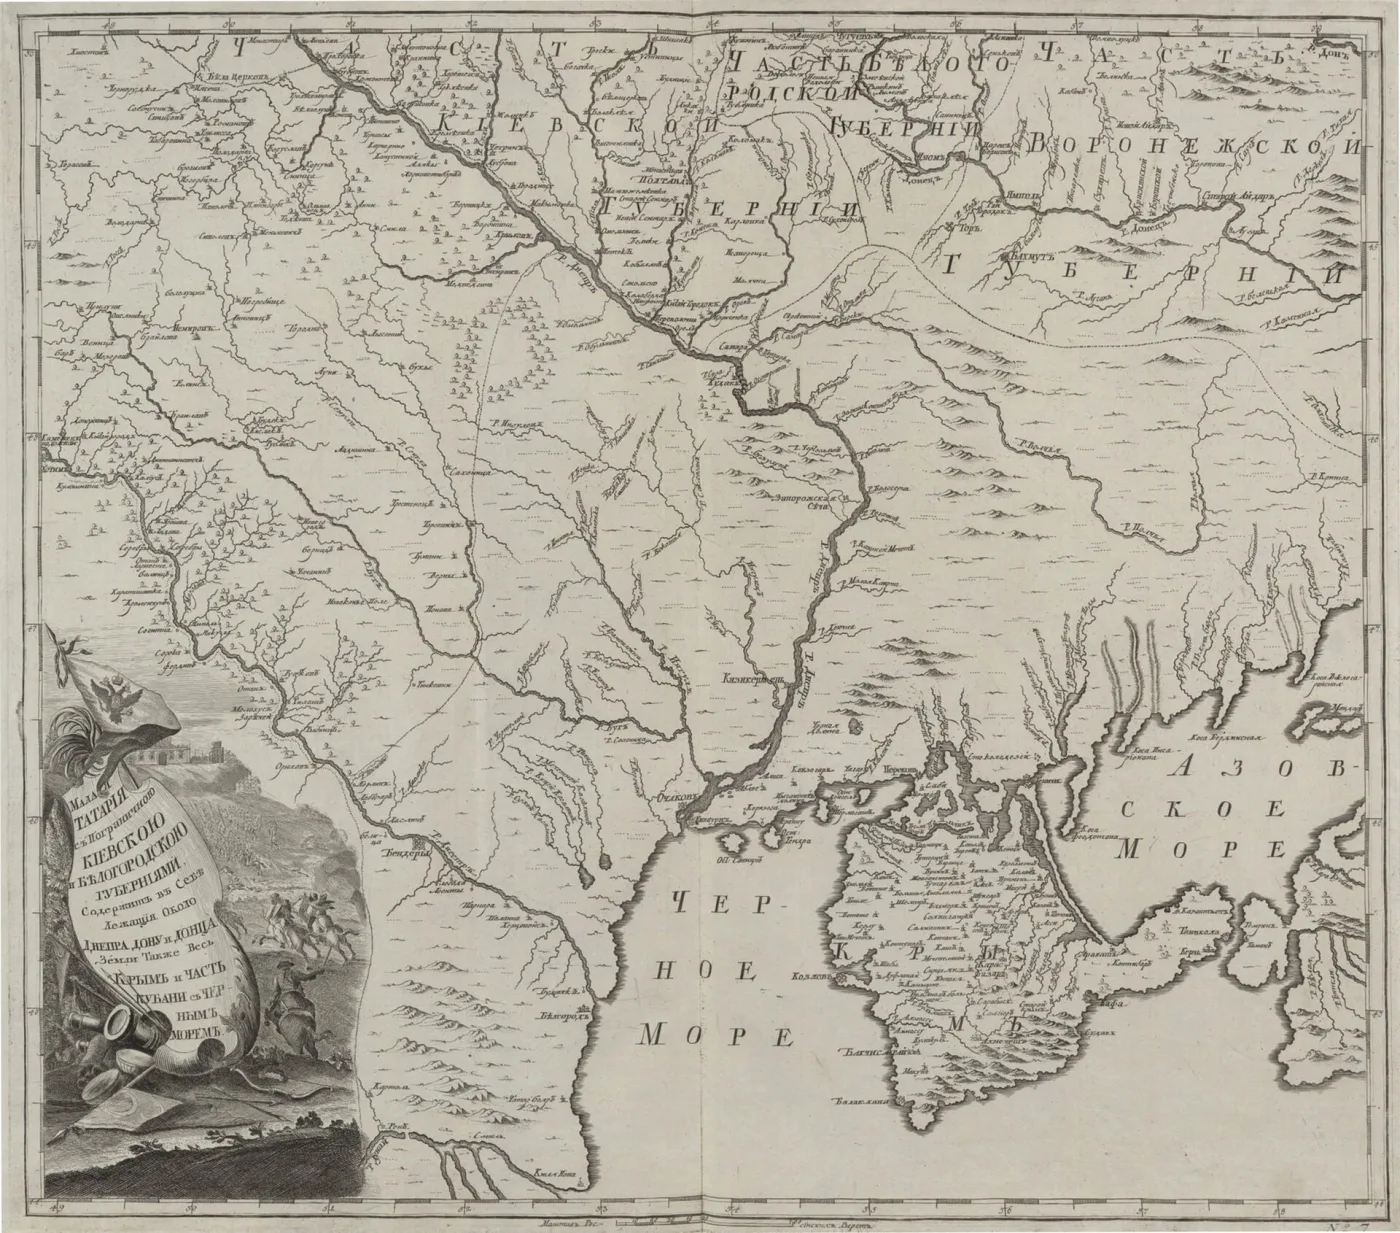
1. Typography Analysis
Font styles and text characteristics:
- Font families: Serif, sans-serif, decorative styles
- Letter forms: Characteristic shapes and proportions
- Spacing and layout: Text arrangement patterns
- Language conventions: Spelling and terminology
2. Cartographic Elements
Map design and content features:
- Border styles: Decorative frames and ornaments
- Compass roses: Navigation symbols and styles
- Scale bars: Measurement indicators
- Legend design: Symbol explanations and layout
3. Historical Context in Maps
Using map content for dating:
- Political boundaries: Country and state borders
- Place names: Historical toponyms and spelling
- Transportation: Roads, railways, and canals
- Geographic knowledge: Known vs. unknown areas
4. Publisher and Printer Information
Imprint and attribution details:
- Publisher names: Company and individual publishers
- Printer marks: Workshop and craftsman identification
- Date stamps: Publication and printing dates
- Edition information: Print runs and states
Plate Marks and Printing Evidence
Plate marks are one of the most reliable indicators of authentic antique prints. Understanding how to identify and interpret them is essential.
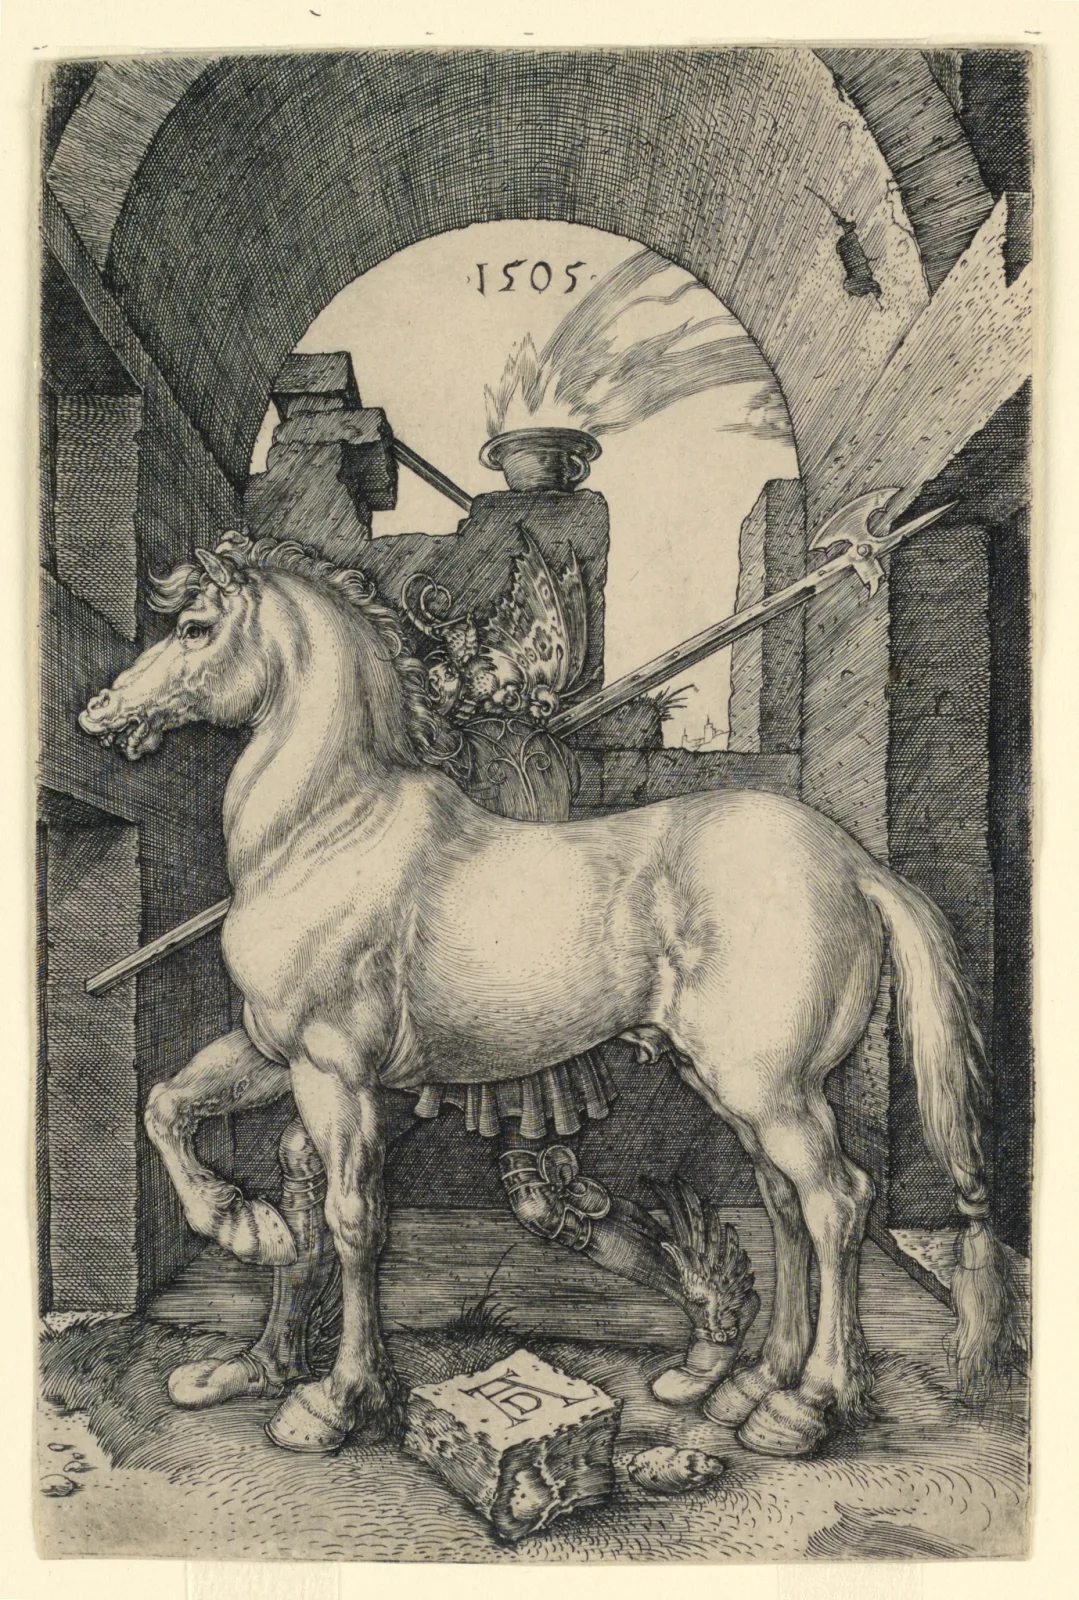
1. Identifying Plate Marks
Characteristics of genuine plate marks:
- Beveled edges: Slightly raised impressions around prints
- Consistent depth: Uniform impression around entire image
- Paper compression: Visible in raking light
- No artificial creation: Cannot be easily faked
2. Plate Mark Variations
Different types of printing evidence:
- Intaglio plate marks: Deep, clear impressions
- Relief printing: No plate marks, flat surface
- Lithography: Minimal or no plate marks
- Modern reproductions: Often lack authentic plate marks
3. Plate Wear and State
Evidence of printing sequence:
- Early impressions: Sharp, clear lines
- Later impressions: Worn, less defined details
- Plate damage: Scratches and wear marks
- State variations: Different printing states
4. Examination Techniques
Professional examination methods:
- Raking light: Side lighting to reveal impressions
- Touch examination: Feeling for raised areas
- Magnification: Detailed examination of edges
- Digital imaging: High-resolution documentation
Advanced Dating Techniques
Combining multiple dating methods provides the most accurate results. Advanced techniques require experience and sometimes professional equipment.
1. Cross-Reference Dating
Using multiple sources for verification:
- Reference books: Specialized dating guides
- Museum collections: Dated examples for comparison
- Auction records: Historical sales data
- Expert consultation: Professional appraisers
2. Scientific Analysis
Modern technology for dating:
- Radiocarbon dating: For organic materials
- X-ray fluorescence: Elemental analysis
- Fiber analysis: Paper composition study
- Ink analysis: Chemical composition testing
3. Historical Context Dating
Using historical knowledge for dating:
- Political events: Wars, treaties, and boundary changes
- Technological advances: Printing and paper innovations
- Economic factors: Trade patterns and availability
- Cultural trends: Design and artistic movements
4. Comparative Analysis
Comparing with known examples:
- Style comparison: Artistic and design elements
- Technical comparison: Printing and paper characteristics
- Content comparison: Information accuracy and completeness
- Condition comparison: Aging and wear patterns
Condition Assessment and Conservation
Condition significantly affects both dating accuracy and value. Understanding how to assess and preserve antique prints and maps is essential.
1. Condition Factors
Key elements of condition assessment:
- Paper condition: Tears, stains, and foxing
- Print quality: Clarity and completeness
- Color condition: Fading and color shifts
- Structural integrity: Mounting and framing condition
2. Common Damage Types
Identifying and understanding damage:
- Foxing: Brown spots from mold or iron particles
- Acid damage: Browning and brittleness
- Water damage: Stains and warping
- Light damage: Fading and color loss
3. Conservation Techniques
Professional preservation methods:
- Deacidification: Neutralizing acidic compounds
- Cleaning: Gentle surface cleaning
- Repair: Japanese tissue mending
- Mounting: Acid-free backing and mats
4. Storage and Display
Proper care and handling:
- Environment control: Temperature and humidity
- Light protection: UV filtering and limited exposure
- Proper framing: Conservation-grade materials
- Handling procedures: Clean hands and support
Identifying Reproductions and Fakes
Unfortunately, the antique print and map market includes many reproductions and fakes. Learning to identify them is crucial for collectors and dealers.
1. Common Reproduction Types
Types of non-original prints:
- Facsimiles: High-quality reproductions
- Restrikes: Later impressions from original plates
- Photomechanical copies: Machine-made reproductions
- Digital prints: Computer-generated copies
2. Detection Methods
Techniques for identifying reproductions:
- Magnification examination: Looking for halftone dots
- Paper analysis: Checking for modern paper types
- Ink analysis: Identifying modern printing inks
- Plate mark examination: Checking for authentic impressions
3. Red Flags
Warning signs of reproductions:
- Too perfect condition: Suspiciously pristine appearance
- Modern paper: Bright white, uniform texture
- Missing plate marks: No printing impressions
- Inconsistent aging: Uneven or artificial wear
4. Authentication Resources
Tools for verification:
- Reference books: Specialized identification guides
- Expert consultation: Professional appraisers
- Museum collections: Comparing with originals
- Digital databases: Online reference collections
Valuation and Authentication
Understanding the value of antique prints and maps requires knowledge of market factors and authentication methods. Professional appraisal is often necessary for valuable items.
1. Value Factors
Elements that affect antique value:
- Rarity: Limited production and survival
- Condition: State of preservation
- Provenance: Ownership history
- Historical significance: Cultural and historical importance
- Market demand: Collector interest and trends
2. Authentication Process
Steps for verifying authenticity:
- Physical examination: Detailed material analysis
- Provenance research: Documenting ownership history
- Expert consultation: Professional evaluation
- Scientific testing: When necessary and appropriate
3. Market Analysis
Understanding current market conditions:
- Recent sales: Comparable auction results
- Market trends: Rising and falling values
- Collector demographics: Buyer preferences and interests
- Economic factors: Overall market conditions
4. Professional Appraisal
When and why to seek professional help:
- High-value items: Expensive or rare pieces
- Insurance purposes: Coverage and protection
- Legal matters: Estate planning and disputes
- Investment decisions: Buying and selling guidance
Digital Tools for Identification
Modern technology has revolutionized antique identification. Digital tools can provide instant insights and help with research and comparison.
1. AI-Powered Apps
Artificial intelligence in antique identification:
- Antique Identifier App: Instant AI-powered identification
- Image recognition: Comparing with vast databases
- Style matching: Identifying design periods
- Condition assessment: AI analysis of wear and damage
2. Online Databases
Digital resources for research:
- Museum collections: High-resolution images and descriptions
- Auction archives: Historical sales data
- Library collections: Digital map and print collections
- Expert blogs: Specialized knowledge and current trends
3. Digital Imaging
Technology for examination and documentation:
- High-resolution photography: Detailed examination
- Digital magnification: Zoom and analysis tools
- Image enhancement: Improving visibility of details
- Comparative analysis: Side-by-side examination
4. Social Media and Forums
Community knowledge sharing:
- Collector groups: Facebook, Reddit, and specialized forums
- Expert networks: Professional appraisers and dealers
- Knowledge sharing: Experience and advice exchange
- Market updates: Current trends and values
Expert Tips and Best Practices
Success in dating antique prints and maps comes from experience and knowledge. Here are expert tips to help you develop your skills.
1. Building Your Knowledge Base
- Study specialized books on print and map identification
- Visit museums and examine original pieces
- Attend antique shows and auctions
- Join collector organizations and forums
- Take courses in art history and printmaking
2. Developing Your Eye
- Examine as many authentic pieces as possible
- Learn to recognize quality materials and craftsmanship
- Understand the difference between age and wear
- Study the evolution of printing techniques
3. Avoiding Common Mistakes
- Don't rely solely on online research
- Beware of "too good to be true" deals
- Always verify provenance claims
- Get professional appraisals for valuable items
- Understand that condition significantly affects value
4. Using Technology Wisely
- Use AI apps like Antique Identifier as a starting point
- Verify digital identifications with traditional methods
- Combine digital tools with expert consultation
- Keep up with new identification technologies
5. Professional Development
- Build relationships with reputable dealers
- Attend professional conferences and workshops
- Consider certification programs in appraisal
- Stay current with market trends and research
Conclusion
Dating antique prints and maps is a complex but rewarding skill that combines historical knowledge, technical expertise, and careful observation. While modern tools like the Antique Identifier app can provide instant insights, they work best when combined with traditional identification methods and expert consultation.
Remember that every antique print and map tells a story about the time and place of its creation. The more you learn about identification techniques, the better you'll become at uncovering those stories and understanding the true value of these historical treasures.
Whether you're a beginner collector or an experienced dealer, continuous learning and practice are the keys to success in antique identification. Start with the basics, build your knowledge gradually, and don't hesitate to seek expert advice when needed.