
Antique Photographs Identification Guide: Daguerreotypes, Tintypes & Vintage Photo Dating
Antique photographs offer a remarkable window into the past, preserving faces, fashions, and moments from bygone eras with stunning clarity. From the silvery surfaces of daguerreotypes to the humble charm of tintypes, each photographic process tells a unique story about the technology and culture of its time. Whether you've discovered a mysterious family portrait in an attic trunk or stumbled upon vintage photographs at an estate sale, understanding how to identify and date these precious artifacts can unlock their historical significance and potential value. This comprehensive guide will walk you through everything you need to know about identifying antique photographs, from the earliest daguerreotypes of the 1840s to the snapshot era of the early 20th century.
Table of Contents
- A Brief History of Photography
- Daguerreotypes: The First Photographs
- Ambrotypes: Glass Plate Portraits
- Tintypes: Photography for the Masses
- Paper Photographs: CDVs and Cabinet Cards
- Stereographs and 3D Photography
- Dating Techniques for Antique Photographs
- Cases, Mounts, and Presentation
- Condition Assessment and Preservation
- Authentication and Detecting Reproductions
- Valuation and Market Considerations
- Digital Tools for Photo Identification
- Expert Tips and Best Practices
A Brief History of Photography
Understanding the evolution of photographic technology is essential for accurate identification and dating of antique photographs. Each era brought new innovations that left distinctive characteristics on the images produced.
The Dawn of Photography (1839-1860)
The invention of photography was announced simultaneously in France and England in 1839. Louis-Jacques-Mandé Daguerre revealed the daguerreotype process, while William Henry Fox Talbot presented the calotype. These revolutionary inventions forever changed how we capture and preserve memories.
- 1839: Daguerreotype process publicly announced in France
- 1841: Talbot patents the calotype paper negative process
- 1851: Frederick Scott Archer introduces the wet collodion process
- 1854: André-Adolphe-Eugène Disdéri patents the carte de visite format
- 1856: Tintype (ferrotype) process patented in the United States
The Golden Age of Studio Photography (1860-1900)
This period saw photography become accessible to the middle class, with portrait studios opening in every town. Standardized formats like cabinet cards made photographs affordable keepsakes.
- 1866: Cabinet card format introduced
- 1871: Gelatin dry plate process developed
- 1880s: Snapshot photography begins with hand-held cameras
- 1888: Kodak introduces the first consumer camera
- 1895: Snapshot photographs become widely popular
The Transition to Modern Photography (1900-1940)
The early 20th century brought mass-market photography and new formats that would eventually lead to the modern photographic era.
- 1900: Kodak Brownie camera democratizes photography
- 1907: Autochrome color process introduced
- 1920s: Real photo postcards peak in popularity
- 1935: Kodachrome color film introduced
- 1936: First 35mm SLR cameras appear
Daguerreotypes: The First Photographs
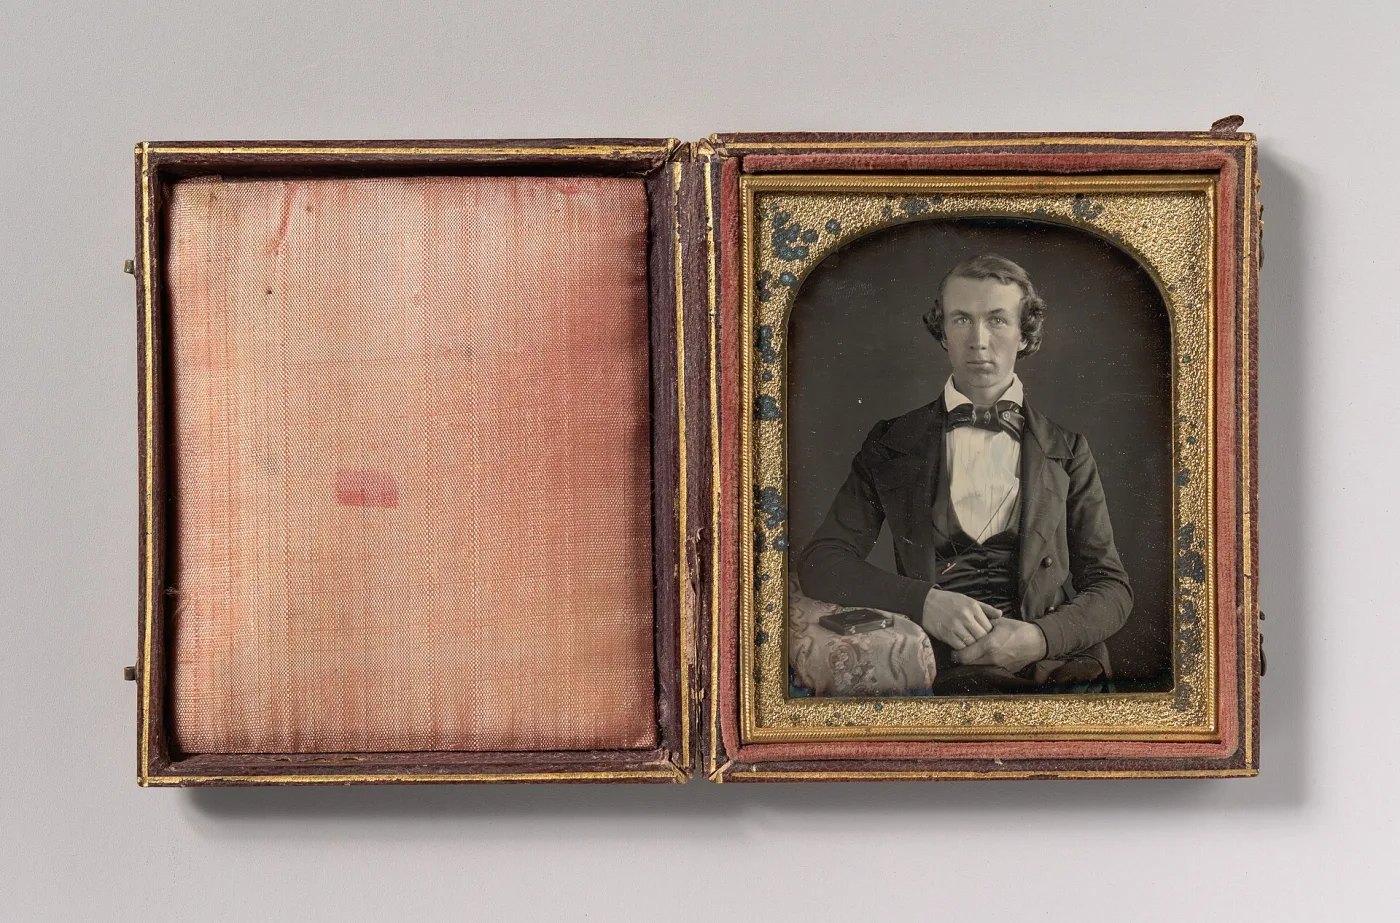
Daguerreotypes represent the first commercially successful photographic process and remain highly prized by collectors. Understanding their unique characteristics is essential for proper identification.
Identifying Characteristics
Daguerreotypes possess distinctive features that set them apart from all other photographic processes:
- Mirror-like surface: The image appears on a highly polished silver-plated copper sheet with an unmistakable reflective quality
- Angle-dependent viewing: The image shifts from positive to negative depending on the viewing angle and lighting
- Lateral reversal: Most daguerreotypes show the image in reverse (mirror image) unless a reversing prism was used
- Delicate surface: The image sits on top of the plate and can be easily damaged by touching
- Brass mat and preserver: Images are typically sealed under glass with a brass mat (often gilded)
- Protective case: Most daguerreotypes are housed in hinged leather or thermoplastic Union cases
Dating Daguerreotypes
Several factors help establish when a daguerreotype was made:
- 1839-1841: Very early examples are rare; images often have a bluish or cool tone
- 1842-1847: Improved techniques produce warmer tones; hand-coloring becomes common
- 1848-1855: Peak production period; gilt brass mats become standard
- 1856-1860: Declining use as ambrotypes and tintypes gain popularity
- Post-1860: Daguerreotypes are rarely made after this date in the United States
Size Classifications
Daguerreotypes were made in standardized sizes that help with dating and valuation:
- Whole plate: 6½ × 8½ inches (extremely rare and valuable)
- Half plate: 4¼ × 5½ inches (rare)
- Quarter plate: 3¼ × 4¼ inches (common)
- Sixth plate: 2¾ × 3¼ inches (most common)
- Ninth plate: 2 × 2½ inches (common)
- Sixteenth plate: 1⅜ × 1⅝ inches (jewelry pieces)
Notable Makers and Studios
Some daguerreotypists achieved fame and their work commands premium prices:
- Mathew Brady: Famous for Civil War photography; earlier daguerreotype work highly valued
- Southworth & Hawes: Boston partnership known for exceptional artistic quality
- Jeremiah Gurney: New York City daguerreotypist with distinctive style
- Robert Cornelius: Philadelphia pioneer who made one of the first self-portraits
- Antoine Claudet: London-based daguerreotypist with royal patronage
Ambrotypes: Glass Plate Portraits
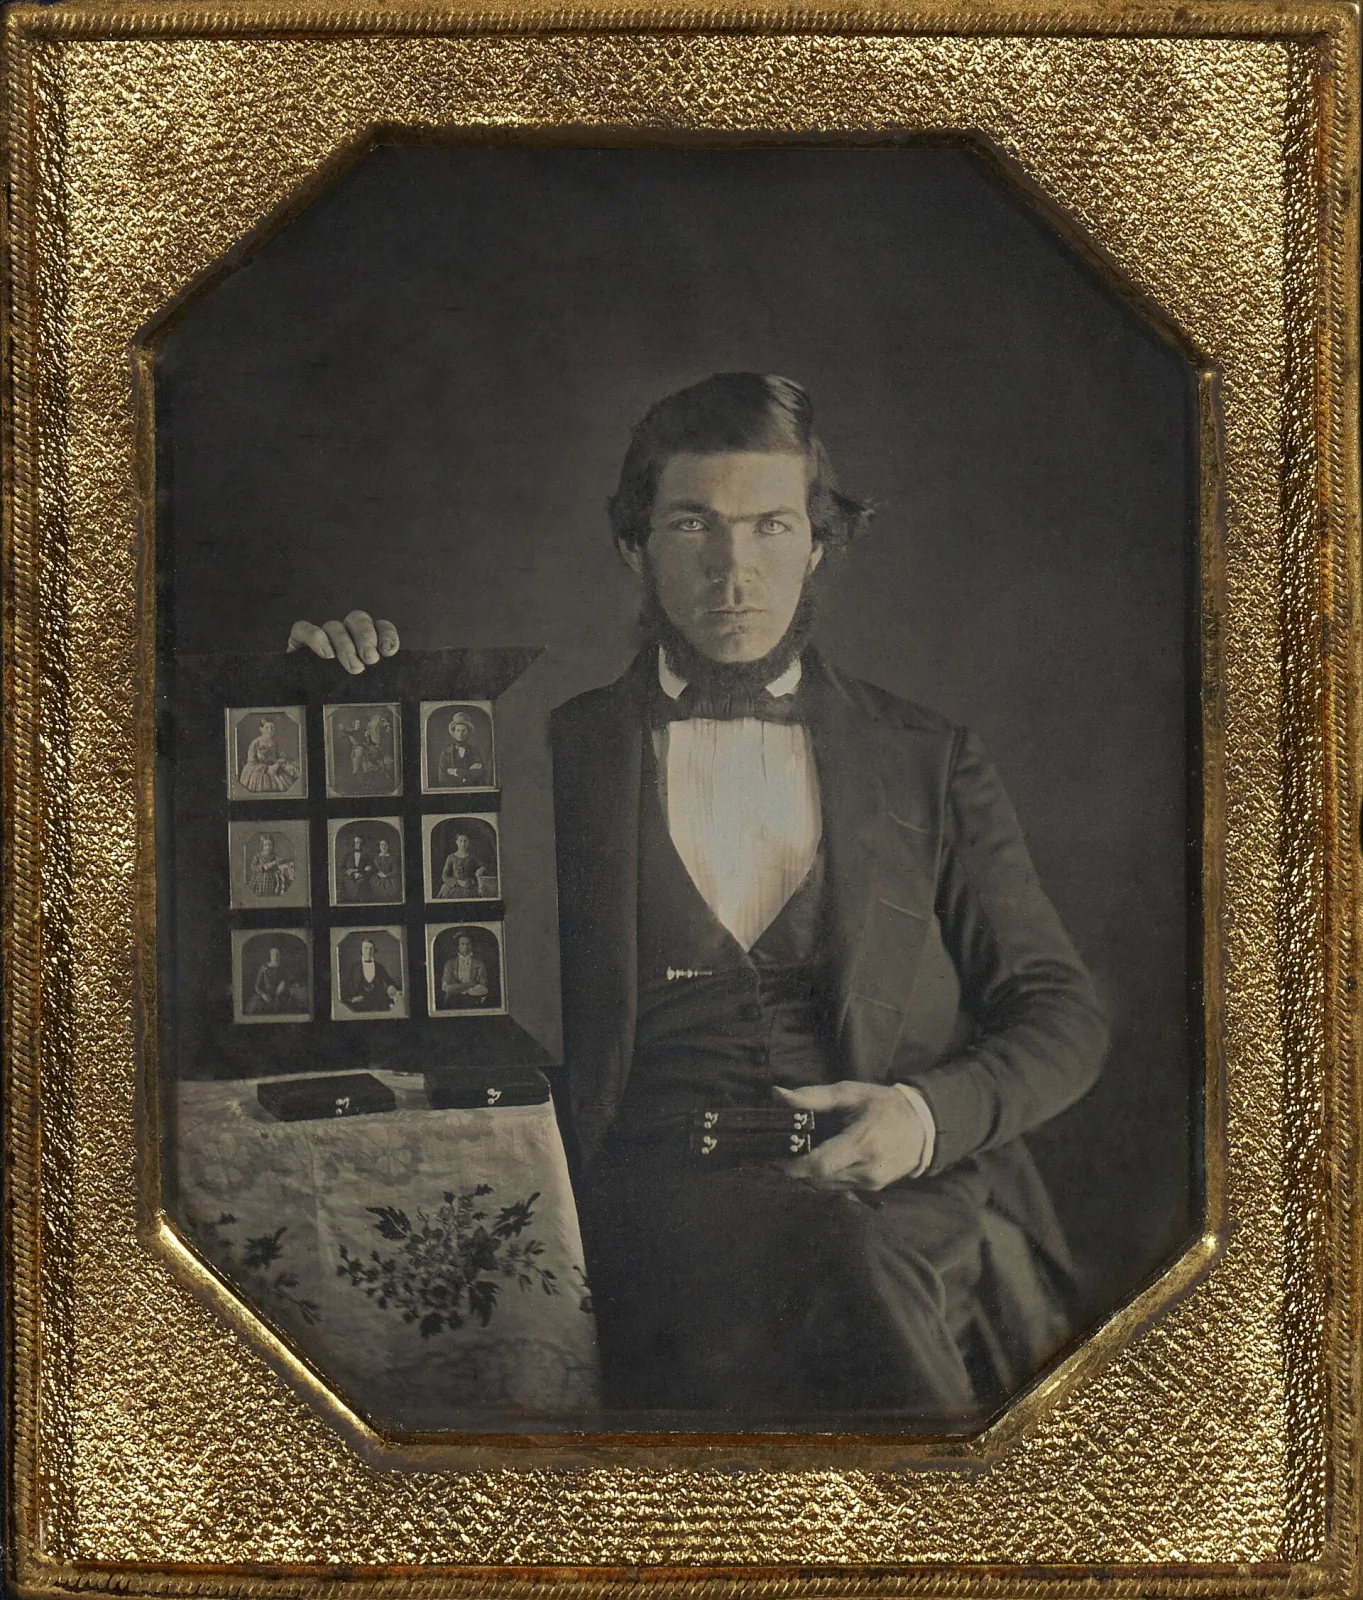
Ambrotypes bridged the gap between expensive daguerreotypes and economical tintypes, offering a glass-based alternative that was cheaper to produce while maintaining excellent image quality.
Identifying Characteristics
Ambrotypes have distinctive features that distinguish them from other photographic processes:
- Glass substrate: The image is created on a glass plate coated with collodion
- Dark backing required: The image only appears as a positive when backed with black material (velvet, paint, or paper)
- Consistent viewing: Unlike daguerreotypes, the image doesn't shift with viewing angle
- Non-reflective surface: Glass surface doesn't have the mirror-like quality of daguerreotypes
- Hand coloring: Many ambrotypes feature hand-applied color, especially for cheeks and jewelry
- Similar presentation: Typically housed in the same cases as daguerreotypes
Types of Ambrotypes
Several variations of the ambrotype process exist:
- Collodion positive: Standard ambrotype on clear glass with dark backing
- Ruby ambrotype: Made on red or ruby-colored glass, producing rich tones
- Double-sided ambrotype: Two glass plates sandwiched together with backing between
- Cut-down daguerreotype: Some ambrotypes were made from reused daguerreotype plates
Dating Ambrotypes
Ambrotypes were produced during a relatively brief period:
- 1854-1856: Introduction and early adoption; often experimental quality
- 1857-1860: Peak popularity; highest quality examples
- 1861-1865: Civil War era; many soldier portraits
- Post-1865: Largely replaced by tintypes and paper photographs
Condition Issues Specific to Ambrotypes
Ambrotypes face unique preservation challenges:
- Lifting emulsion: The collodion layer can separate from the glass
- Glass breakage: Cracked or broken glass is common
- Backing deterioration: Black backing material may fade or peel
- Silvering damage: Edge deterioration similar to old mirrors
Tintypes: Photography for the Masses
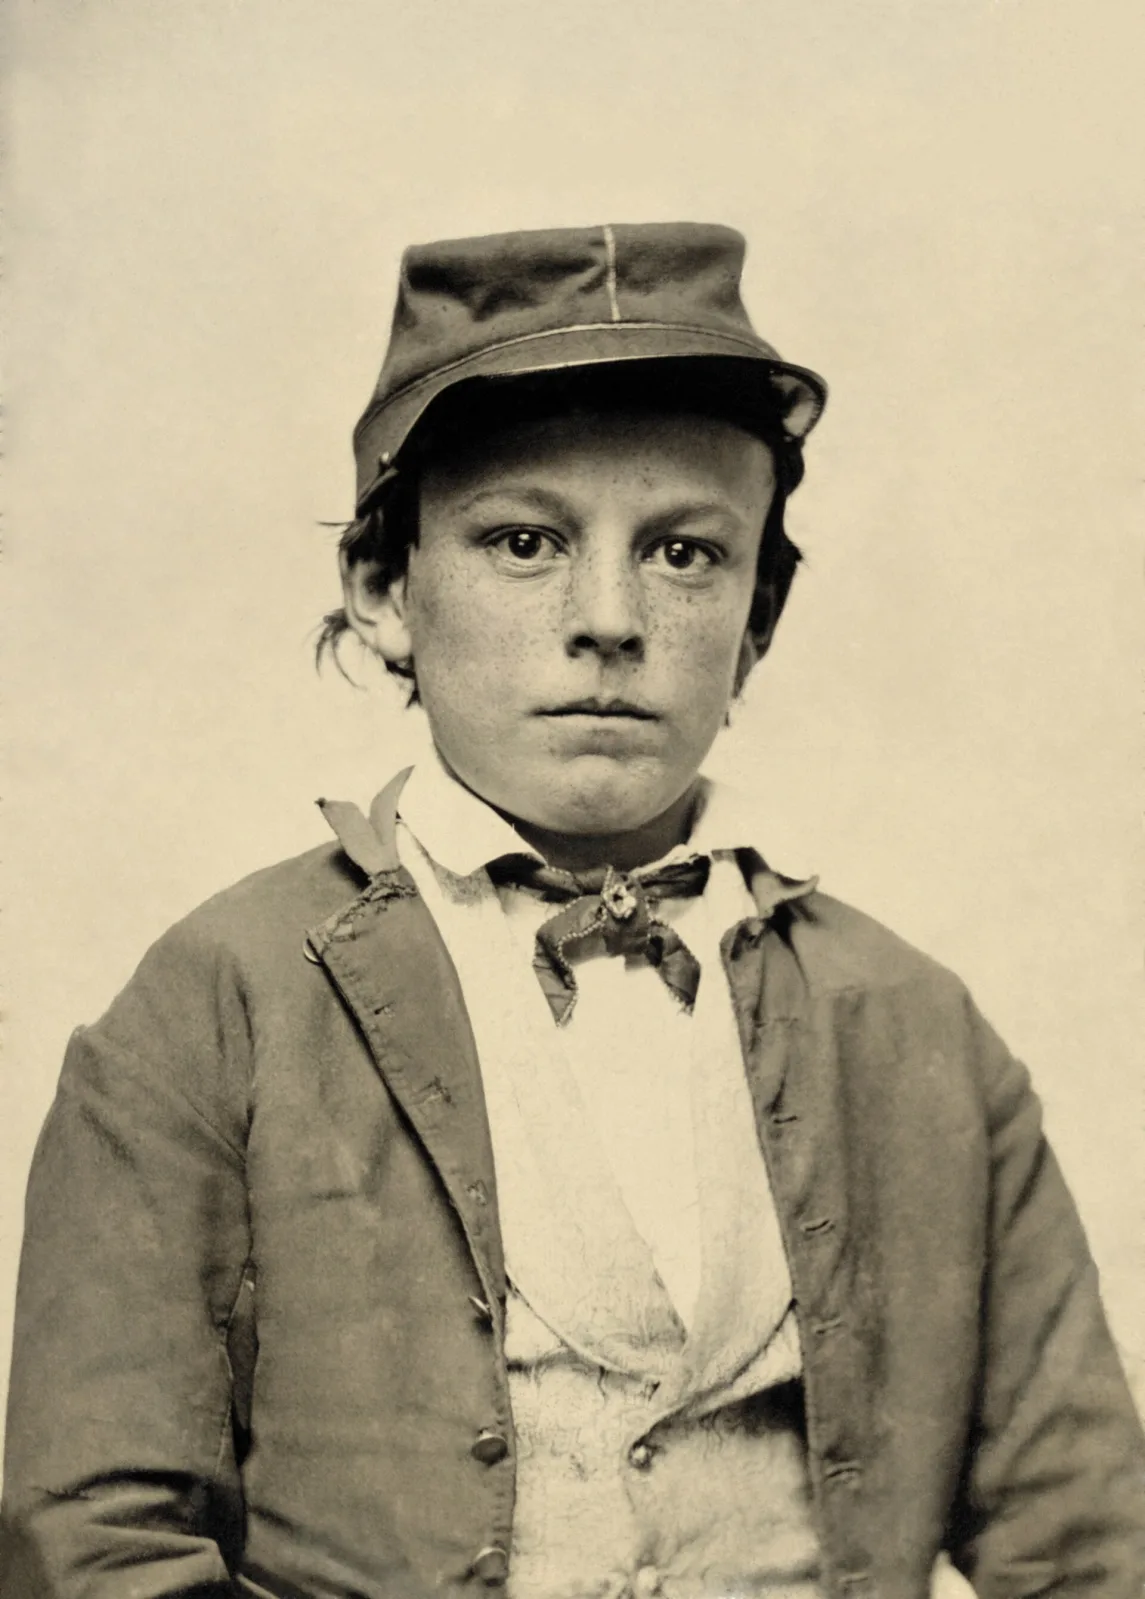
Tintypes (also called ferrotypes or melainotypes) democratized portrait photography, making images affordable for working-class families and Civil War soldiers alike. Their durability has allowed many examples to survive to the present day. The same process was miniaturized into the ferrotype badges of political campaign memorabilia, which set tiny tintype portraits of candidates into stamped brass frames from 1856 through the 1880s.
Identifying Characteristics
Tintypes have unique features that make identification straightforward:
- Metal substrate: Image created on thin iron sheets coated with black or brown lacquer
- Magnetic: Tintypes will attract a magnet (this is the quickest identification test)
- Dark background: No backing required as the metal itself provides the dark background
- Relatively flat tones: Less contrast and detail than daguerreotypes or ambrotypes
- Often hand-colored: Tinting for cheeks, lips, jewelry, and clothing was common
- Variable quality: Ranges from carefully composed studio portraits to quick carnival shots
Types and Formats
Tintypes were produced in various sizes and presentations:
- Cased tintypes: Presented in same Union cases as daguerreotypes and ambrotypes
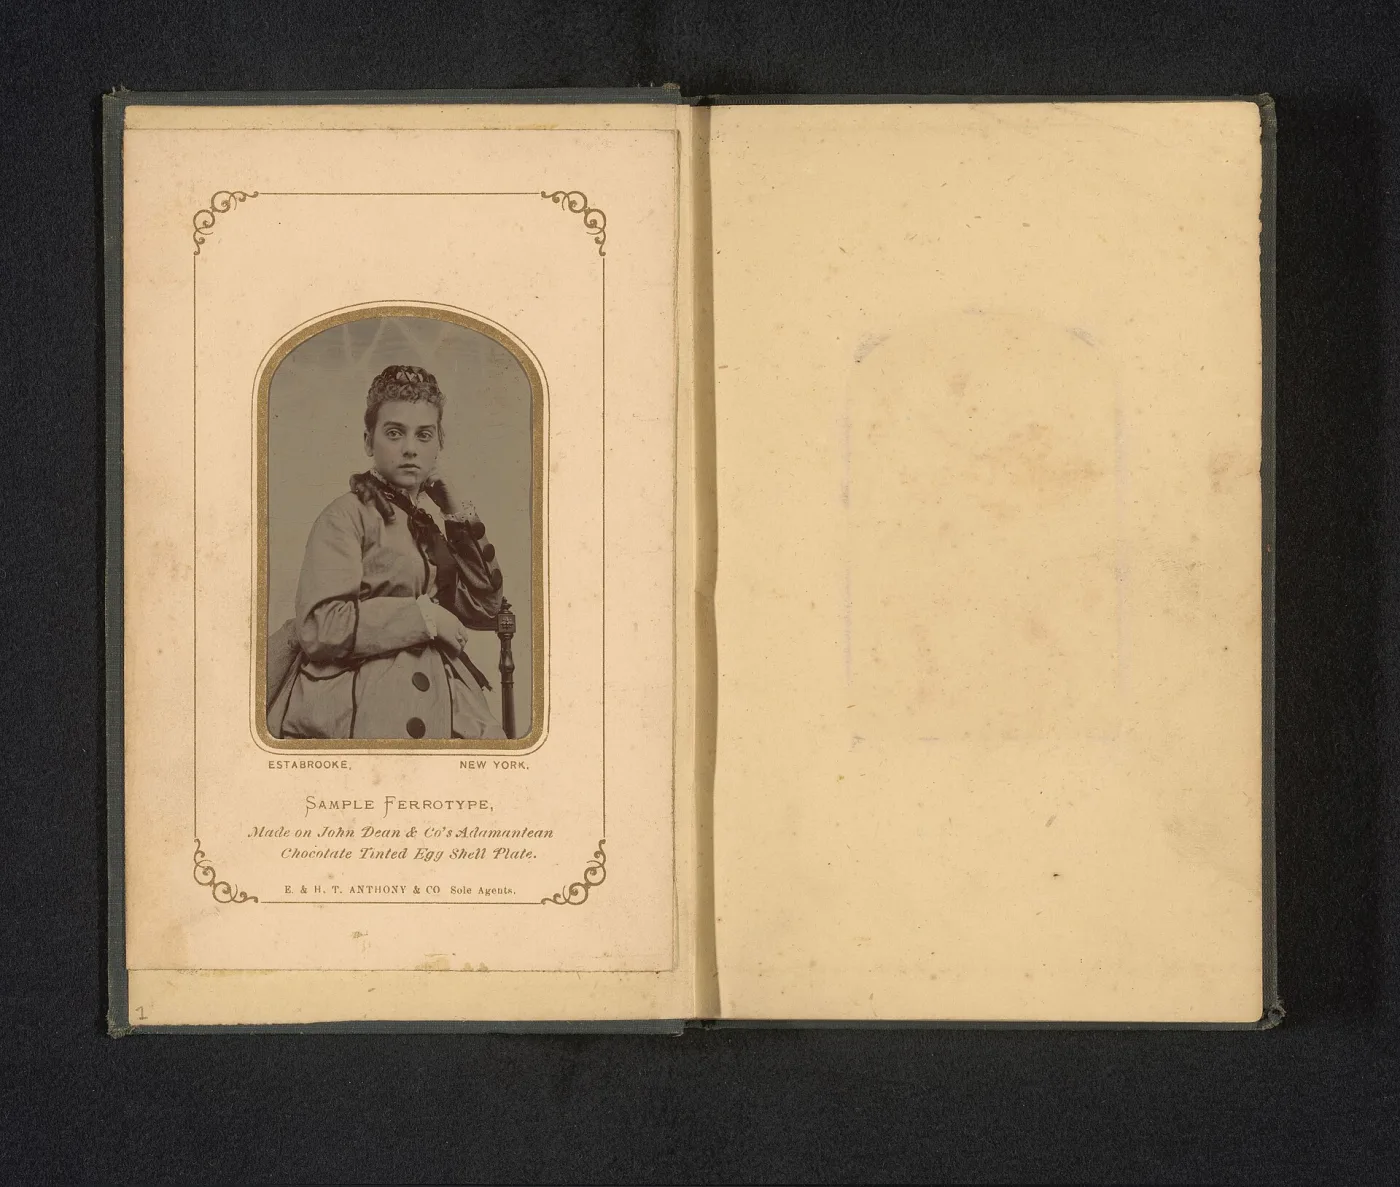
- Paper sleeve tintypes: Mounted in simple paper envelopes or folders
- Gem tintypes: Tiny (1 × 1 inch) images, often used in jewelry or albums
- Bon-ton tintypes: Oval or shaped tintypes with decorative borders
- Outdoor tintypes: Taken by traveling photographers at fairs and carnivals
- Carte-sized tintypes: Made to fit standard carte de visite albums
Dating Tintypes
Tintypes span a long production period with distinct phases:
- 1856-1860: Early period; often presented in Union cases; higher quality
- 1861-1865: Civil War era; many soldier portraits; patriotic themes
- 1866-1880: Peak production; diverse formats and sizes
- 1880-1900: Declining quality; often casual carnival or fair photographs
- 1900-1950: Limited novelty use; boardwalk and amusement park tintypes
Civil War Tintypes
Civil War-era tintypes are among the most collected and valuable:
- Soldier portraits: Young men in uniform, often with weapons
- Patriotic cases: Union cases with flags, eagles, or political themes
- Identified subjects: Images with names or unit information command premiums
- Confederate subjects: Much rarer and more valuable than Union subjects
- African American soldiers: Extremely rare and historically significant
Paper Photographs: CDVs and Cabinet Cards
Paper photographs mounted on cardboard became the dominant format from the 1860s onward, making photography truly accessible and creating the first photo albums and celebrity photographs.
Cartes de Visite (CDVs)
Cartes de visite ("visiting cards") revolutionized portrait photography:
- Standard size: Approximately 2½ × 4 inches on card mount
- Albumen prints: Most CDVs use the albumen printing process with characteristic warm tones
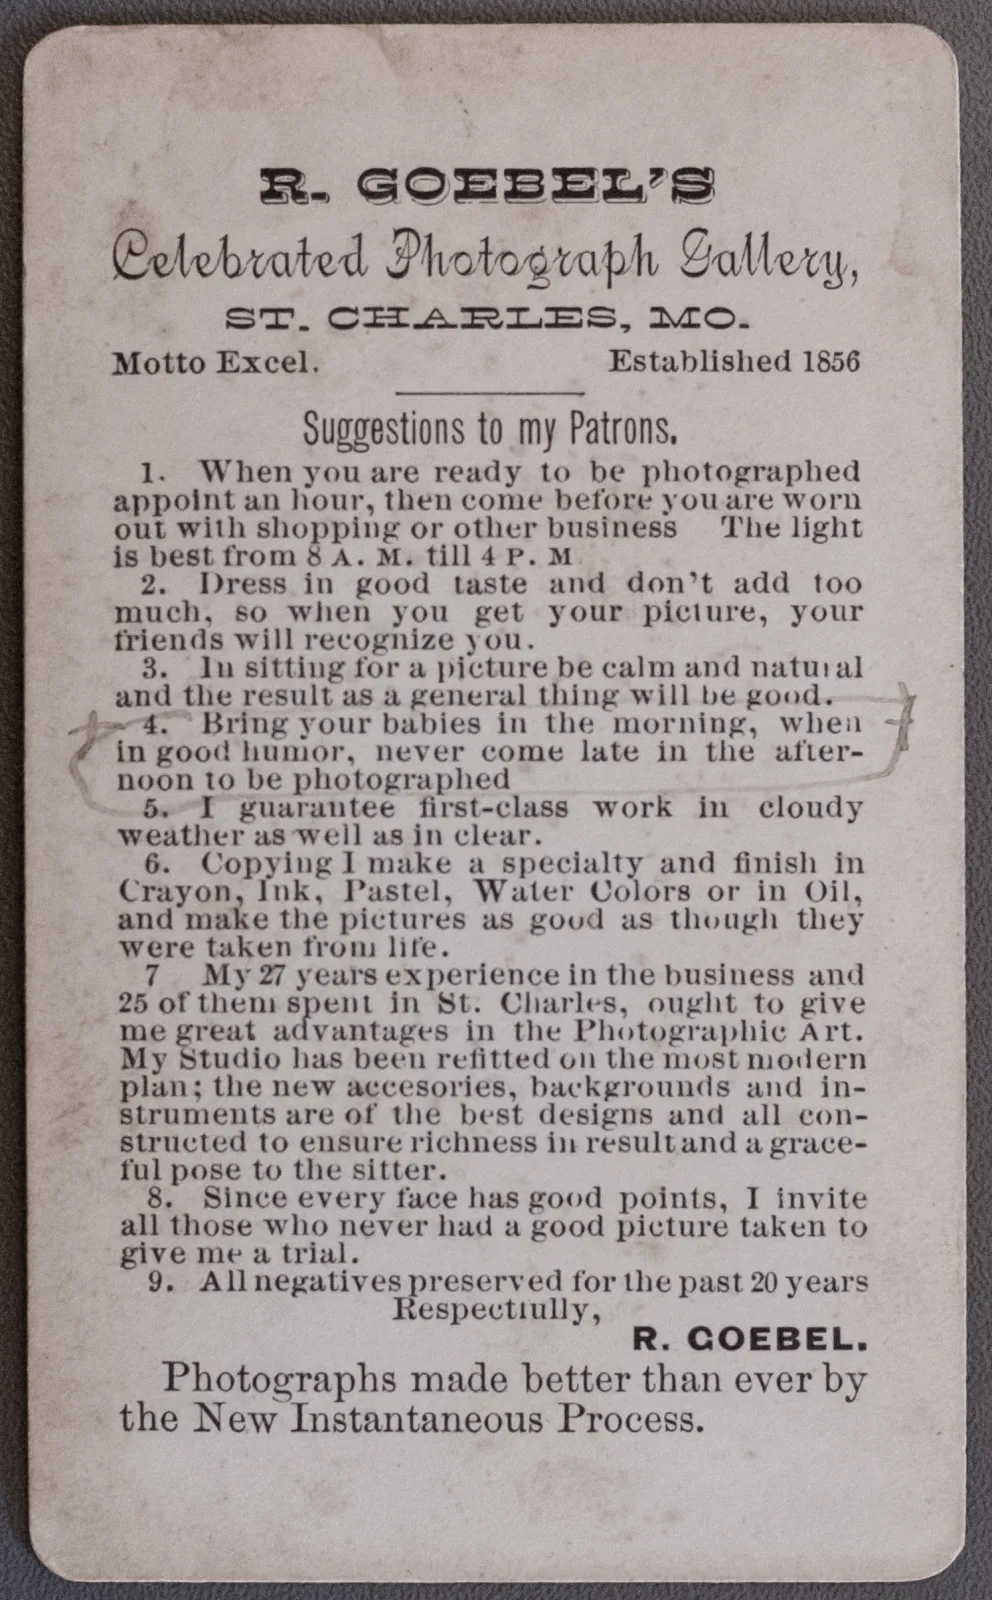
- Studio imprints: Photographer's name and address typically printed on reverse
- Peak era: 1860-1875, though production continued into the 1890s
- Celebrity cartes: Famous people, royalty, and performers sold as collectibles
- Tax stamps: U.S. photographs from 1864-1866 may bear revenue stamps
Cabinet Cards
Cabinet cards offered larger images for better display:
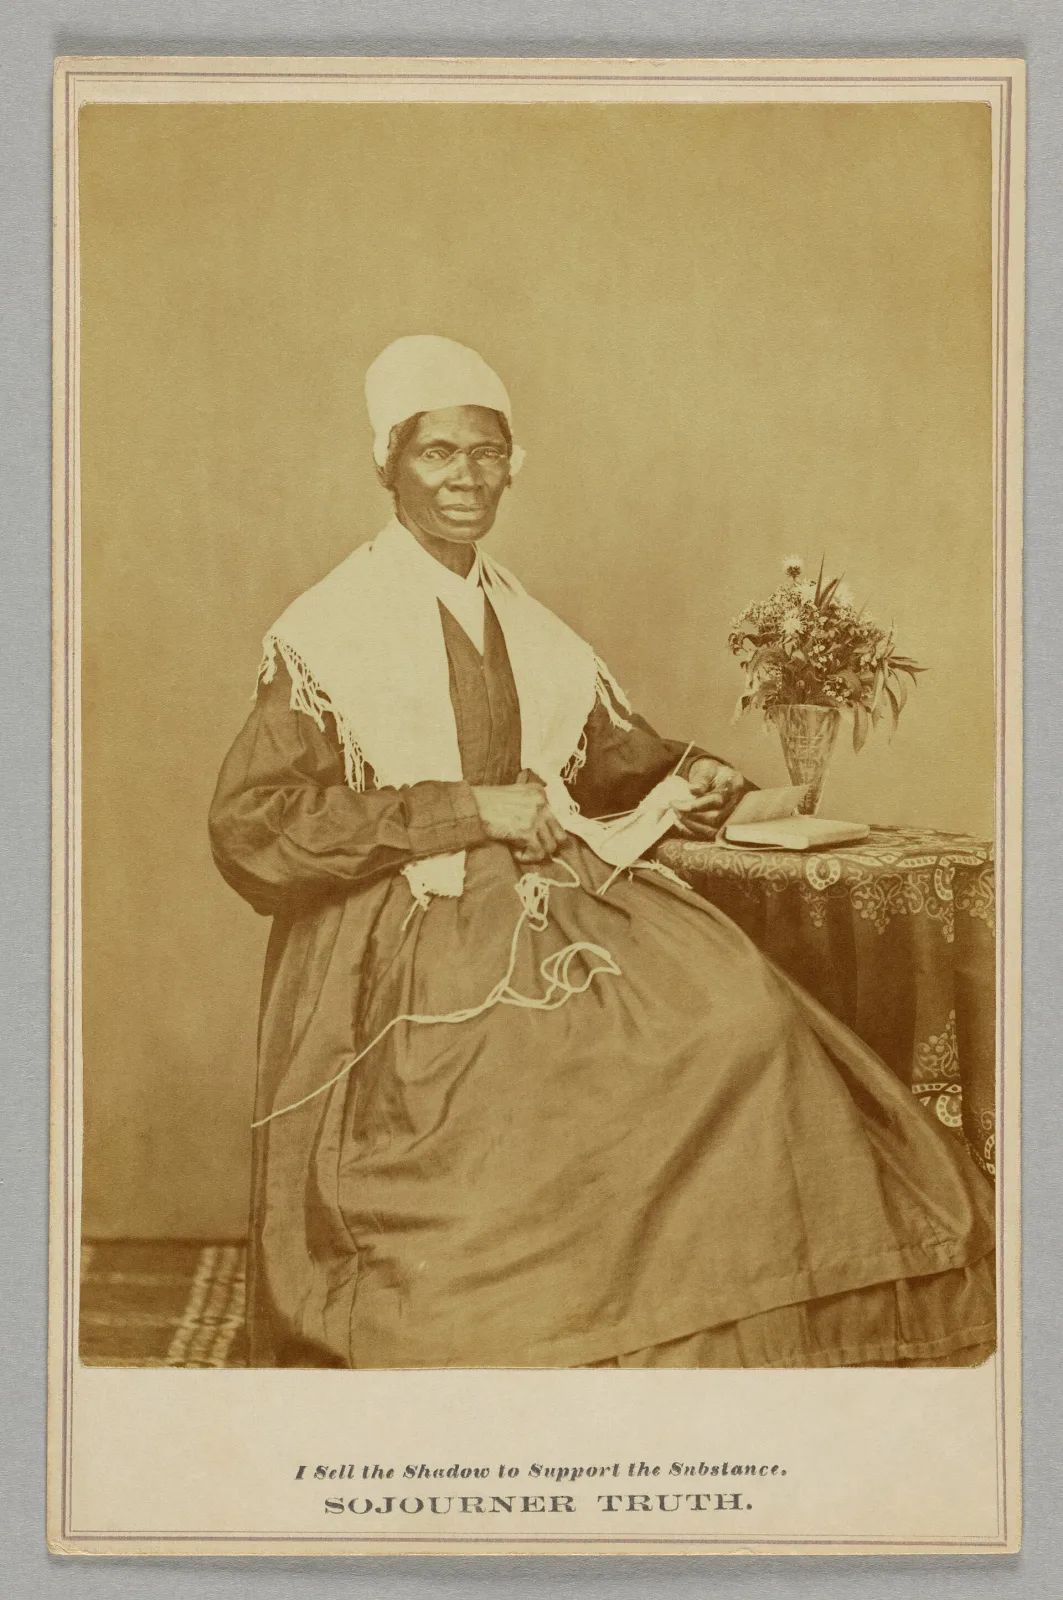
- Standard size: Approximately 4¼ × 6½ inches on card mount
- Higher quality: Larger format allowed for more detail and artistic poses
- Elaborate mounts: Ornate borders, gold edges, and decorative printing
- Peak era: 1870-1900, gradually replaced by newer formats
- Studio backdrops: Often feature painted backgrounds, props, and furniture
Dating Paper Photographs
Multiple factors help date CDVs and cabinet cards:
- Mount color: Evolution from plain white to cream to colors to black
- Corner style: Square corners (early) to rounded corners (later)
- Mount thickness: Thinner mounts generally indicate earlier dates
- Printing style: Typography and design elements changed over decades
- Revenue stamps: Required on U.S. photographs 1864-1866
- Photographer's address: Can be researched in city directories
Print Processes for Paper Photographs
Understanding print processes aids in dating and identification:
- Salt prints (1840-1860): Matte surface, warm brown tones, often faded
- Albumen prints (1855-1900): Glossy surface, yellowing common, most abundant type
- Collodion prints (1865-1905): Very glossy, neutral tones
- Gelatin silver prints (1885-present): Neutral to cool tones, glossy or matte
- Platinum prints (1880-1920): Matte surface, wide tonal range, expensive
- Carbon prints (1870-1920): Rich blacks, permanent, prestigious

Stereographs and 3D Photography
Stereographs provided Victorian audiences with immersive 3D entertainment long before modern virtual reality, alongside the projecting magic lantern for group viewing, and they remain popular collectibles today.
Understanding Stereographs
Stereographs consist of two nearly identical images mounted side by side:
- 3D effect: When viewed through a stereoscope, images merge to create depth perception
- Standard format: Two 3 × 3 inch images on a 3½ × 7 inch card
- Subject matter: Views, travel scenes, humor, genre scenes, disasters, and celebrities
- Peak era: 1850-1920, with multiple format variations
Major Stereograph Publishers
Several companies dominated stereograph production:
- London Stereoscopic Company: British pioneer, began 1854
- E. & H.T. Anthony: Major American publisher, began 1859
- Underwood & Underwood: Educational and travel views
- Keystone View Company: Large producer of educational sets
- Kilburn Brothers: Scenic views and White Mountain images
Dating Stereographs
Mount characteristics help date stereographs:
- 1850-1865: Thin mounts, often yellow, square corners
- 1865-1875: Thicker mounts, rounded corners appear
- 1875-1890: Curved mounts introduced for viewing comfort
- 1890-1910: Gray or colored mounts, often with advertising
- 1910-1935: Lithographed images, educational sets
Collectible Categories
Certain stereograph subjects are particularly sought after:
- Civil War views: Battlefields, soldiers, leaders
- Western expansion: Railroads, Native Americans, mining
- Disasters: San Francisco earthquake, Chicago fire
- World's Fairs: Expositions and international events
- Occupational: Workers and industries
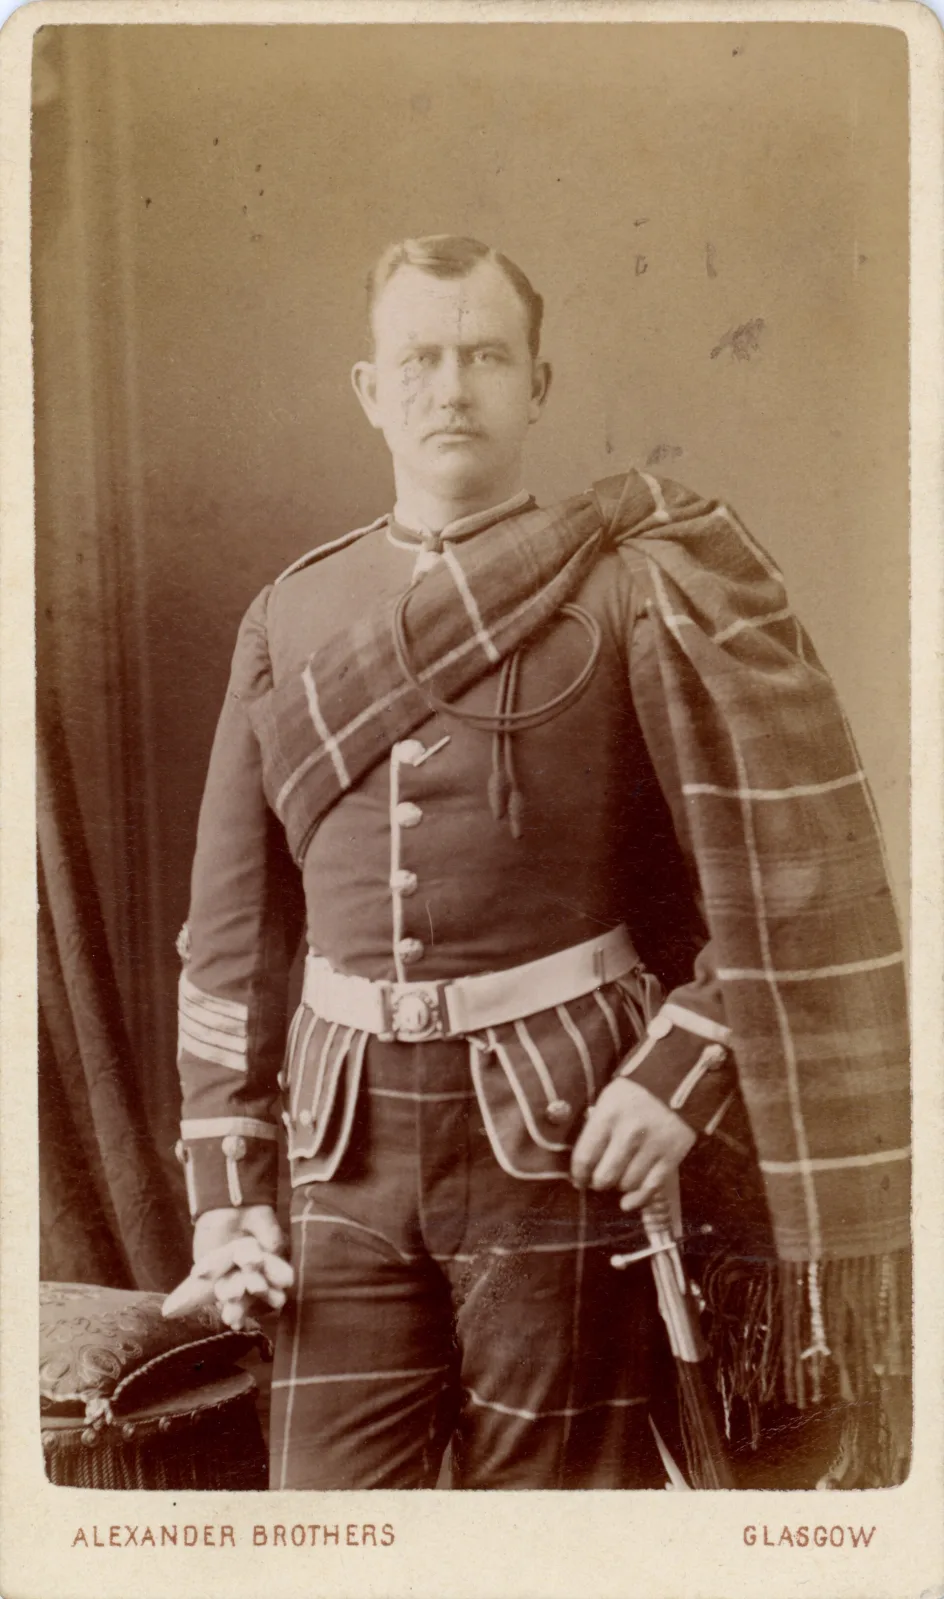
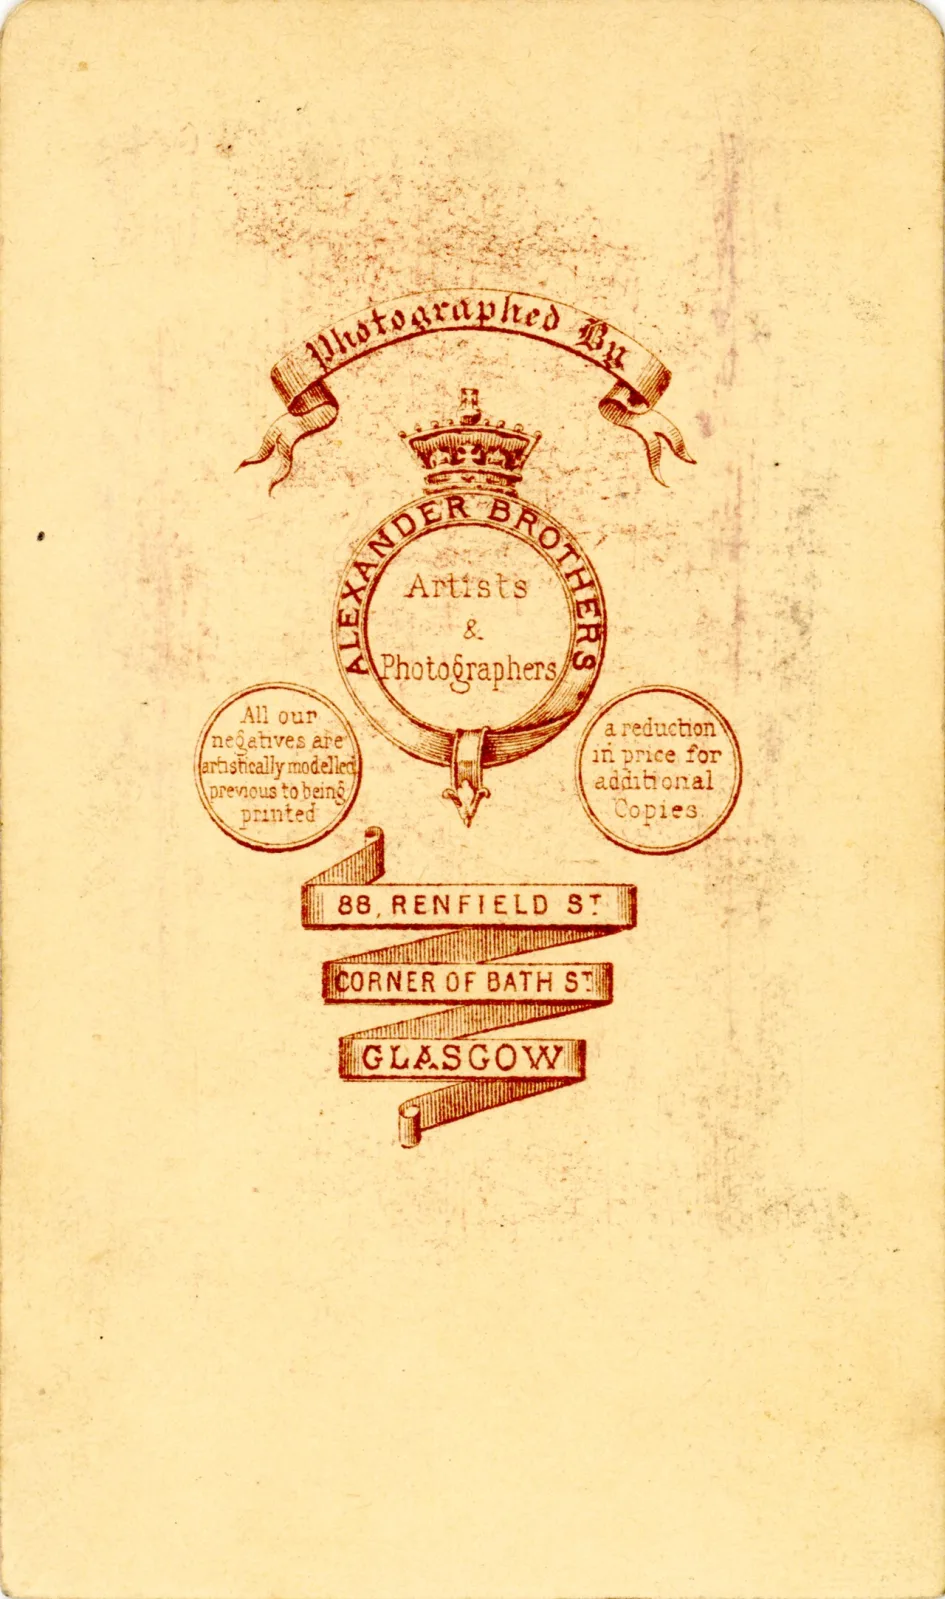
One carte de visite, both sides, and the second is the one that dates it. Almost every dating method in this section runs through the back of the mount. The printed imprint gives a studio name and a street address, and a studio at a numbered address can be traced through trade directories to the years it actually traded — which brackets the photograph without any reference to costume or pose. The design of the imprint helps too: plain type gives way to elaborate crests and pictorial backs across the 1860s and 1870s, so the ornateness of the printing is itself a rough date. And the card stock matters — early CDV mounts are thin with square corners, later ones thicker with rounded corners and often a coloured or bevelled edge. Photograph the back before the front, and never let a dealer sell you a card face-up in a sleeve.
Dating Techniques for Antique Photographs
Accurate dating of antique photographs requires analyzing multiple elements, from fashion and hairstyles to photographic technology and presentation materials.
Fashion and Costume Dating
Clothing provides some of the most reliable dating evidence:
- Women's dress silhouettes: Changed dramatically every decade with distinctive features
- Men's collar styles: Evolved from high stocks to wing collars to modern turndowns
- Children's clothing: Boys often wore dresses until age 5-6 in the 19th century
- Mourning attire: Black clothing and jet jewelry indicate bereavement
- Military uniforms: Specific design elements date to particular wars and periods
Hairstyle Analysis
Hair fashions changed frequently and provide good dating evidence:
- 1840s-1850s: Center parts, smooth styles, ringlets for women
- 1860s: Hair pulled back, chignons, nets and snoods
- 1870s-1880s: Elaborate updos, frizzed fronts, high styles
- 1890s-1900s: Gibson Girl pompadours, bouffant styles
- 1910s-1920s: Simpler styles, then bobbed hair
Studio Props and Backgrounds
Photographers used period-specific props and settings:
- 1840s-1860s: Plain backgrounds, minimal props, classical columns
- 1870s: Ornate furniture, balustrades, painted scenery
- 1880s-1890s: Rustic settings, swings, boats, elaborate backdrops
- 1900s-1910s: Simpler settings, potted plants, art nouveau elements
- Head clamps: Visible or hidden posing supports used throughout the 19th century
Jewelry and Accessories
Personal adornments reflect period styles:
- Mourning jewelry: Jet, hair jewelry, and black stones indicate bereavement
- Watch chains: Styles and wearing positions changed over time
- Brooches: Cameos, lockets, and pin styles evolved
- Eyeglasses: Frame styles changed dramatically
- Fans: Essential female accessory with period-specific designs
Technical Dating Indicators
The photographic process itself provides dating evidence:
- Exposure times: Blurring indicates older technology with longer exposures
- Toning: Sepia, gold, and other toning methods indicate different eras
- Paper types: Different photographic papers were popular in different decades
- Mount characteristics: Thickness, color, and style evolved over time
Cases, Mounts, and Presentation
The presentation materials for antique photographs often provide as much information about dating and value as the images themselves.
Union Cases
Union cases housed daguerreotypes, ambrotypes, and tintypes:
- Material: Thermoplastic composition (shellac and wood fiber)
- Introduced: 1854, patented by Samuel Peck
- Designs: Thousands of different designs from geometric to pictorial
- Rare designs: Historical scenes, buildings, and portraits most valuable
- Maker marks: Some cases stamped with manufacturer names
- Colors: Brown, black, and rare colors like green or red
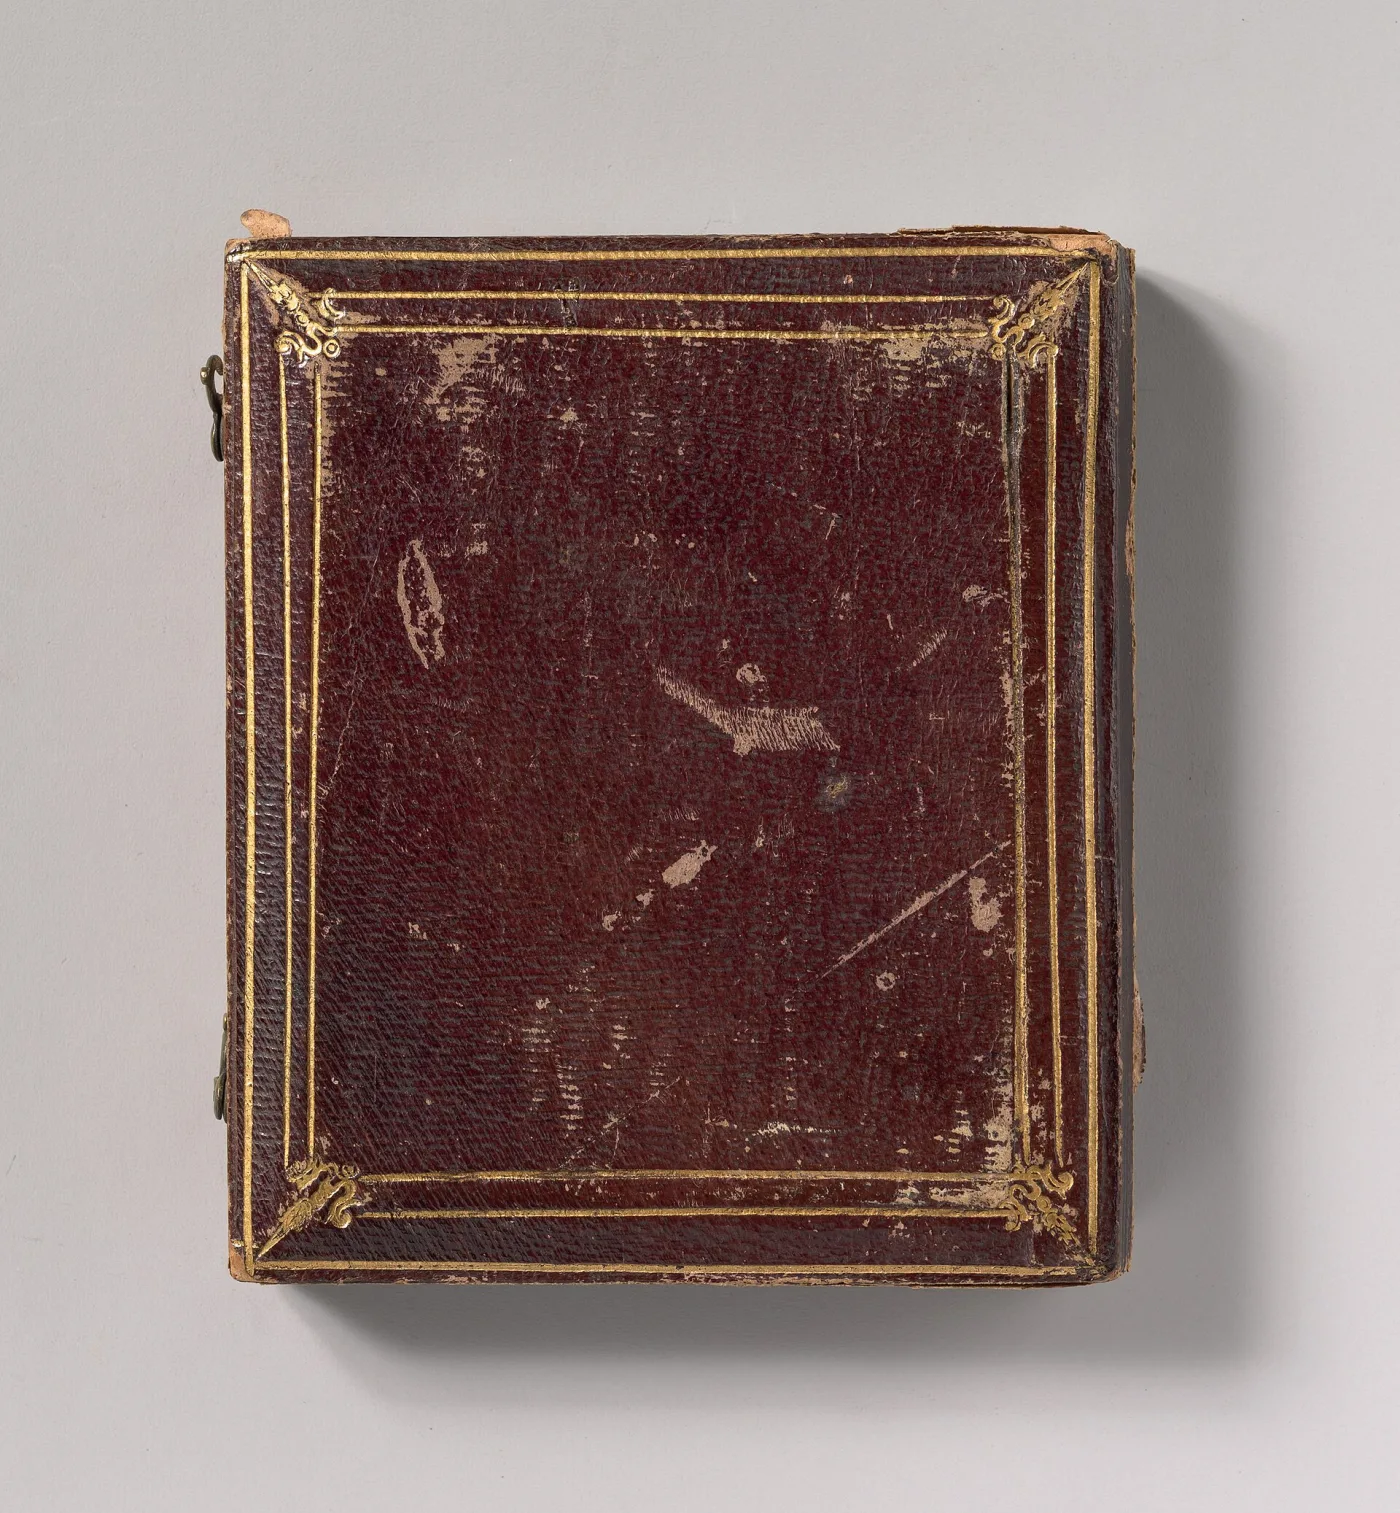
Leather Cases
Leather cases preceded and coexisted with Union cases:
- Period: 1840s through 1860s
- Construction: Leather over wood or paper board
- Interiors: Velvet or silk linings in various colors
- Closures: Hook clasps or push-button closures
- Embossing: Decorative patterns pressed into leather
Card Mount Evolution
Mount characteristics help date paper photographs:
- 1860s: Plain white or cream mounts, thin stock
- 1870s: Red or purple backs appear, ornate borders
- 1880s: Scalloped edges, colored mounts, gilt decoration
- 1890s: Black and dark green mounts, Art Nouveau designs
- 1900s: Simple designs return, commercial printing
Photo Albums
Victorian photo albums are collectible objects in their own right:
- CDV albums: Designed for carte de visite collection and display
- Cabinet card albums: Larger format for cabinet cards
- Musical albums: Contained music boxes that played when opened
- Binding materials: Leather, velvet, celluloid, and other materials
- Metal clasps: Decorative closures often featured
Condition Assessment and Preservation
Understanding condition issues helps with both valuation and preservation of antique photographs.
Common Condition Problems
Different photograph types face specific deterioration issues:
- Daguerreotype tarnishing: Sulfur exposure causes silver sulfide formation
- Ambrotype lifting: Collodion separating from glass support
- Tintype rust: Iron oxidation beneath the image layer
- Albumen yellowing: Natural aging of egg-white binder
- Silver mirroring: Metallic sheen on gelatin prints
- Foxing: Brown spots from fungal growth
- Fading: Loss of image density from light exposure
Condition Grading
Standard grades help describe condition consistently:
- Mint/Near Mint: Perfect or virtually perfect condition
- Excellent: Minor wear consistent with age
- Very Good: Light wear, minor issues not affecting image
- Good: Moderate wear, some condition issues
- Fair: Significant wear or damage
- Poor: Major damage, image compromised
Handling Best Practices
Proper handling prevents additional damage:
- Cotton gloves: Always use clean cotton gloves when handling
- Support the image: Never bend or flex photographic materials
- Avoid touching surfaces: Oils and acids from skin cause damage
- Keep cases closed: Open only when necessary for examination
- Use proper lighting: Minimize exposure to light during viewing
Storage Recommendations
Proper storage extends photograph lifespan:
- Archival materials: Use acid-free boxes, folders, and sleeves
- Climate control: Stable temperature (65-70°F) and humidity (30-40%)
- Darkness: Store away from light sources
- Avoid attics and basements: Temperature and humidity extremes cause damage
- Separate formats: Different photograph types have different storage needs
When to Seek Professional Conservation
Some issues require expert intervention:
- Broken glass: Ambrotypes with cracked glass need stabilization
- Severe tarnishing: Professional cleaning can sometimes restore daguerreotypes
- Active deterioration: Stop ongoing damage before it worsens
- Significant value: High-value images deserve professional care
- Historical importance: Historically significant images warrant conservation
Authentication and Detecting Reproductions
As antique photographs have increased in value, reproductions and fakes have become more common. Learning to distinguish genuine antiques from reproductions is essential.
Red Flags for Reproductions
Warning signs that an image may not be authentic:
- Too perfect condition: Genuine antiques show appropriate age wear
- Incorrect materials: Modern papers, plastics, or metals
- Anachronistic elements: Modern objects visible in supposedly old images
- Wrong process for date: Image claims date inconsistent with technology
- Suspicious provenance: Vague or unverifiable history
- Known reproduction image: Some famous images have been widely reproduced
Authentication Methods
Techniques for verifying authenticity:
- Physical examination: Examine materials, construction, and wear patterns
- Magnification: High-powered loupe or microscope reveals printing methods
- UV examination: Ultraviolet light can reveal repairs and alterations
- Process verification: Confirm the photographic process matches claimed date
- Comparative analysis: Compare with documented authentic examples
- Expert consultation: Seek opinions from recognized specialists
Types of Fakes and Reproductions
Understanding different categories of non-authentic items:
- Modern reproductions: Newly made photographs in old style
- Copy photographs: Period photographs of earlier images
- Enhanced originals: Genuine images with added elements
- Misattributed images: Authentic photographs incorrectly identified
- Composite images: Multiple images combined into one
Famous Subject Authentication
Special care is needed when authenticating celebrity images:
- Abraham Lincoln: One of the most frequently faked subjects
- Civil War figures: Military leaders and officers often misidentified
- Outlaws and lawmen: Western figures like Billy the Kid require extreme scrutiny
- Literary figures: Authors and poets are frequent subjects of fake identifications
- Provenance research: Document chain of ownership when possible
Valuation and Market Considerations
The antique photograph market has evolved significantly, with certain categories commanding substantial prices while others remain accessible to beginning collectors.
Value Factors
Multiple elements affect antique photograph values:
- Subject matter: Famous people, significant events, and rare subjects command premiums
- Condition: Better condition dramatically increases value
- Rarity: Uncommon formats, processes, or subjects are more valuable
- Attribution: Known photographers add value
- Size: Larger format generally means higher value
- Historical significance: Connection to important events increases value
- Aesthetic quality: Artistic composition and technical excellence add value
High-Value Categories
Certain photograph types consistently bring premium prices:
- Civil War military: Especially identified soldiers and officers
- Western Americana: Cowboys, Native Americans, mining, railroads
- African American subjects: Especially pre-Civil War and identified individuals
- Occupational images: Workers with tools of their trade
- Post-mortem photographs: Victorian memorial images
- Famous photographers: Known artists and studios
- Outdoor scenes: Especially daguerreotypes of landscapes
Collecting Strategies
Approaches for building a meaningful collection:
- Specialize: Focus on a specific era, region, or subject
- Buy the best: Quality over quantity builds value
- Research thoroughly: Knowledge prevents costly mistakes
- Document provenance: Maintain records of purchase and ownership
- Build relationships: Connect with dealers, collectors, and experts
- Consider conservation: Protect investments with proper storage
Buying and Selling Venues
Where to find and sell antique photographs:
- Auction houses: Major houses for high-value items; specialized photo sales
- Antique shows: Photography-specific shows and general antique events
- Online marketplaces: eBay, specialized dealer websites, collector forums
- Dealers: Established photography dealers offer expertise and guarantees
- Estate sales: Often source of fresh-to-market discoveries
- Collector-to-collector: Direct sales through collector networks
Digital Tools for Antique Photograph Identification
Modern technology offers powerful tools for researching, identifying, and dating antique photographs.
1. AI-Powered Identification Apps
Artificial intelligence has revolutionized antique photograph identification:
- Antique Identifier App: Instant AI-powered identification from photos of your photographs
- Process recognition: AI can distinguish between daguerreotypes, tintypes, and other formats
- Date estimation: Analysis of fashion, props, and technical elements
- Condition assessment: AI evaluation of damage and deterioration
- Value guidance: Market comparisons and valuation estimates
2. Online Research Resources
Digital databases provide extensive research capabilities:
- Library of Congress: Millions of digitized photographs with detailed catalog records
- Ancestry and genealogy sites: Historical photographs linked to family records
- Museum collections online: Smithsonian, Met, Getty, and other collections
- Photographer databases: Research studio locations and operating dates
- City directories: Digitized directories help date photographers
3. Digital Imaging Tools
Technology for examining and documenting photographs:
- High-resolution scanning: Create detailed digital copies for study
- Image enhancement: Reveal faded details and hidden information
- Comparative overlays: Compare similar images side by side
- Measurement tools: Precise sizing for format identification
4. Social Media and Online Communities
Connect with experts and fellow collectors:
- Facebook groups: Active communities for different photograph specialties
- Reddit forums: r/oldphotos and related communities
- Instagram: Dealers and collectors sharing images and knowledge
- Discussion forums: Specialized websites for collectors
Expert Tips and Best Practices
1. Building Expertise
- Handle as many authentic photographs as possible to develop tactile knowledge
- Study reference books on costume, furniture, and material culture
- Visit museum collections to see documented examples
- Attend collector meetings and photography history conferences
- Subscribe to specialized publications and online resources
2. Examination Best Practices
- Always examine photographs under good lighting with magnification
- Look for hallmarks of specific processes (tarnish patterns, substrates, etc.)
- Check cases, mounts, and backs for dating information
- Research photographer imprints to narrow date ranges
- Consider all elements together rather than relying on single factors
3. Common Mistakes to Avoid
- Don't assume age based solely on subject matter or clothing
- Avoid cleaning or attempting restoration without professional guidance
- Don't remove photographs from original cases or mounts
- Never write on photographs or their backs
- Don't store in plastic sleeves that can trap moisture
- Avoid displaying originals in direct sunlight
4. Using Technology Effectively
- Use AI identification apps like Antique Identifier as a starting point for research
- Verify AI identifications with traditional methods and expert consultation
- Cross-reference multiple online sources for accuracy
- Document your collection digitally for insurance and research purposes
- Stay current with new digital tools and resources
5. Ethical Considerations
- Respect the privacy and dignity of photographic subjects
- Be honest about condition and authenticity when selling
- Preserve provenance information for future researchers
- Consider donating significant historical photographs to public institutions
- Report suspected stolen or looted images to appropriate authorities
Conclusion
Antique photographs represent an extraordinary form of historical documentation, offering direct visual connections to the past that no other medium can match. Whether you're examining a daguerreotype of a Victorian family, a tintype of a Civil War soldier, or a cabinet card from a small-town studio, each image contains layers of information waiting to be decoded. From the photographic process used to the fashion worn by the subjects, from the studio props to the mount design, every element tells part of the story.
Mastering antique photograph identification requires patience, study, and hands-on experience, but the rewards are immense. The thrill of correctly identifying a rare photographic process, discovering the identity of an unknown subject, or finding a valuable image at an estate sale makes the learning process deeply satisfying. By combining traditional connoisseurship with modern tools like the Antique Identifier app, today's collectors have more resources than ever for understanding and appreciating these remarkable artifacts.
As you develop your expertise, remember that every photograph was once a living moment—a person sitting before a camera, a photographer arranging the scene, a family preserving a precious memory. Treating these objects with the respect they deserve honors both the subjects and the craft of photography itself. Whether you collect casually or professionally, your role as a caretaker of photographic history contributes to preserving these windows to the past for future generations.