Antique Lighting Identification: Complete Guide 2026
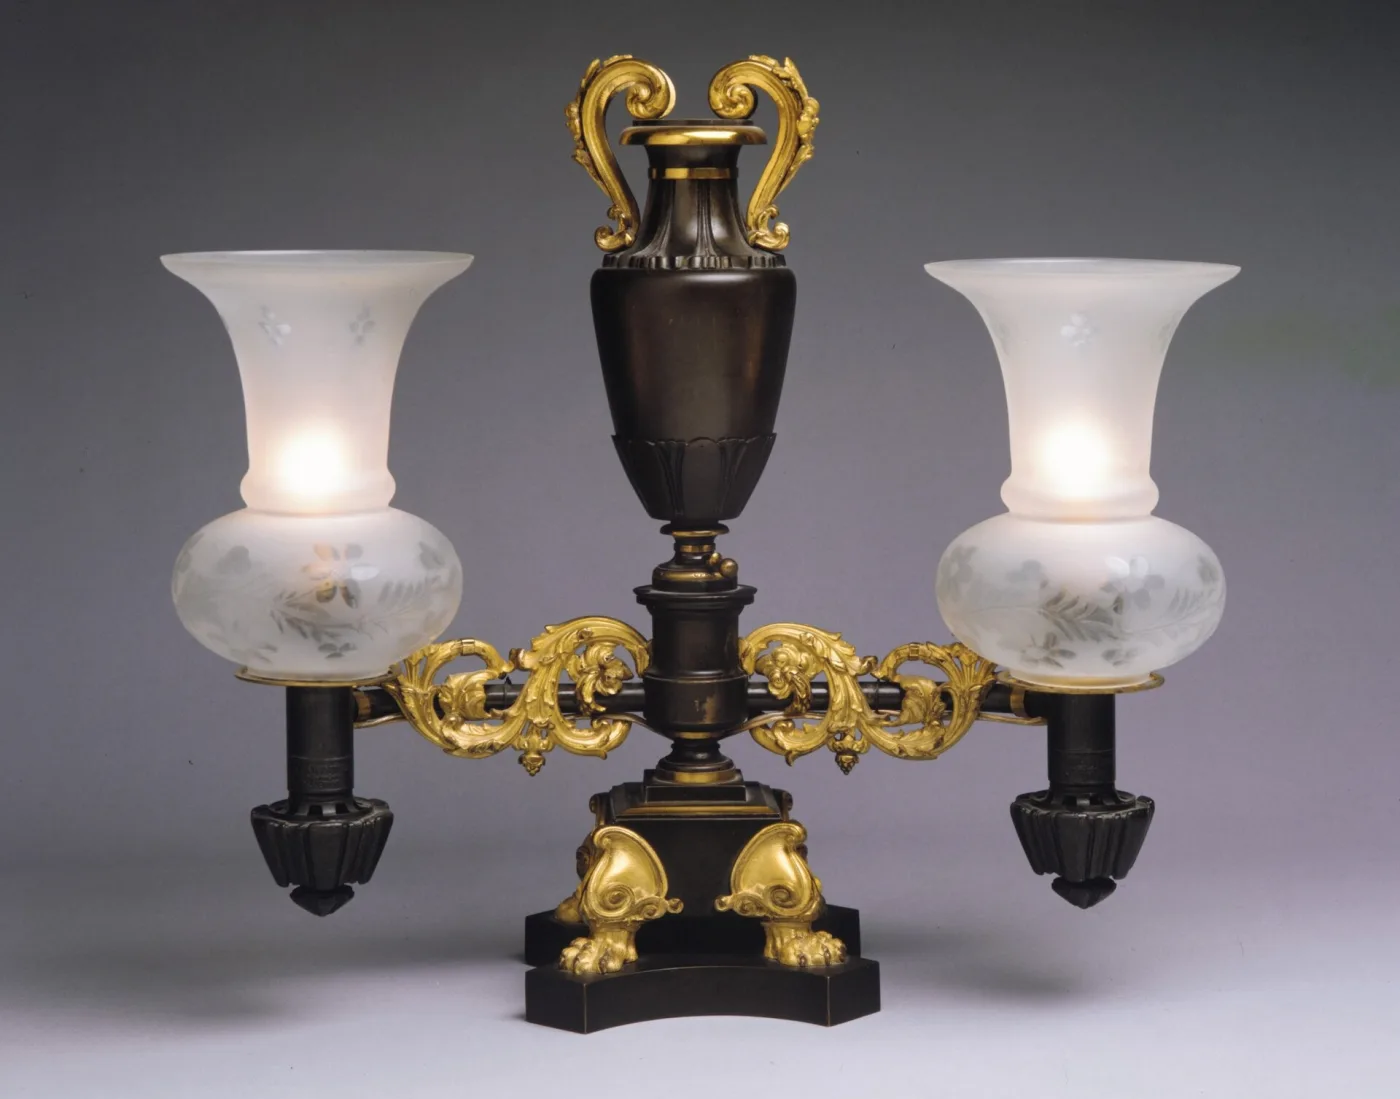
Antique lighting represents one of the most fascinating and complex categories in antique collecting. From the warm glow of whale oil lamps to the elegant gas fixtures of the Victorian era, and the revolutionary early electric lighting that transformed homes, antique lighting tells the story of human innovation and domestic comfort. This comprehensive guide will provide you with the knowledge and tools you need to identify, authenticate, and value antique lighting fixtures. Whether you're examining an oil lamp's burner threads or analyzing a gas fixture's conversion history, understanding these details is crucial for any serious collector. Modern tools like the Antique Identifier app can provide instant AI-powered identification, but mastering the fundamentals of lighting identification will make you a more knowledgeable collector.
Table of Contents
- What Is Antique Lighting?
- Historical Lighting Timeline
- Lighting Identification Methods
- Anatomy and Hardware Analysis
- Glass and Shades Identification
- Bases and Materials
- Original vs. Converted Fixtures
- Authentication Techniques
- Care, Safety, and Use
- Value Assessment and Market Trends
- Digital Tools for Lighting Identification
- Expert Tips and Best Practices
What Is Antique Lighting?
Antique lighting encompasses all lighting fixtures that are at least 100 years old and represent historical lighting technologies. The definition varies by type:
- Oil Lamps: Typically 100+ years old, from whale oil to kerosene
- Gas Fixtures: Generally 150+ years old, from early gas lighting
- Early Electric: Often 80+ years old, from the electrification era
- Transitional Pieces: Fixtures converted between fuel types
The key characteristics that make lighting truly antique include:
- Historical significance and technological innovation
- Quality craftsmanship and period-appropriate materials
- Original components and minimal modifications
- Provenance and documented history of use
- Representation of specific lighting eras and styles
Historical Lighting Timeline
1. Pre-Industrial Era (Pre-1800)
The earliest lighting consisted of simple devices:
- Rush lights: Simple wicks dipped in animal fat
- Betty lamps: Hanging oil lamps with open reservoirs
- Candles: Made from tallow, beeswax, or whale oil
- Simple oil lamps: Clay or metal containers with floating wicks
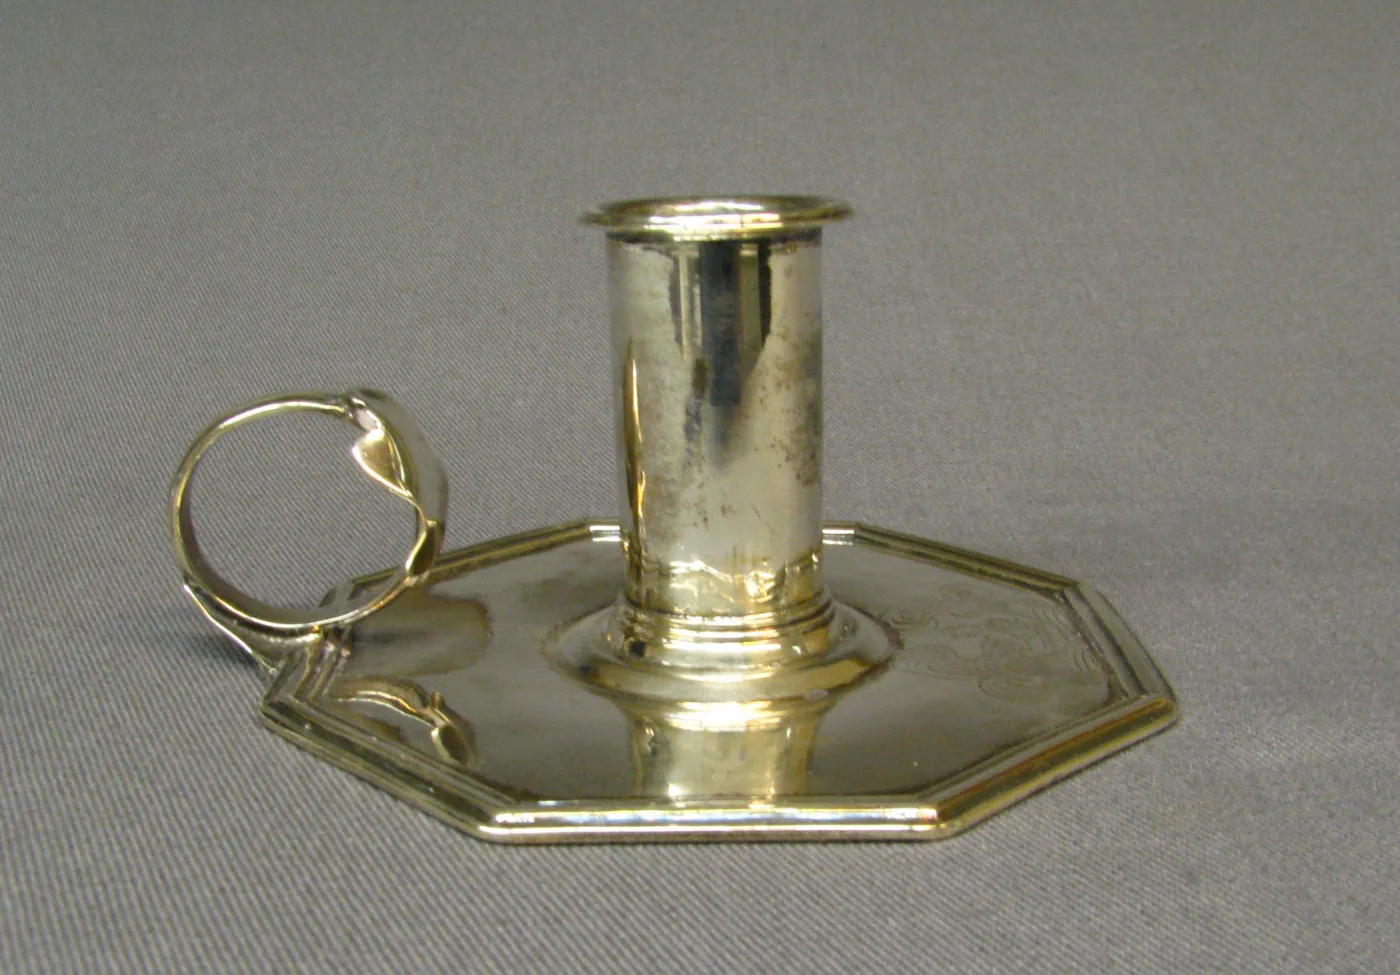
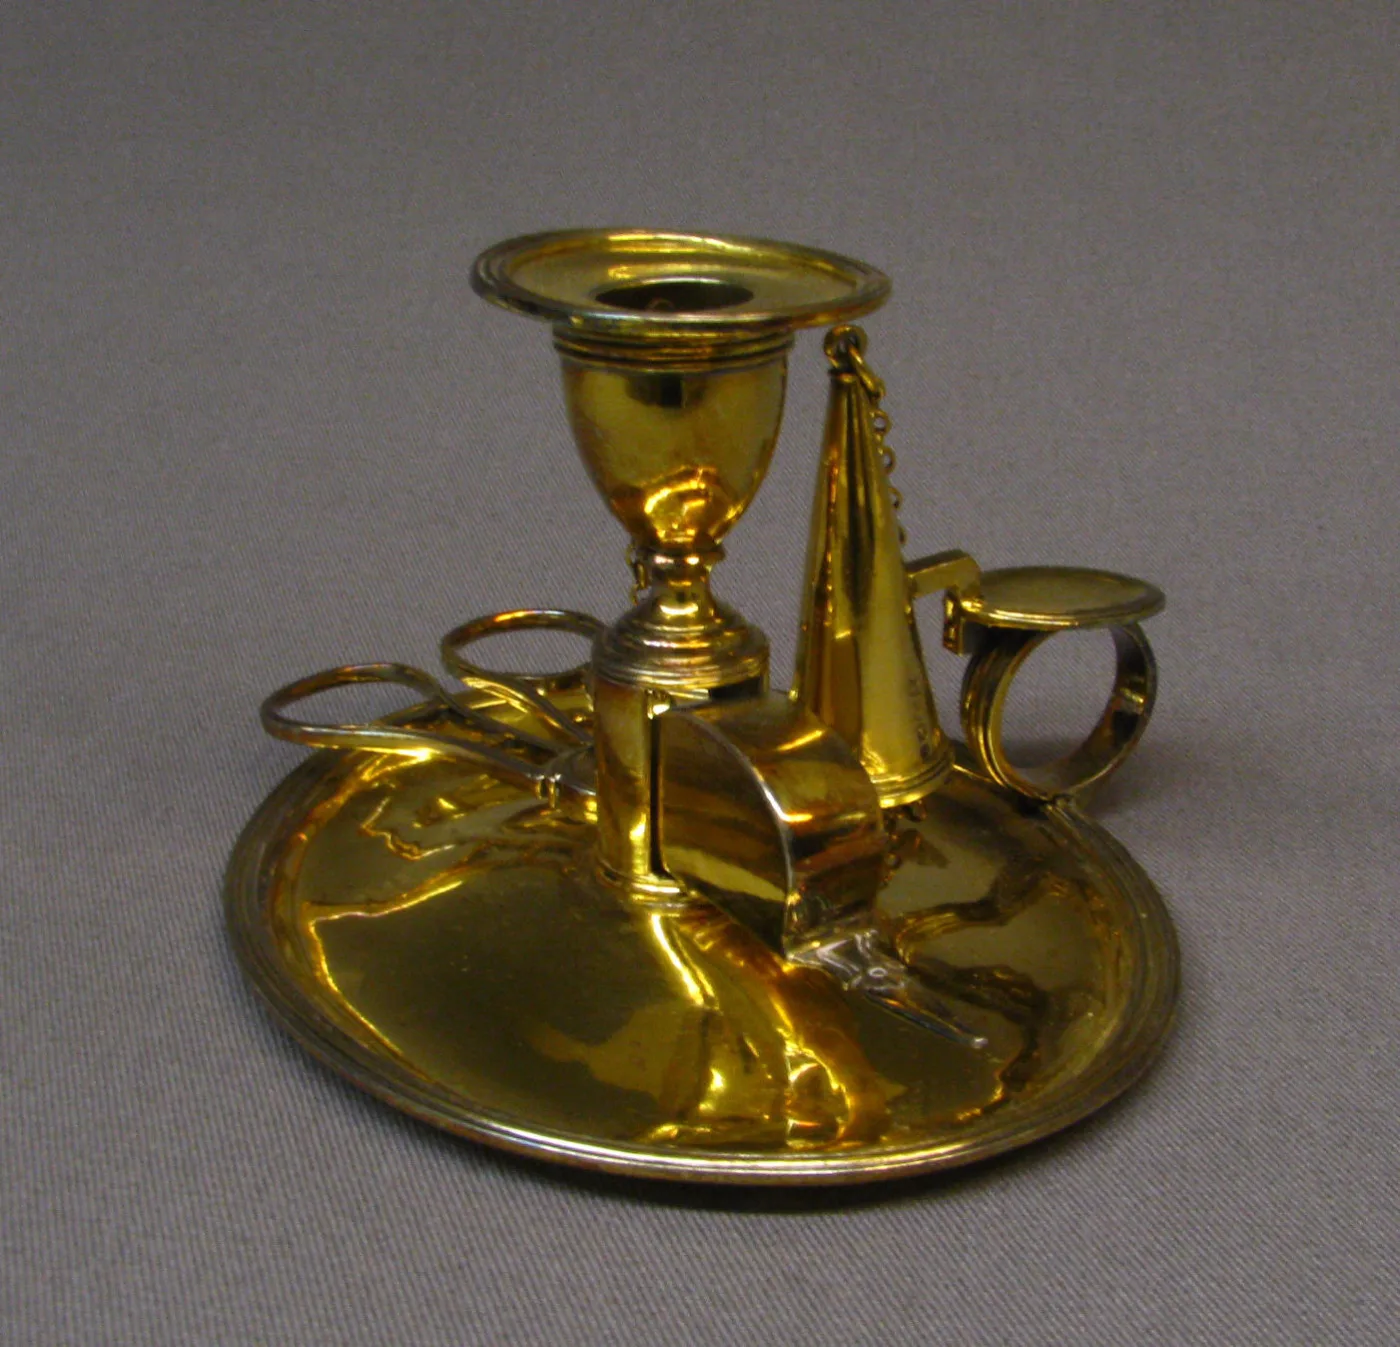
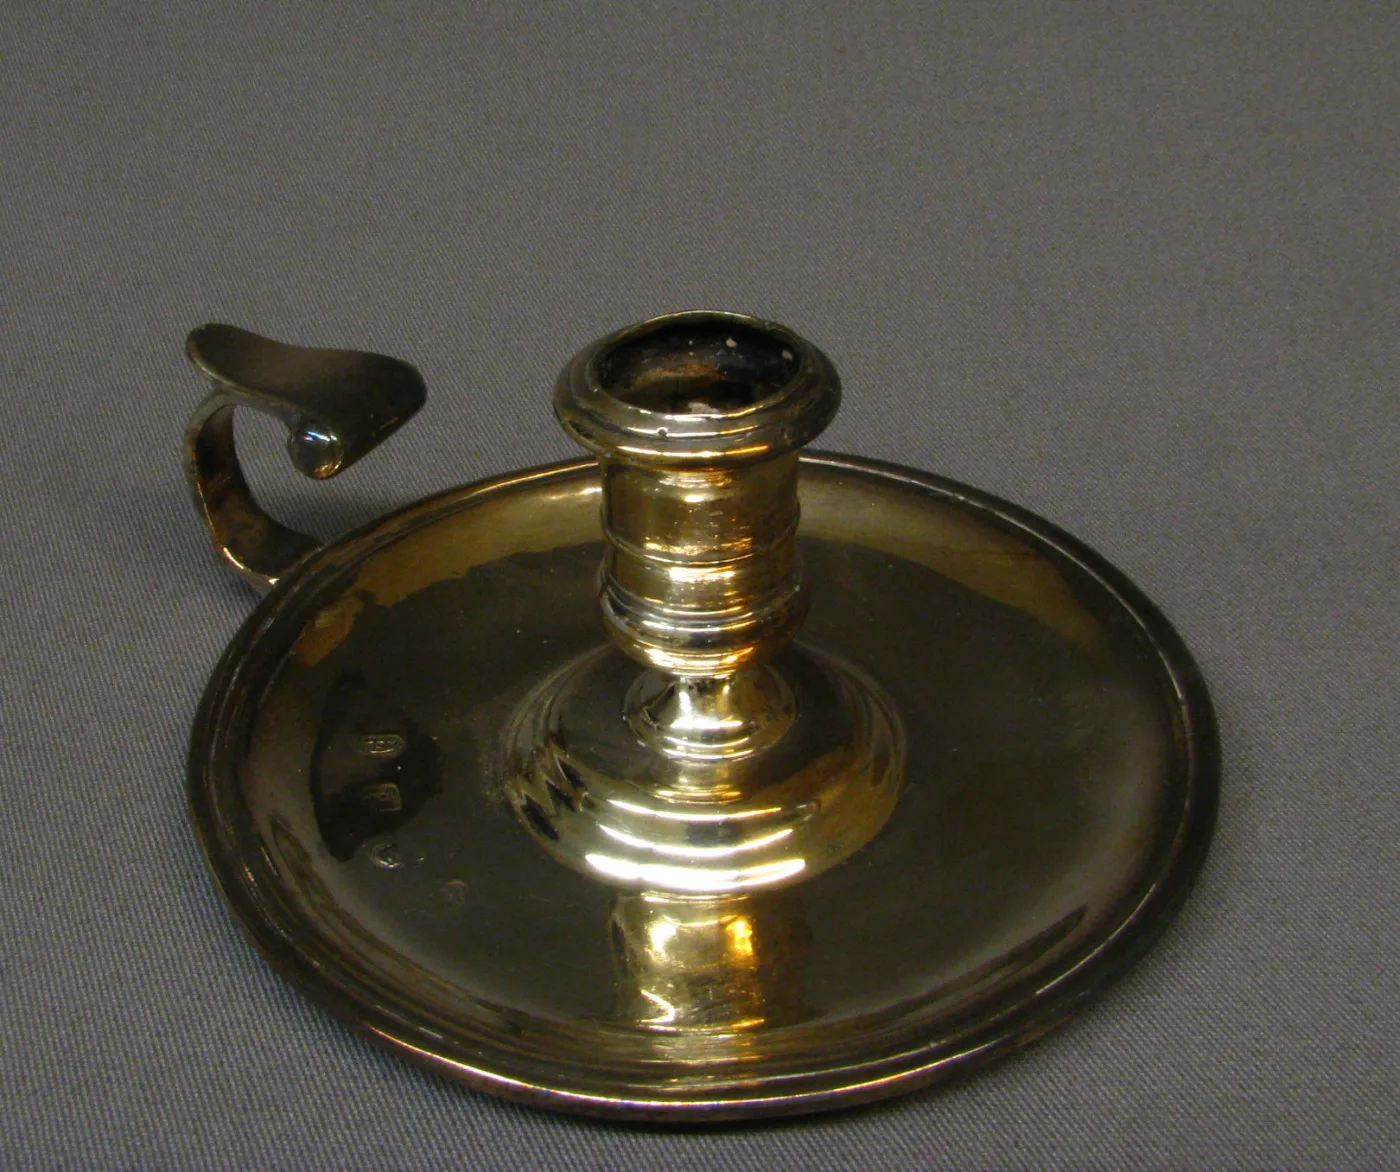
A hundred and thirty years between them, and the form barely moves: pan, socket, handle. What changes is the finish and the fittings. That matters when you are buying, because a chamber candlestick offered on its own is the normal case — the extinguisher and snuffers were loose objects that walked away — and a stick with its original accessories is worth materially more than the same stick alone. Check that the extinguisher actually fits its loop and that the snuffers carry the same marks before paying for a set.
2. Whale Oil Era (1780-1860)
Whale oil revolutionized lighting with brighter, cleaner light:
- Argand lamps: First practical oil lamps with tubular wicks
- Whale oil burners: Specialized burners for whale oil fuel
- Chimney development: Glass chimneys to protect flames
- Gallery forms: Metal rings to support chimneys
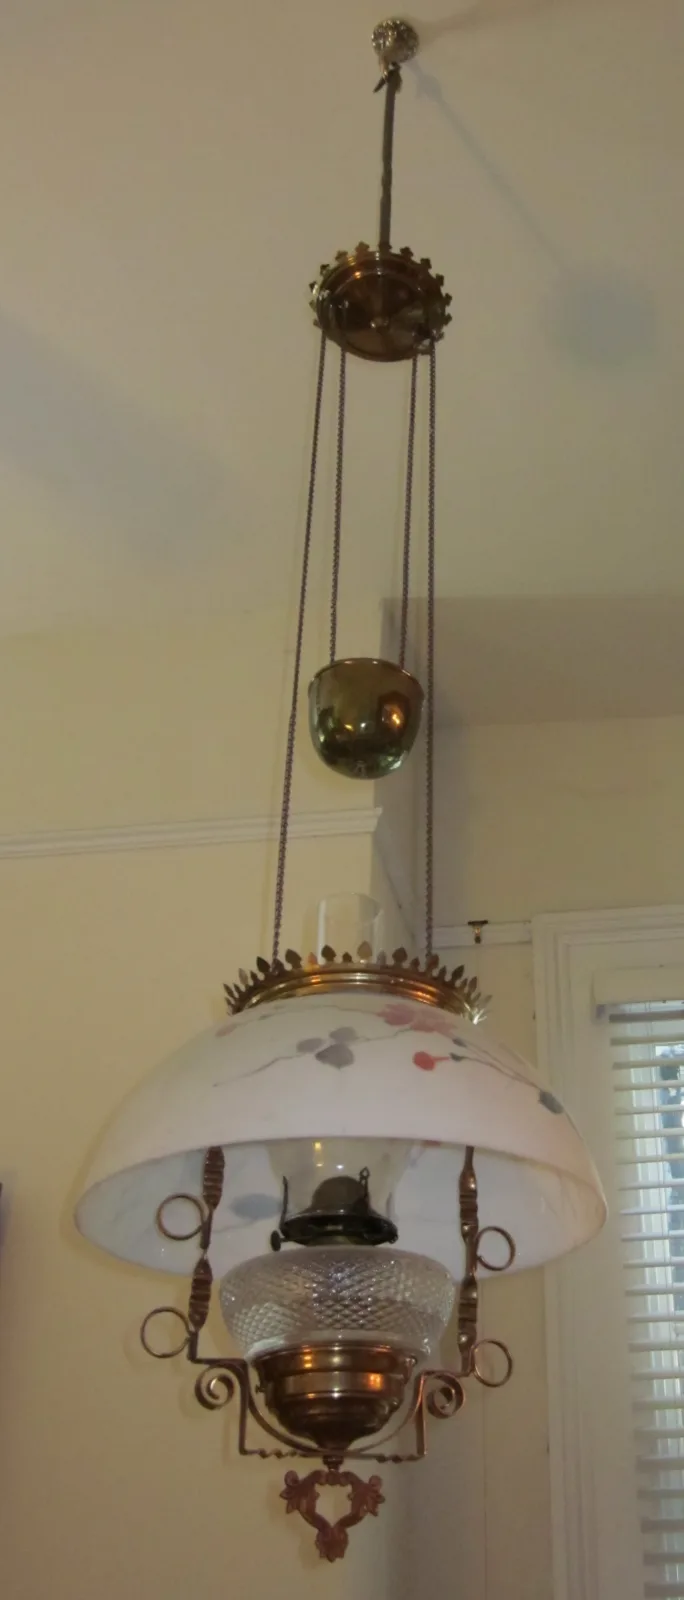
3. Kerosene Revolution (1850-1920)
Kerosene made lighting affordable and safe:
- Standardized burners: 1/2", 7/8", 1 1/2" thread sizes
- Flat wick burners: Most common household lighting
- Center draft burners: More efficient air mixing
- Duplex burners: Two wicks for brighter light
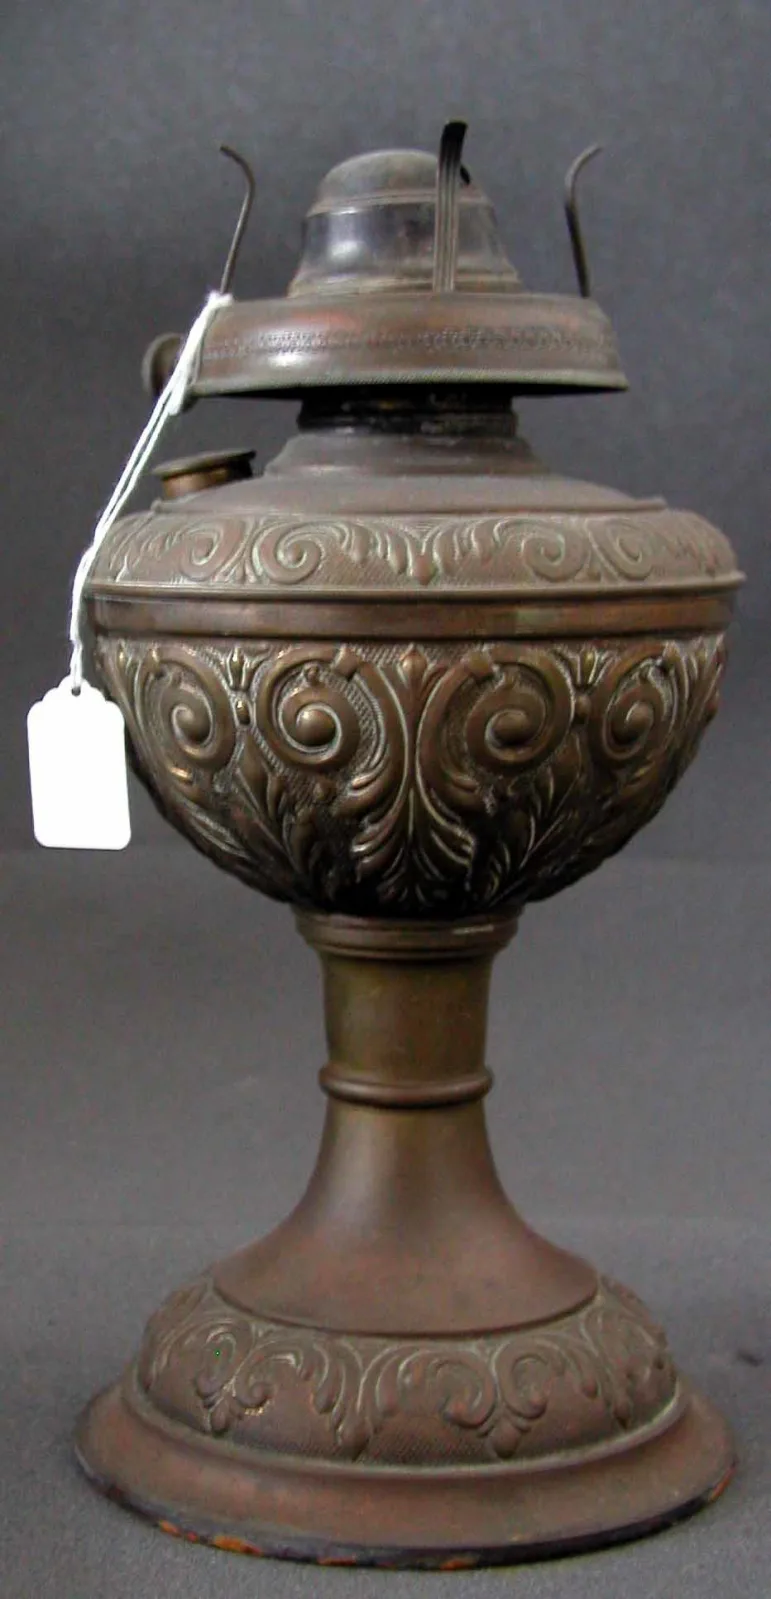
4. Gas Lighting Era (1800-1920)
Gas lighting brought illumination to cities and homes:
- Early gas fixtures: Simple burners with fishtail jets
- Victorian gas lighting: Ornate fixtures with multiple burners
- Gas keys and valves: Control mechanisms for gas flow
- Gas arms and pipes: Distribution systems for gas
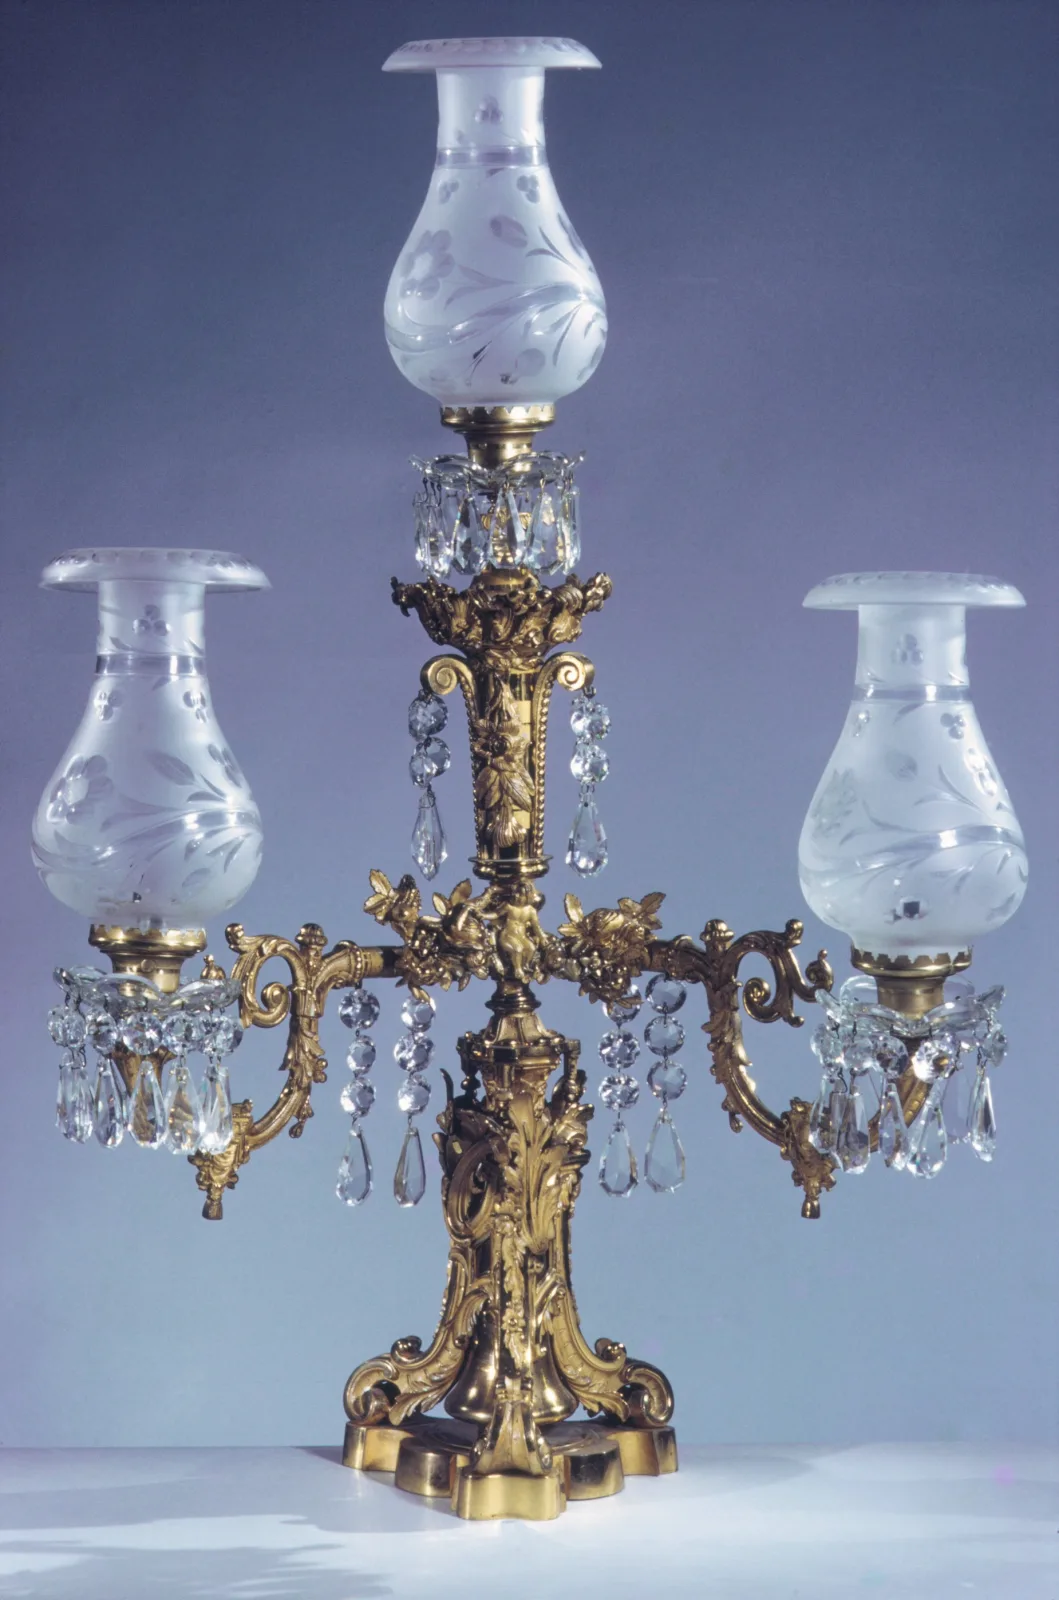
5. Early Electric Era (1880-1940)
Electricity transformed lighting completely:
- Early sockets: Porcelain or Bakelite with key switches
- Cloth-covered wiring: Early electrical insulation
- Transitional fixtures: Gas fixtures converted to electric
- Art Deco lighting: Modern designs for electric power
Lighting Identification Methods
1. Visual Examination
The first step in antique lighting identification is thorough visual examination:
- Construction techniques: Hand-filed edges, hand-forged components, period-appropriate screws
- Materials: Type of metal, glass quality, ceramic composition
- Wear patterns: Natural aging, consistent patina, appropriate wear locations
- Design elements: Period-appropriate styles, decorative motifs, proportions
2. Markings and Signatures
Many antique lighting pieces bear identifying marks:
- Maker's marks: Company names, logos, or symbols
- Patent numbers: Manufacturing dates and innovation claims
- Quality marks: Metal purity stamps, glass quality indicators
- Import/export marks: Country of origin, customs stamps
3. Style and Period Analysis
Understanding historical design periods is crucial for dating:
- Federal (1780-1830): Classical motifs, simple forms, brass construction
- Victorian (1837-1901): Ornate decoration, complex forms, multiple materials
- Art Nouveau (1890-1910): Curved lines, nature motifs, organic forms
- Art Deco (1920-1940): Geometric patterns, bold colors, modern materials
Anatomy and Hardware Analysis
1. Oil Lamp Components
Understanding oil lamp anatomy is essential for identification:
- Burners: Match thread sizes and gallery shapes to period types
- Chimneys: Look for bulge, straight, or flare profiles appropriate to era
- Fonts: Kerosene reservoirs in glass, brass, or ceramic
- Wicks: Flat wicks vs. tubular wicks, width measurements
- Galleries: Metal rings supporting chimneys, often with decorative elements
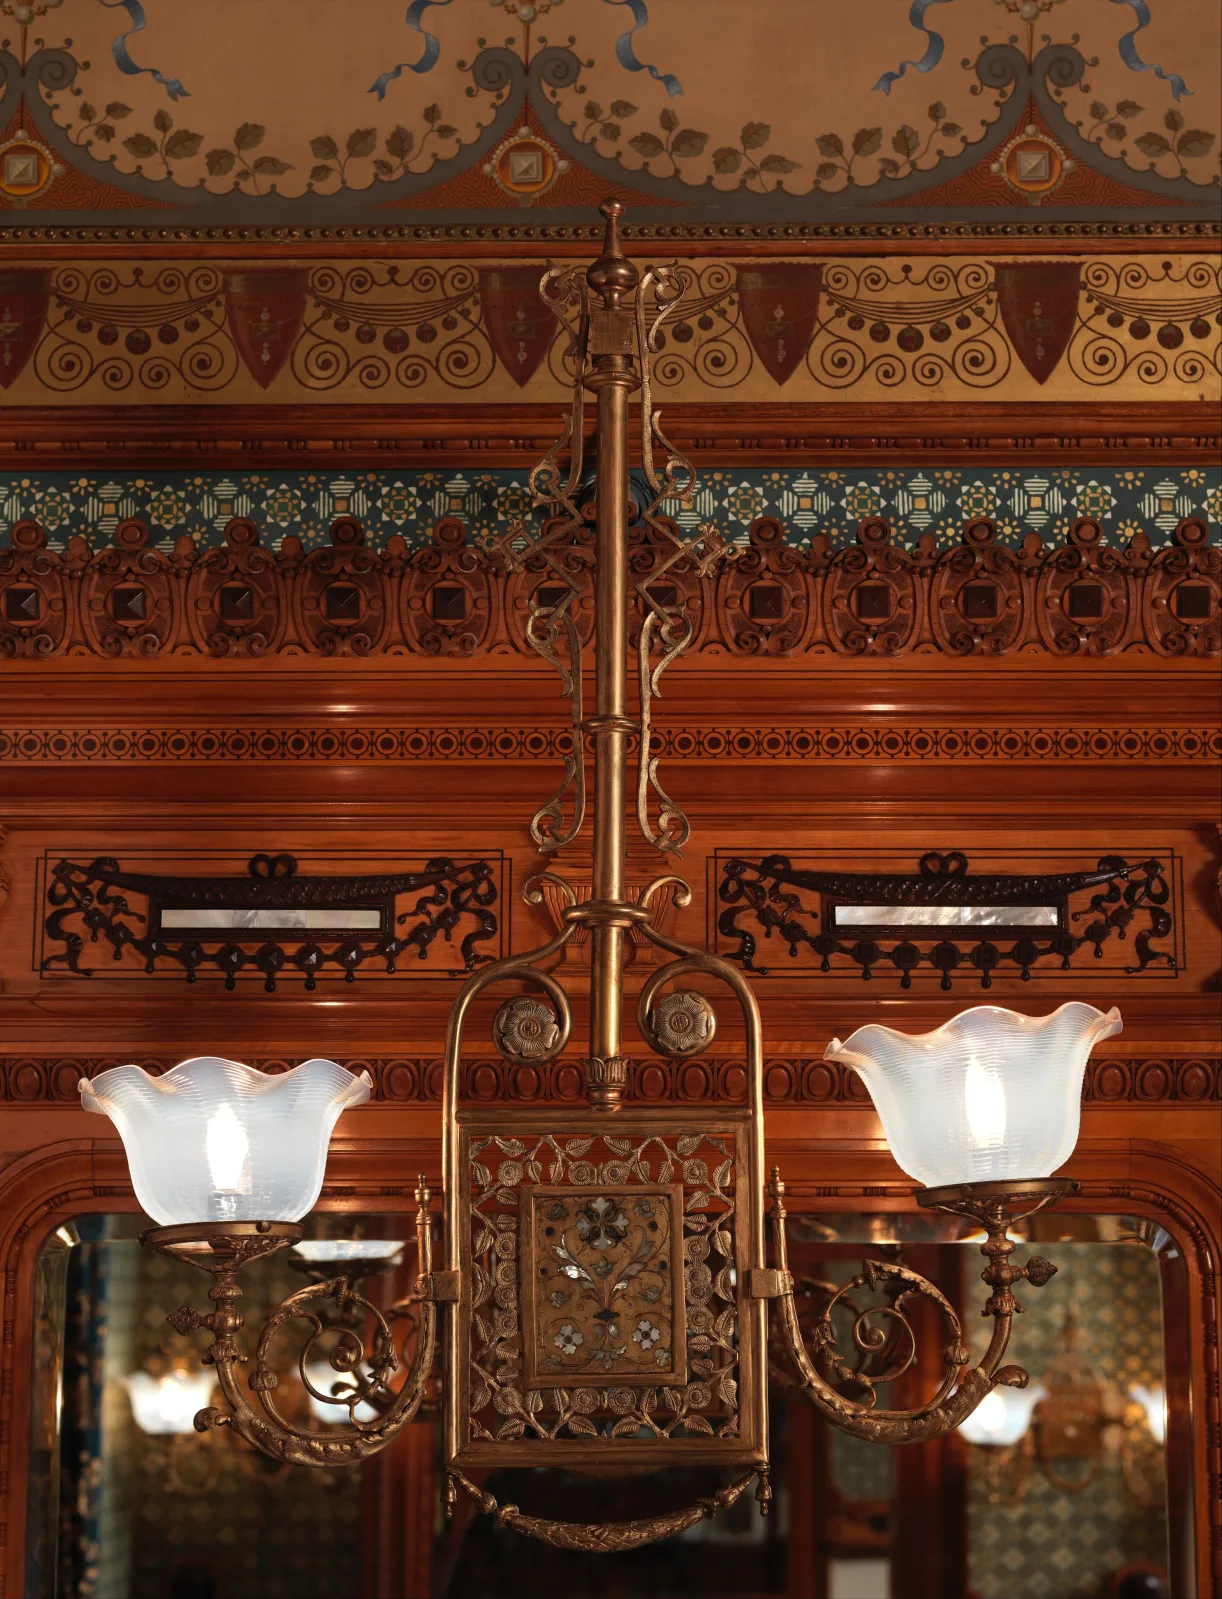
2. Gas Fixture Hardware
Gas lighting has distinctive components:
- Gas keys: Valve styles and operation mechanisms
- Jets: Tip types including pinhole, fishtail, and batwing
- Mixing chambers: Air-gas mixing for proper combustion
- Gas arms: Distribution pipes with original gas channels
- Burner heads: Various styles for different gas pressures
3. Electric Components
Early electric lighting has telltale features:
- Sockets: Porcelain or Bakelite with key switches
- Wiring: Cloth-covered conductors, early insulation
- Switches: Key-operated, pull-chain, or push-button
- Shade fitters: Standard sizes including 2 5/8", 4", and 10"
4. Thread Standards and Measurements
Standardized measurements help with identification:
- Burner threads: 1/2", 7/8", 1 1/2" for oil lamps
- Shade fitters: Measure inside diameter of shade rim
- Pipe threads: Gas pipe sizes and threading
- Socket threads: Standard Edison base sizes

Glass and Shades Identification
1. Manufacturing Techniques
Glass manufacturing methods provide dating clues:
- Blown glass: Look for pontil marks, tool marks, striations
- Molded glass: Identify mold seams, consistent patterns
- Hand finishing: Subtle asymmetry, seed bubbles, hand-ground edges
- Machine production: Perfect symmetry, uniform thickness, smooth surfaces
2. Glass Types and Qualities
Different glass types indicate different periods:
- Milk glass: Opaque white glass popular in Victorian era
- Cased glass: Multiple layers of colored glass
- Cut glass: Geometric patterns cut into crystal
- Pressed glass: Machine-pressed patterns and designs, including slag glass panels used in turn-of-the-century parlor lamps
- Art glass: Hand-crafted artistic pieces
3. Decoration and Finishing
Surface treatments provide period information:
- Painting: Hand-painted vs. decal decoration
- Etching: Acid-etched patterns and designs
- Gilding: Gold leaf or gold paint application
- Enameling: Fired enamel decoration
4. Matching Shades to Fixtures
Ensuring authenticity of shade-fixture combinations:
- Fitter compatibility: Proper size and style matching
- Period consistency: Design style appropriate to fixture era
- Wear patterns: Consistent aging between shade and base
- Material compatibility: Appropriate glass types for fixture style
Bases and Materials
1. Metal Construction
Metal bases provide important dating information:
- Brass: Most common for Victorian and earlier periods
- Bronze: Higher quality, often gilded or patinated
- Iron: Early period and industrial lighting
- Zinc: Later period, often plated
- Aluminum: Modern period, lightweight construction
2. Non-Metal Materials
Alternative materials indicate different periods and styles:
- Marble: Victorian period bases and columns
- Porcelain: Art Nouveau and Art Deco periods
- Wood: Early period and rustic styles
- Ceramic: Various periods, often hand-painted
3. Construction Details
Manufacturing techniques reveal age and quality:
- Hand filing: Irregular edges indicating hand work
- Screw types: Period-appropriate fasteners
- Joint methods: Soldering, riveting, or mechanical fastening
- Surface finishing: Hand-polished vs. machine-finished
Original vs. Converted Fixtures
1. Oil to Electric Conversion
Common conversion that requires careful examination:
- Plugged burner holes: Look for filled or capped openings
- Added sockets: Modern electrical components
- Wiring modifications: New electrical wiring paths
- Thread adapters: Convert burner threads to socket threads
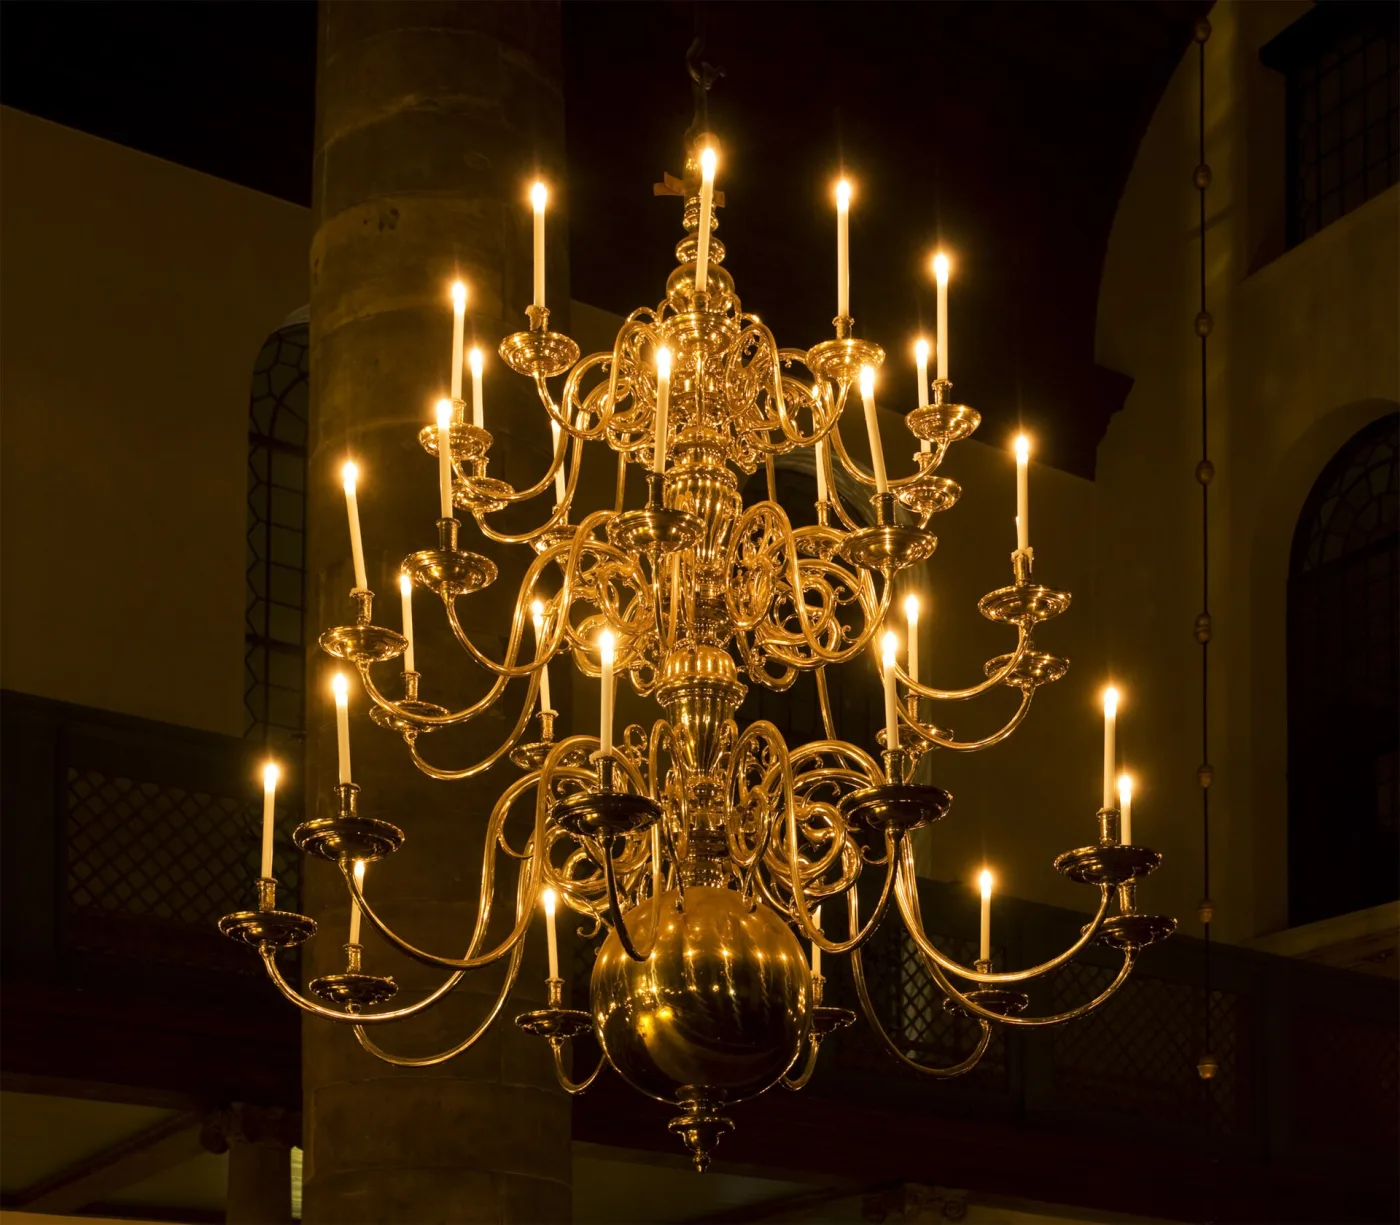
2. Gas to Electric Conversion
More complex conversion with multiple indicators:
- Plugged gas ports: Filled gas supply openings
- Wiring through gas tubes: Electrical wires in gas channels
- Modified burners: Gas burners replaced with sockets
- Extra holes: Additional openings for wiring
3. Detection Methods
Systematic approach to identifying conversions:
- Thread examination: Check for mismatched or forced fits
- Finish consistency: Look for different patina on new parts
- Component dating: Ensure all parts are period-appropriate
- Documentation research: Check for conversion records
Authentication Techniques
1. Provenance Research
Documented history provides authentication support:
- Family records: Photographs and documentation
- Sales receipts: Purchase and sale records
- Insurance appraisals: Professional assessments
- Historical documentation: Period catalogs and advertisements
2. Scientific Analysis
Modern technology provides authentication methods:
- Metal analysis: X-ray fluorescence for composition
- Glass dating: Chemical composition analysis
- Paint analysis: Pigment identification and dating
- Ultraviolet examination: Detecting repairs and alterations
3. Expert Consultation
Professional expertise provides valuable insights:
- Appraiser evaluation: Condition and value assessment
- Conservator examination: Technical analysis and recommendations
- Museum curator review: Historical context and significance
- Collector community input: Shared knowledge and experience
Care, Safety, and Use
1. Safety Considerations
Antique lighting requires careful safety measures:
- Electrical safety: Professional inspection of converted fixtures
- Fuel safety: Proper handling of oil and gas components
- Heat management: Protecting shades and finishes from heat
- Stability: Ensuring fixtures are properly secured
2. Cleaning and Maintenance
Proper care preserves value and appearance:
- Metal cleaning: Gentle methods for brass and bronze
- Glass care: Safe cleaning for delicate shades
- Finish preservation: Maintaining original patina
- Component maintenance: Regular inspection and adjustment
3. Display and Storage
Proper environment extends fixture life:
- Climate control: Stable temperature and humidity
- Light protection: Avoiding direct sunlight exposure
- Dust management: Regular cleaning and covering
- Handling procedures: Careful movement and installation
Value Assessment and Market Trends
1. Factors Affecting Value
Multiple factors influence antique lighting value:
- Originality: Unconverted, complete fixtures
- Condition: Original finish, minimal damage
- Rarity: Limited production, unique features
- Provenance: Famous ownership, historical significance
- Quality: Craftsmanship, materials, design excellence
2. Market Trends
Understanding current market conditions:
- Collector demographics: Age, interests, purchasing power
- Design trends: Current popularity of specific styles
- Economic factors: Interest rates, inflation, disposable income
- Cultural shifts: Historical interest and appreciation
3. Valuation Methods
Professional approaches to value assessment:
- Comparable sales: Recent auction results and dealer prices
- Replacement cost: Cost to recreate or replace
- Income potential: Exhibition, rental, or investment value
- Expert appraisal: Professional assessment and certification
Digital Tools for Lighting Identification
1. AI-Powered Apps
Modern technology revolutionizes lighting identification:
- Antique Identifier App: Instant AI-powered identification from photos
- Component matching: Compare burners, shades, and bases
- Style recognition: Identify design periods and influences
- Condition assessment: AI analysis of wear and damage
2. Online Databases
Digital resources for research and comparison:
- Museum collections: High-resolution images and detailed descriptions
- Auction archives: Historical sales data and pricing
- Collector forums: Community knowledge and experience sharing
- Expert blogs: Specialized knowledge and current trends
3. Virtual Reality and 3D Scanning
Emerging technologies in lighting identification:
- 3D modeling: Detailed examination of complex fixtures
- Virtual restoration: See fixtures in their original condition
- Comparative analysis: Side-by-side fixture comparison
- Digital catalogs: Comprehensive reference collections
Expert Tips and Best Practices
1. Building Your Knowledge Base
- Study period-specific lighting catalogs and advertisements
- Visit museums with lighting collections
- Attend antique lighting shows and auctions
- Join lighting collector organizations and forums
- Take courses in lighting history and technology
2. Developing Your Eye
- Examine as many authentic pieces as possible
- Learn to recognize quality materials and craftsmanship
- Understand the difference between age and wear
- Study the evolution of lighting technology
3. Avoiding Common Mistakes
- Don't rely solely on online research
- Beware of "too good to be true" deals
- Always verify provenance claims
- Get professional appraisals for valuable items
- Understand that condition significantly affects value
4. Using Technology Wisely
- Use AI apps like Antique Identifier as a starting point
- Verify AI identifications with traditional methods
- Combine digital tools with expert consultation
- Keep up with new identification technologies
5. Lighting-Specific Considerations
- Learn to identify thread standards and measurements
- Understand the differences between fuel types
- Recognize conversion indicators and their implications
- Appreciate the importance of original components
- Consider safety implications of antique lighting use
Conclusion
Antique lighting identification is a specialized skill that combines historical knowledge, technical understanding, and careful observation. From the simple beauty of an oil lamp's flame to the complex elegance of a gas chandelier, antique lighting represents human ingenuity and artistic expression. While modern tools like the Antique Identifier app can provide instant insights, they work best when combined with traditional knowledge and expert consultation.
Remember that every antique lighting fixture tells a story of technological progress and domestic comfort. The more you learn about identification techniques, the better you'll become at uncovering those stories and preserving these important pieces of our lighting heritage.
Whether you're examining thread sizes on an oil lamp burner or analyzing the conversion history of a gas fixture, patience, research, and a willingness to learn are your best tools. Start with the basics, build your knowledge gradually, and don't hesitate to seek expert advice when needed.