Antique Buttons Identification Guide: Materials, Styles & Dating Techniques
Antique buttons represent one of the most fascinating and collectible categories in the world of antiques. From delicate hand-painted porcelain buttons to intricately carved ivory examples, buttons offer a unique window into fashion history, craftsmanship, and cultural evolution. This comprehensive guide will teach you everything you need to know about identifying antique buttons, from recognizing materials and manufacturing techniques to understanding historical periods and determining value.
Table of Contents
Button Materials and Composition
Understanding button materials is fundamental to accurate identification. Different materials were popular during different periods and can provide crucial dating clues.
Natural Materials
Early buttons were made from natural materials readily available:
- Bone: Common in 18th and 19th centuries, often dyed or painted
- Horn: Made from animal horn, popular in Victorian era, often carved
- Ivory: Premium material, carved with intricate designs, pre-1940s
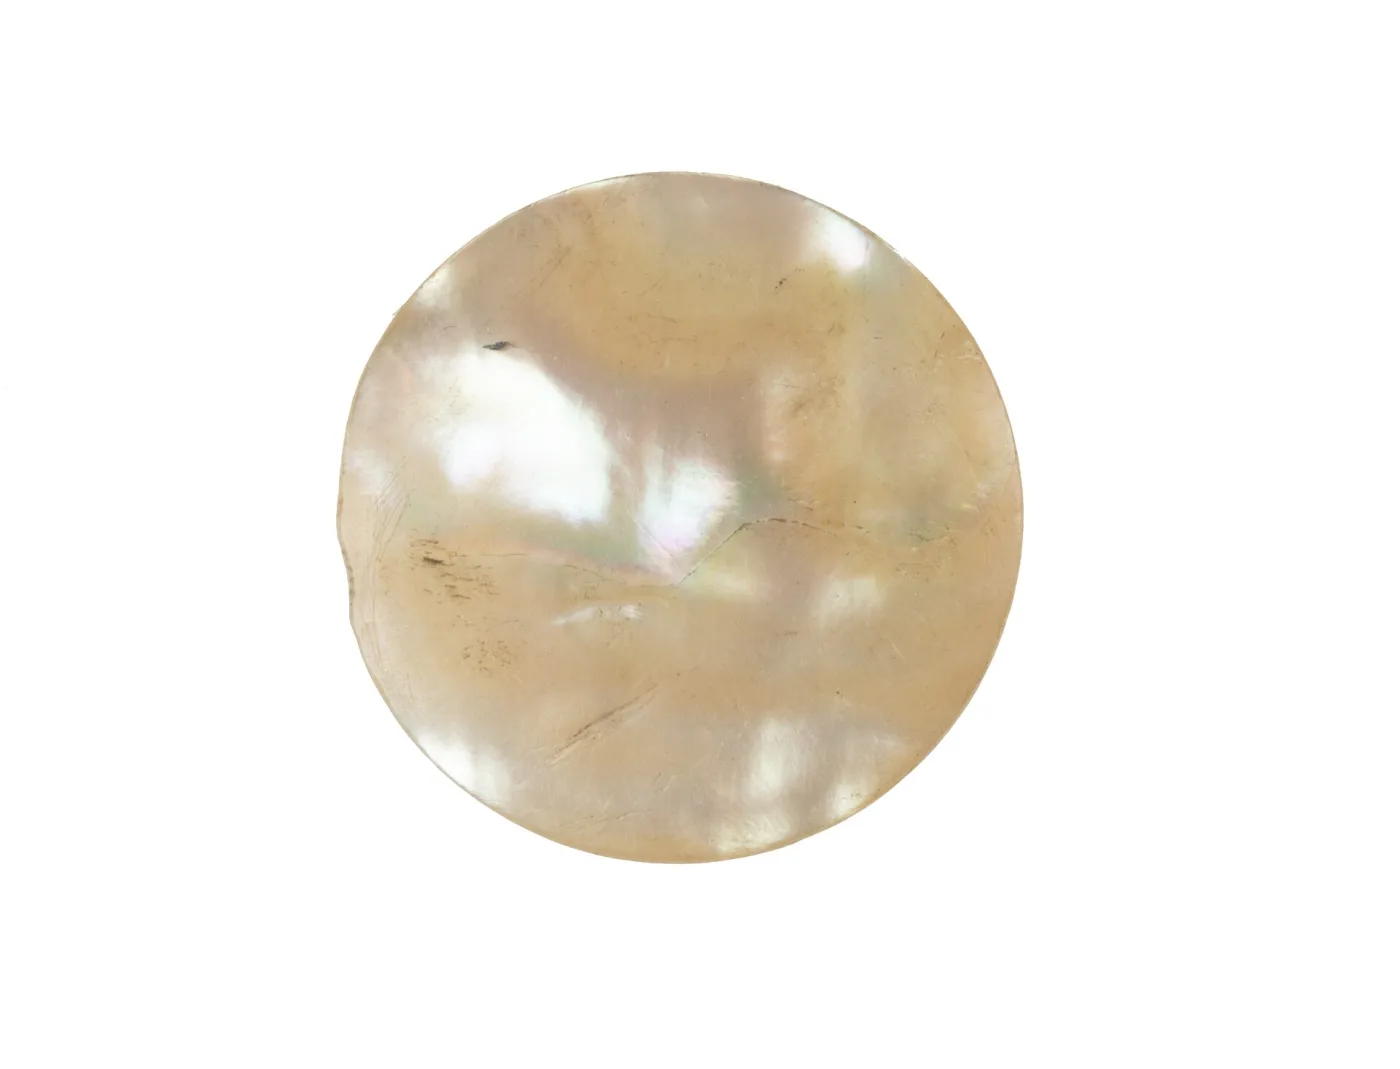
- Mother-of-Pearl: Iridescent shell material, popular 1800-1920
- Wood: Simple carved or turned buttons, various periods
- Leather: Molded or carved leather buttons, often military
- Shell: Various shell types, including abalone and tortoiseshell
Metal Buttons
Metal buttons have been used throughout history:
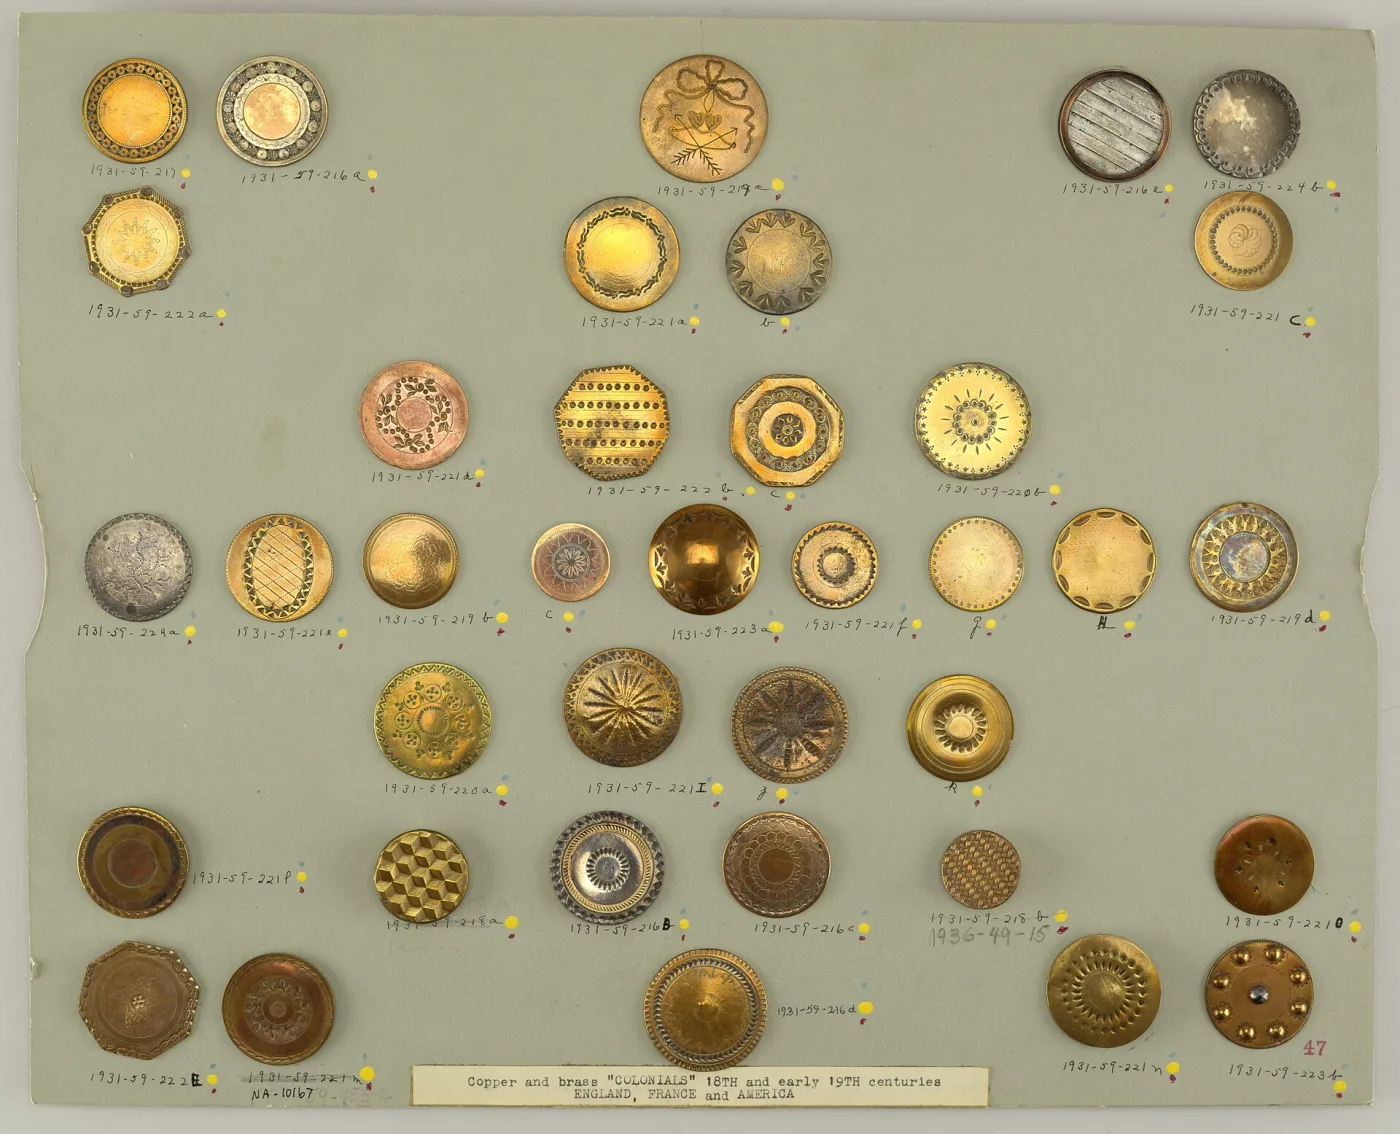
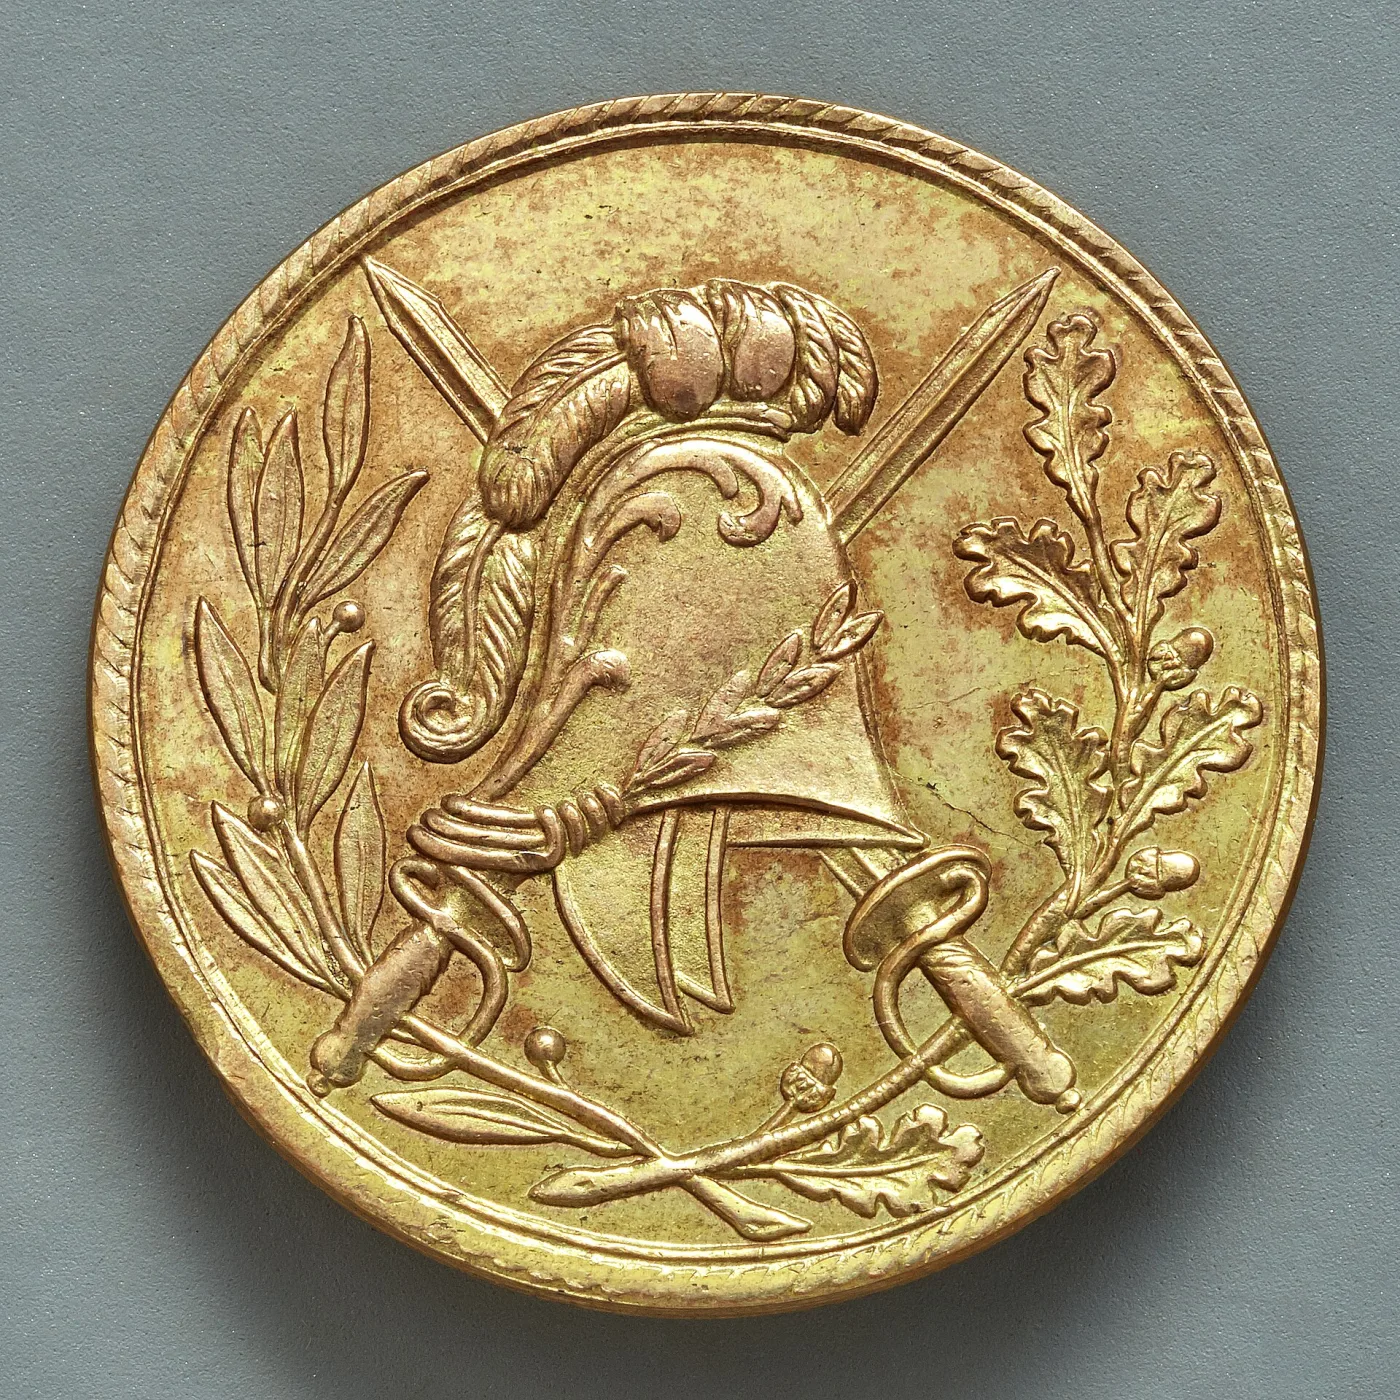
- Brass: Common military buttons, often with designs or coats of arms
- Copper: Early buttons, often tarnished with green patina
- Silver: Sterling silver buttons, often hallmarked
- Gold: Gold-plated or solid gold buttons, luxury items
- Pewter: Soft metal, often with decorative designs
- Steel: Industrial buttons, often with enamel or paint
- Tin: Early American buttons, often painted or decorated
Ceramic and Glass Buttons
Ceramic and glass buttons offer beautiful decorative possibilities:
- Porcelain: Hand-painted or transfer-printed, 18th-19th centuries
- China: Glazed ceramic buttons, often with floral designs
- Glass: Molded or pressed glass, often with embedded designs
- Enamel: Colored glass fused to metal, Art Nouveau and Art Deco
- Bisque: Unglazed porcelain, often hand-painted
Early Synthetic Materials
The Industrial Revolution introduced new button materials:
- Gutta-Percha: Early plastic from tree sap, 1840s-1900
- Celluloid: First synthetic plastic, 1870s-1940s, flammable
- Bakelite: Early thermosetting plastic, 1920s-1940s
- Casein: Milk protein plastic, 1920s-1940s
- Galalith: Milk-based plastic, early 20th century
Fabric and Composite Buttons
Fabric-covered and composite buttons:
- Fabric-Covered: Buttons wrapped in silk, velvet, or other fabrics
- Thread-Wrapped: Buttons wrapped with thread or yarn
- Composite: Multiple materials combined, often with decorative tops
- Cardboard: Early composite buttons with fabric or paper covering
Manufacturing Techniques and Methods
Understanding how buttons were made provides crucial dating clues and authenticity indicators.
Hand-Crafted Methods
Early buttons were individually crafted:
- Hand-Carving: Individual buttons carved from bone, ivory, or wood
- Hand-Turning: Buttons turned on lathes, creating circular shapes
- Hand-Painting: Individual decoration on porcelain or glass buttons
- Hand-Engraving: Designs cut into metal or other materials
- Hand-Molding: Buttons formed by hand in molds
Industrial Manufacturing
The Industrial Revolution transformed button production:
- Die-Cutting: Metal dies cut uniform shapes from materials
- Machine-Turning: Automated lathes for consistent production
- Mold-Pressing: Materials pressed into molds under pressure
- Transfer-Printing: Designs transferred to ceramic buttons
- Machine-Stamping: Designs stamped into metal buttons
Shank Attachment Methods
The way shanks are attached indicates manufacturing period:
- Hand-Sewn Shanks: Wire or thread shanks attached by hand
- Soldered Shanks: Metal shanks soldered to metal buttons
- Molded Shanks: Shanks formed as part of the button
- Riveted Shanks: Shanks attached with rivets
- Threaded Shanks: Screw-in shanks for removable buttons
Historical Periods and Button Styles
Button styles evolved dramatically throughout history, reflecting fashion trends and technological advances.
18th Century Buttons (1700-1799)
Early buttons were primarily functional but increasingly decorative:
- Materials: Silver, brass, bone, wood, fabric-covered
- Styles: Simple domed shapes, engraved designs
- Military: Uniform buttons with coats of arms
- Characteristics: Hand-crafted, individual variation, simple shanks
- Notable: Silver buttons often hallmarked, brass buttons with military designs
Early 19th Century (1800-1840)
Buttons became more decorative and varied:
- Materials: Porcelain, glass, mother-of-pearl, brass
- Styles: Hand-painted porcelain, molded glass, carved mother-of-pearl
- Characteristics: Increasing variety, better quality materials
- Notable: Porcelain buttons with hand-painted scenes, glass buttons with embedded designs
Victorian Period (1840-1901)
The Victorian era saw an explosion of button variety:
- Materials: Gutta-percha, horn, ivory, jet, mother-of-pearl, celluloid
- Styles: Highly decorative, mourning buttons (jet), carved designs
- Characteristics: Ornate decoration, sentimental motifs, black mourning buttons
- Notable: Jet buttons for mourning wear, carved horn buttons, early celluloid
Art Nouveau Period (1890-1910)
Art Nouveau brought flowing, organic designs:
- Materials: Enamel, glass, metal, horn
- Styles: Curved lines, nature motifs, asymmetrical designs
- Characteristics: Artistic designs, nature-inspired, flowing forms
- Notable: Enamel buttons with floral designs, glass buttons with organic shapes
Art Deco Period (1920-1940)
Art Deco introduced geometric, modern designs:
- Materials: Bakelite, celluloid, enamel, chrome, glass
- Styles: Geometric patterns, bold colors, streamlined forms
- Characteristics: Modern aesthetic, machine-age influence, bold designs
- Notable: Bakelite buttons in geometric shapes, chrome and enamel combinations
Mid-20th Century (1940-1970)
Post-war buttons reflected new materials and styles:
- Materials: Plastic, Lucite, metal, fabric-covered
- Styles: Novelty designs, colorful plastics, modern shapes
- Characteristics: Mass production, variety of colors, novelty themes
- Notable: Lucite buttons, novelty plastic buttons, fabric-covered buttons

Back Examination and Shank Analysis
The back of a button often provides the most important identification clues.
Shank Types and Evolution
Shank styles evolved over time:
- Wire Shanks: Hand-formed wire loops, early periods
- Thread Shanks: Fabric or thread loops, early fabric buttons
- Soldered Shanks: Metal shanks soldered to metal buttons
- Molded Shanks: Shanks formed as part of plastic or composite buttons
- Self-Shank: Button designed with integrated shank
- No Shank: Sew-through buttons with holes instead of shanks
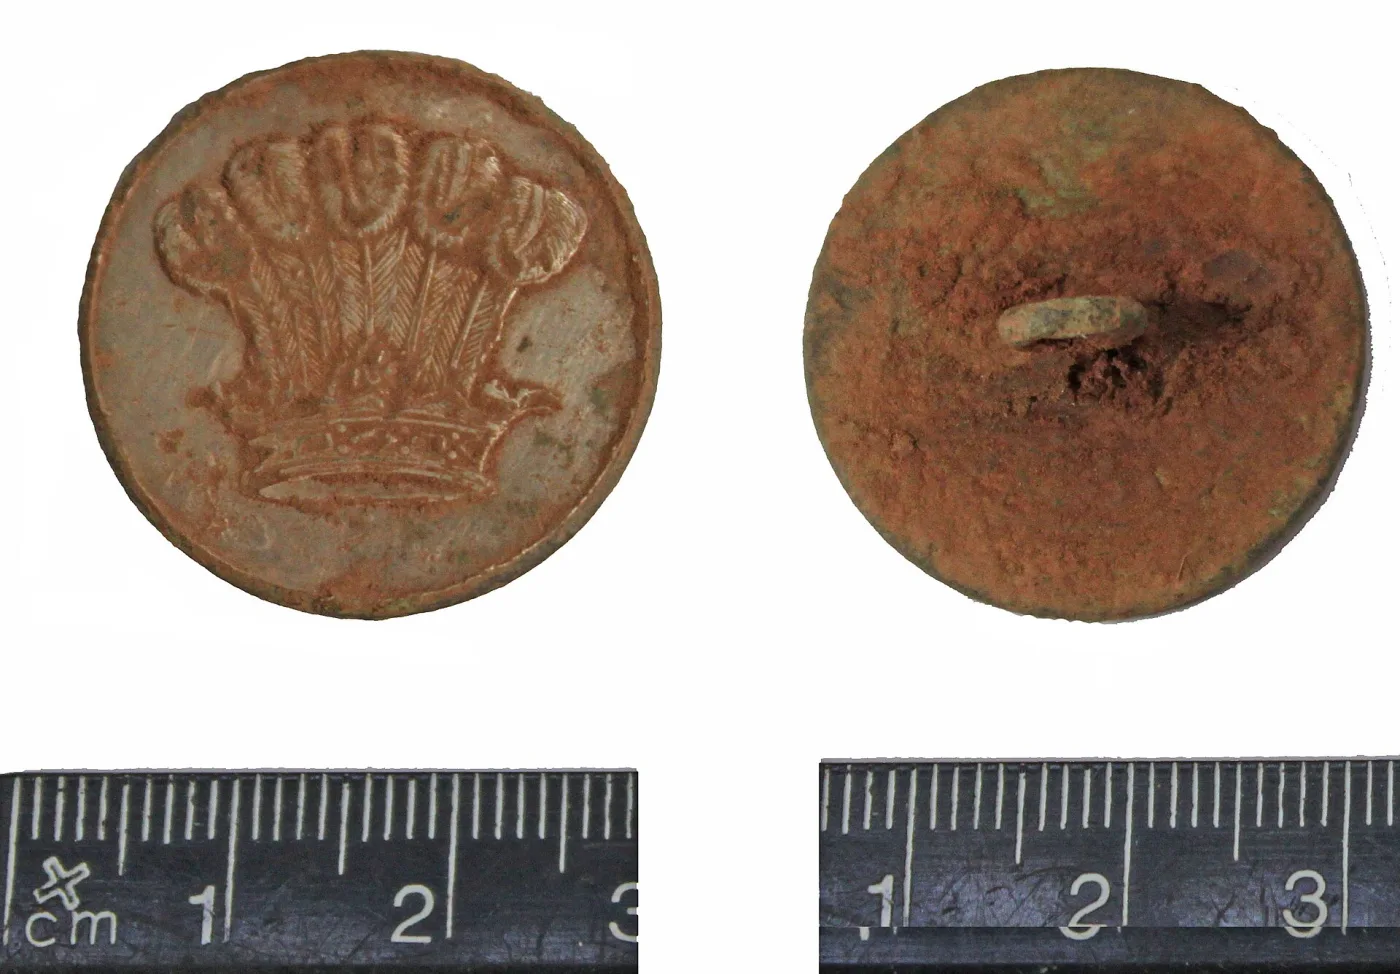
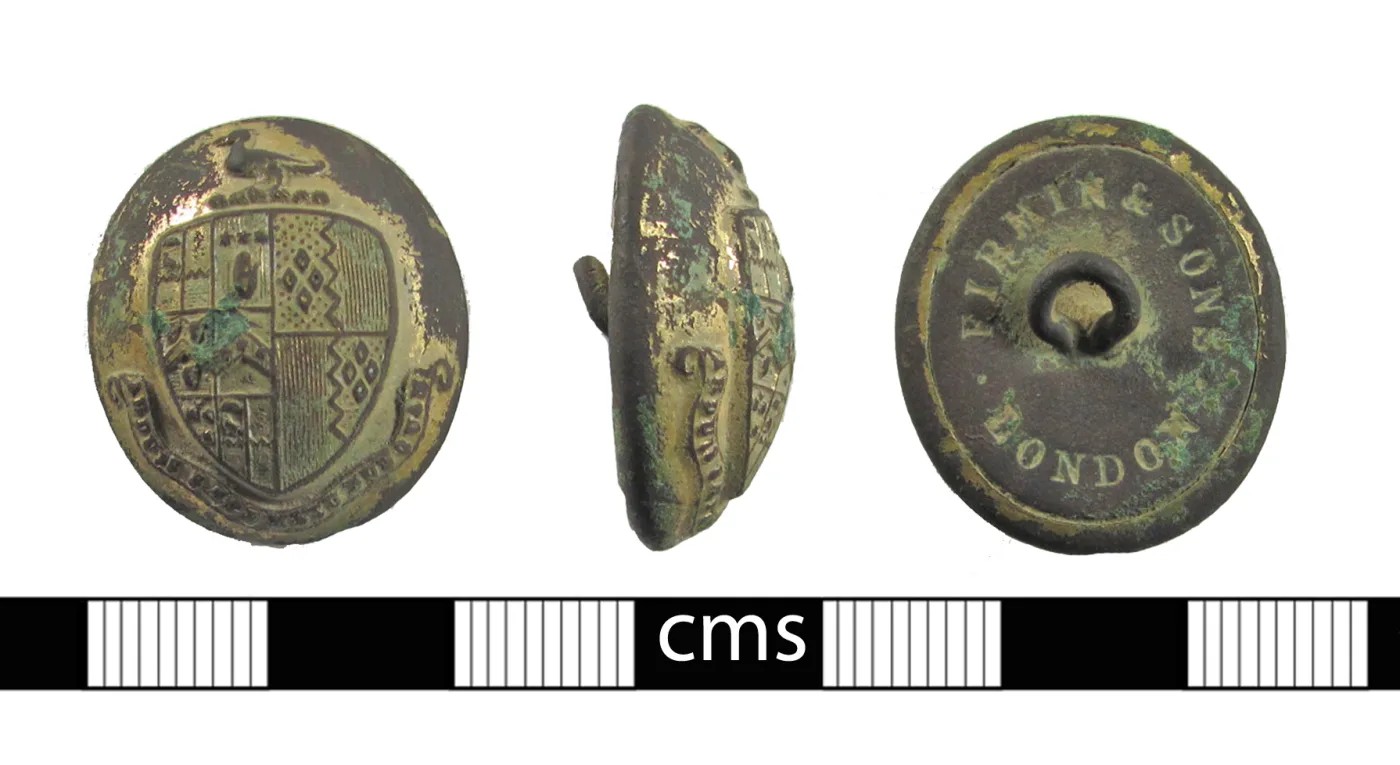
Both are Firmin and Sons of London, and in both cases the back dates the button far more tightly than the front does. The recorded find on the left is placed to 1876–1894 because “153” is a street number: Firmin traded at 153 The Strand for those eighteen years, and the address travelled on the backstamp. The one on the right is placed to roughly 1850–1900 on the arrangement of the name alone. That is the working rule for British livery and uniform buttons. The crest identifies a family or a regiment that may have used the same device for a century and tells you little about age; the maker’s name, address and the way the lettering is laid out changed on a schedule that has been written down. Read the back first. Note also that both shanks are applied loops fixed into the crown of a domed one-piece back — the construction you should expect on work of this period, and a moulded shank formed in one piece with the body is a signal to look again.
Back Markings and Stamps
Many buttons bear marks on the back:
- Manufacturer Marks: Company names or logos
- Patent Numbers: Design or manufacturing patents
- Country of Origin: "Made in" stamps
- Material Marks: Composition indicators
- Date Codes: Manufacturing dates or periods
Back Surface Characteristics
The back surface reveals manufacturing methods:
- Hand-Finished: Irregular surfaces, tool marks
- Machine-Finished: Smooth, uniform surfaces
- Mold Marks: Seam lines from two-part molds
- Grinding Marks: Evidence of finishing processes
- Oxidation: Patina on metal buttons
Decorative Techniques and Embellishments
Understanding decorative techniques helps identify period and value.
Painting and Printing
- Hand-Painting: Individual brushwork on porcelain or glass
- Transfer-Printing: Designs transferred from paper to ceramic
- Enamel Painting: Colored glass fused to metal surfaces
- Lacquer: Painted designs on various materials
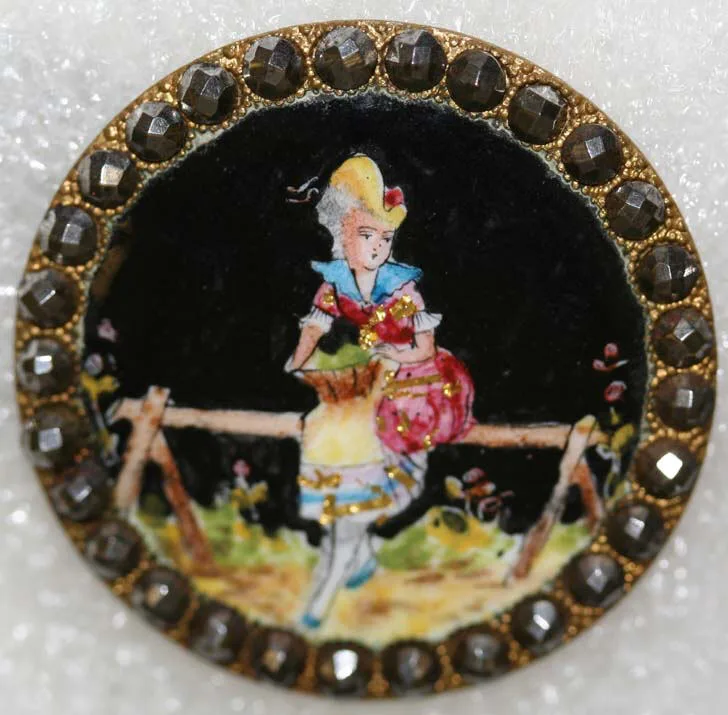
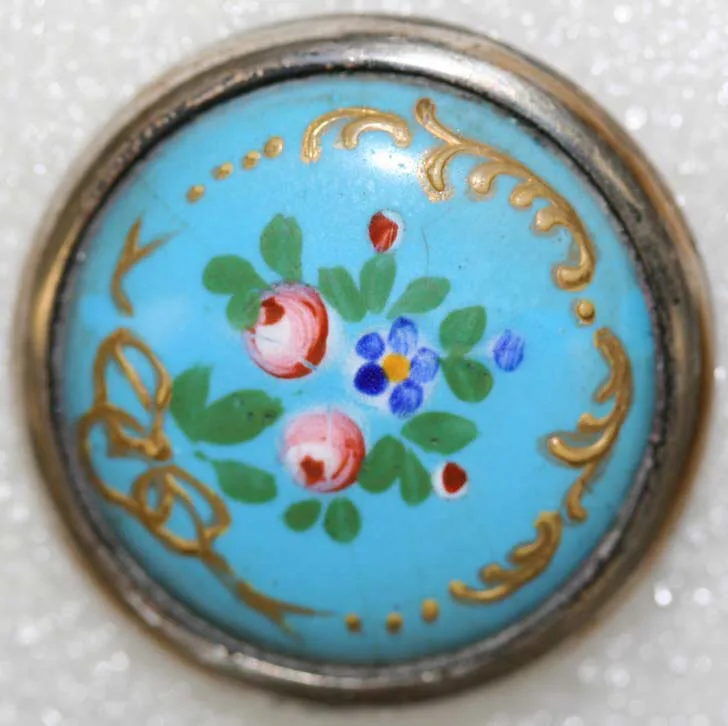
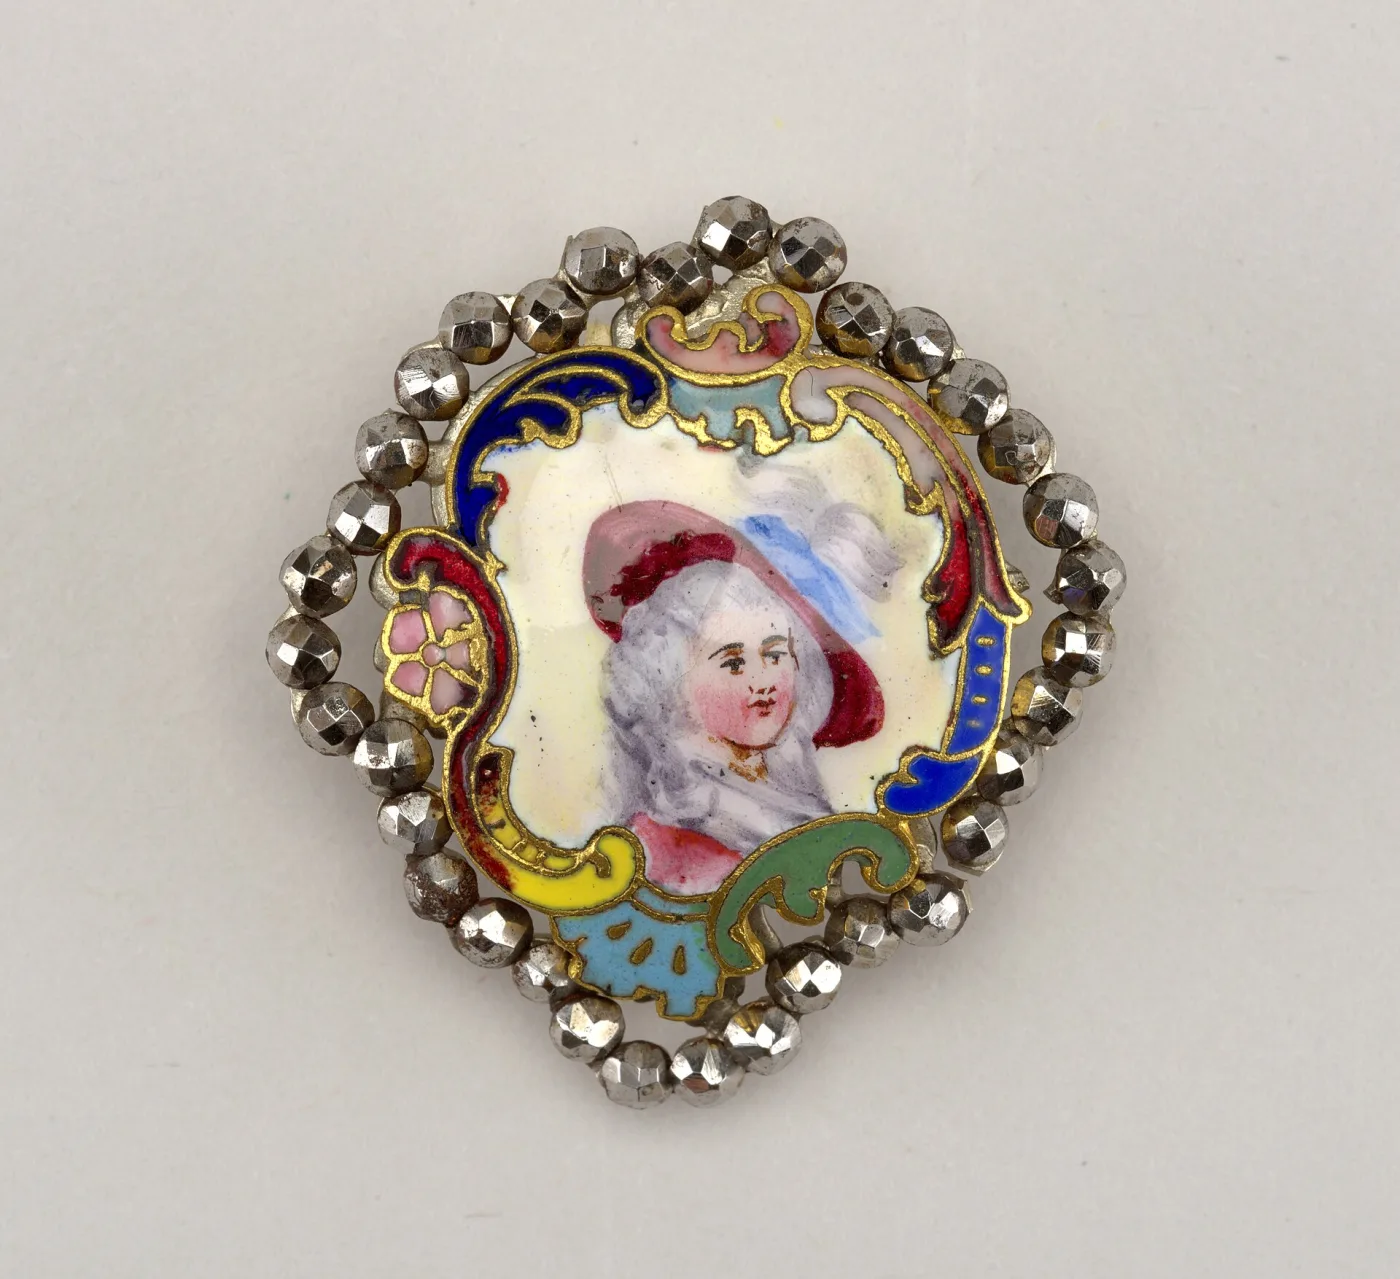
These read as the same technique and are not, and the difference shows at the surface rather than in the picture. On the painted button the pigment sits on its ground, so the brushwork carries a slight relief that catches raking light, and it fails by wearing through — check the highest points of the figure, the shoulder and the hat brim, before anything else. On the enamelled one the colour is glass, fused and fired to the metal, so it is flush and level with the rim and it fails by chipping and crazing instead. The distinction is worth holding onto commercially, because a repainted button is difficult to detect and a re-enamelled one is close to impossible, which is why examples like these are judged on the integrity of the border, the setting and the mount at least as much as on the image itself.
Carving and Engraving
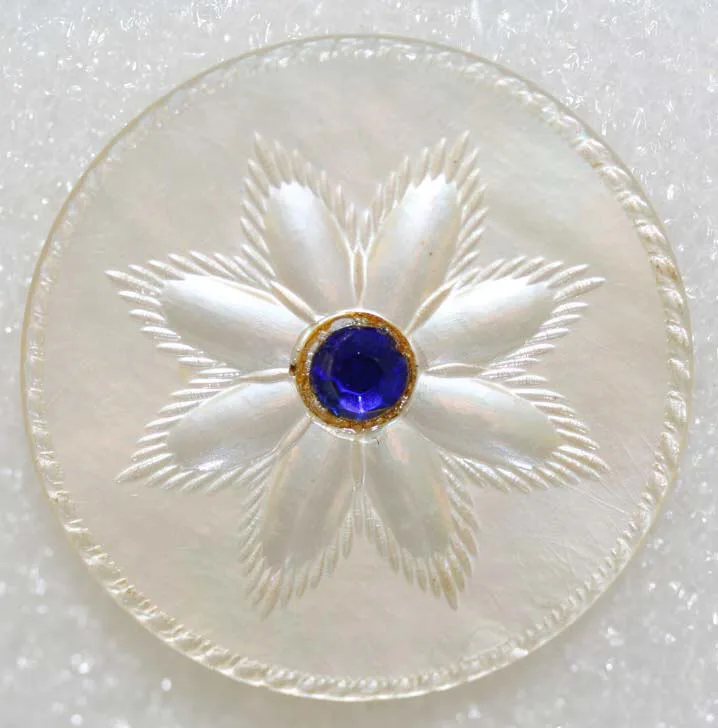
- Hand-Carving: Designs cut into bone, ivory, or wood
- Machine-Carving: Uniform carved patterns
- Engraving: Designs cut into metal surfaces
- Etching: Acid-etched designs on metal or glass
Inlay and Overlay
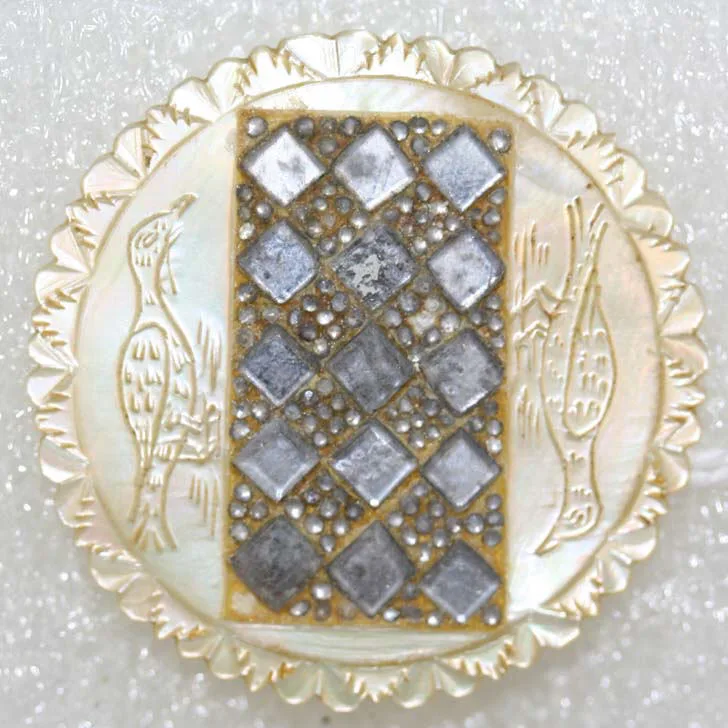
- Inlay: Materials set into recessed areas
- Overlay: Materials applied over base material
- Mosaic: Small pieces arranged in patterns
- Foil Backing: Metallic foil behind transparent materials
Molding and Embossing
- Molded Designs: Patterns formed during molding process
- Embossed: Raised designs pressed into material
- Repoussé: Designs hammered from reverse side
- Stamped: Designs pressed into metal
Maker Marks and Manufacturer Identification
Identifying the maker can significantly increase button value and historical interest.
Types of Maker Marks
- Company Names: Full manufacturer names
- Initials: Maker or designer initials
- Logos: Company symbols or emblems
- Patent Numbers: Design or manufacturing patents
- Location Marks: City or country of manufacture
Famous Button Manufacturers
Recognizing important button makers:
- Waterbury Button Company: American, 1812-present, military and civilian
- Scovill Manufacturing: American, 1802-1950s, metal buttons
- B.F. Goodrich: American, rubber and plastic buttons
- Dorset Button Makers: English, 17th-19th centuries, fabric-covered
- French Button Makers: Various manufacturers, enamel and decorative buttons
Researching Maker Information
- Reference Books: Button collector guides and manufacturer directories
- Online Databases: Button identification websites and forums
- Museum Collections: High-resolution images of marked buttons
- Collector Organizations: Button collector societies and clubs
Dating Methods and Techniques
Accurate dating requires multiple approaches and evidence.
Material Analysis
- Material Type: Certain materials indicate specific periods
- Material Quality: Early materials often higher quality
- Material Patina: Natural aging provides clues
- Material Composition: Chemical analysis for modern materials
Style Analysis
- Design Elements: Motifs, patterns, proportions
- Historical Context: Fashion trends and cultural influences
- Regional Variations: Local styles and preferences
- Fashion Periods: Popular styles and their evolution
Technical Dating
- Manufacturing Methods: Hand vs. machine production
- Shank Types: Evolution of shank styles
- Back Characteristics: Markings, finishes, construction
- Scientific Methods: Material analysis, chemical testing
Provenance Research
- Family History: Ownership documentation
- Historical Context: Period-appropriate use
- Photographs: Historical images showing buttons
- Fashion History: Period fashion trends
Value Assessment and Collecting Tips
Understanding what makes buttons valuable helps with identification and collecting.
Value Factors
- Rarity: Limited production, unique designs, unusual materials
- Condition: Original finish, minimal damage, intact shanks
- Maker: Famous or important manufacturer
- Period: Desirable historical era
- Design: Artistic quality, decorative appeal
- Material: Precious or unusual materials
- Provenance: Documented history or famous ownership
Collecting Strategies
- Focus Areas: Collect by material, period, or maker
- Quality Over Quantity: Better to have fewer high-quality pieces
- Research: Study reference books and online resources
- Networking: Join collector organizations and forums
- Documentation: Keep records of purchases and research
Market Considerations
- Current Trends: Popular materials and periods
- Economic Factors: Market conditions and collector interest
- Geographic Demand: Regional preferences and markets
- Specialized Collectors: Niche markets for specific types
Care and Preservation
- Storage: Store in acid-free containers, avoid direct sunlight
- Cleaning: Gentle cleaning appropriate to material
- Handling: Handle carefully to avoid damage
- Documentation: Photograph and catalog collection
- Insurance: Consider insurance for valuable collections
Common Mistakes to Avoid
- Over-Cleaning: Can damage original finish or patina
- Repairs: Inappropriate repairs can reduce value
- Misidentification: Relying on single characteristic
- Condition Issues: Not recognizing damage or alterations
- Market Assumptions: Assuming all old buttons are valuable
Conclusion
Antique button identification is a fascinating field that combines historical knowledge, material science, and aesthetic appreciation. By learning to recognize materials, manufacturing techniques, and period styles, you can develop the expertise needed to identify and authenticate antique buttons.
Remember that button identification often requires multiple pieces of evidence working together. A single characteristic is rarely definitive, but when combined with other indicators—material type, manufacturing method, style, and markings—it can provide a clear picture of a button's age, origin, and value.
Whether you're a serious collector or just beginning to explore the world of antique buttons, understanding these identification principles will enhance your appreciation of these small but significant historical artifacts. Each button tells a story of fashion, craftsmanship, and cultural history, making them valuable not just as collectibles, but as windows into the past.